
Box Stitch Knit Hat | Yarnspirations
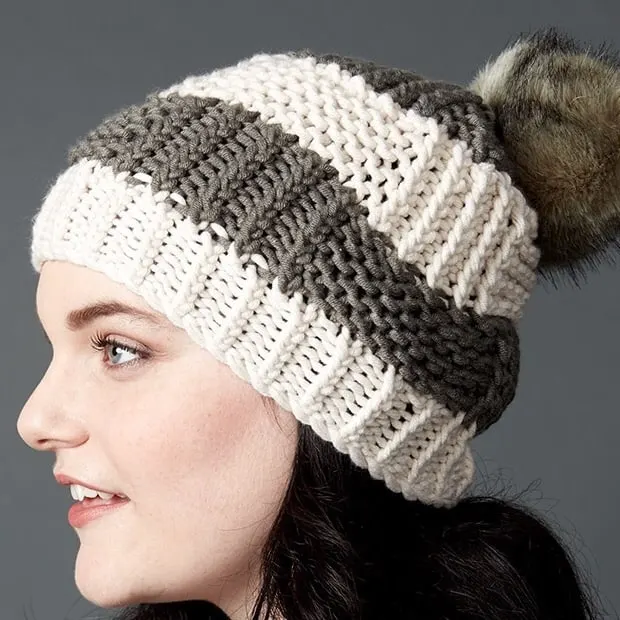
Bold colors and rich texture give the Box Stitch Knit Hat wide appeal. Knit using Bernat Beyond Super Bulky Yarn this pattern works up in no time at all. The added nylon in the yarn makes Bernat Beyond live up to its name. I’d call it beyond squishy, beyond soft and beyond cozy!
I know half of you took one look at the picture and thought, “I already know the basket weave stitch. I’ve used it in hats before.” Don’t let the easy skill level fool you. This is definitely not the same old basket weave you know and there are some great opportunities to learn some new stitches and techniques.
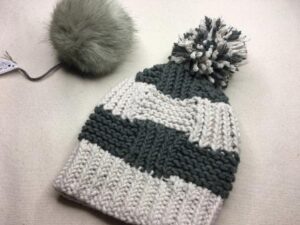
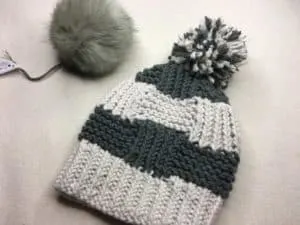
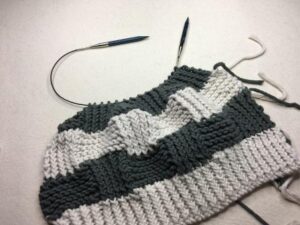
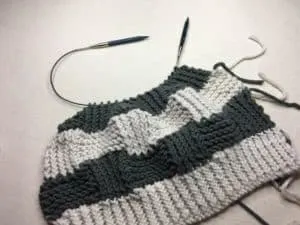
For starters we’re not knitting in the round. (Should I repeat that?) We are NOT knitting in the round. One of the unique features of this pattern is that the hat is knit as a flat panel and them seamed. Not only is that hat flat, it’s also twisted. Well, the stitches are anyway. By knitting and purling through the back loop the stitches become twisted giving the hat more texture.
Box Stitch Knit Hat
Pattern
Yarn
Bernat® Beyond™ (4.2 oz/120 g; 80 yds/73 m)
Contrast A Cream (23004) 1 ball
Contrast B Slate (23003) 1 ball
Bernat Faux Fur Pompom in Grey Lynx (optional)

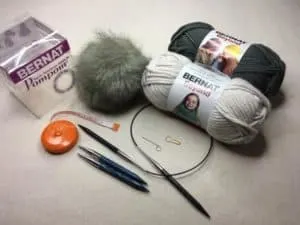
Needles & Supplies
U.S. 10½ (6.5 mm) and U.S. 11 (8 mm) needles or size needed to obtain gauge.
Stitch marker
Measuring tape
Tapestry needle for weaving in ends
Skill Level
Easy
Size
To fit Child 6/10 (Adult)
Gauge
10 sts and 14 rows = 4″ [10 cm] in Texture Pat.
Skills taught in this tutorial
Cast on
Knit Stitch
K1tbl – Knit next stitch through back loop
K2togtbl – Knit next 2 stitches together through the back loop
K3tog – Knit next 3 stitches together
Knit through the front and back of the loop
Purl Stitch
P1tbl – Purl 1 through the back loop
Increase
Bind off
Seaming
If you need a slow motion video on the main stitches or techniques, please check out my slower tutorials on GoodKnit Kisses YouTube playlist. Don’t forget on your desktop you can slow down the playback of ANY video to clearly see how the techniques are knit.
Notes for Loom Knitters
Loom: Large gauge loom with at least 48 pegs (child size) or 54 pegs (adult size)
NOTES:
- Cast on 48 stitches for child size and 54 for adults. The needle knit pattern uses fewer cast on stitches and increase after the ribbing. For ease I suggest casting on the exact number of stitches you need for the box stitch.
- Sizing and fit can be adjusted by using different knit stitches. Using Ewrap for all K stitches (this is in addtion to the Ktbl stitches) will make the hat a little looser and even 48 pegs should be large enough an adult. To get a proper fit for a child I suggest using the Uwrap stitch for all K stitches listed in the pattern.
- Remember! In a flat panel every wrong side row needs to be worked using the opposite stitch! That means a K becomes a P, a K2tog becomes a P2tog, etc.
- Grab your copy of the pattern so you can follow along with the row instructions and take notes.
- K1tbl IS an ewrap knit stitch.
- The P1tbl is always on a wrong side row so that becomes an ewrap every time too. Love it!
- K2togtbl is a long abbreviation that means “Knit 2 together through the back loop.” Treat this as a K2tog using the ewrap stitch. This video shows how to work the K2tog.
- K3tog is a decrease that knits 3 stitches together. To work this stitch you need to combine the loops from the next 3 pegs onto one peg. This is a little bit of work because you need to move the previous stitches in the row over to close that gap.
Let’s make the Box Stitch Knit Hat!
The Techniques
Brim it…
At first glance you may think this is a standard 1 x 1 ribbing, but it’s not! Every other stitch is twisted. Ktbl (knit through the back loop) and Ptbl (Purl through the back loop) created a “Y” shaped stitch instead of the “V” we typically see. I’ll get you through switching back and forth between the stitches and before you know it we’ll be on to the fun part!
Box it up…
Next we move on to the main stitch pattern that makes this hat pop! The boxes in our pattern are made up of garter stitch and ribbing that uses twisted stitches. You’ve already learned the new stitches on the brim so now it’s just counting your stitches. I love the unique shaping and texture this gives the hat. The boxes are not perfect squares and that gives the hat character.
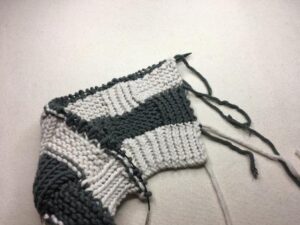
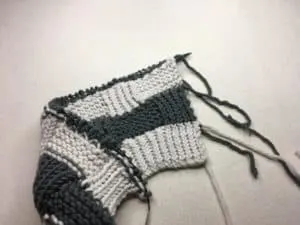
Bump in the road…
Once we finish the body we’ll decrease the crown. I call this the bump in the road because we’ve got a couple stitches you may not have worked before. The first we’ll run into is the K3tog or knit 3 stitches together. No problem! It’s just as easy to work as it’s cousin the K2tog. The next one is the K2togtbl (knit 2 together through the back loop). Don’t let the long abbreviations intimidate you. You work this stitch just like the Ktbl, but work it through two stitches instead of one.
Better not forget the pom pom…
Finally, the knitting is finished and it’s time to wrap this up. We’ll start by seaming it up. I’ll teach you how to seam it up smoothly. Lastly, we’ll add a pom pom. I’ll show you what the hat looks like with a Bernat Faux Fur Pom or a 2-color pom pom that matches the hat. Of course the pom pom is optional, but why wouldn’t you? They are so cute!


Watch the video directly on YouTube.
I hope you enjoyed making your hat as much as I enjoyed making mine! If you want more great patterns from Yarnspirations you need to check out the new F/W Fashion Lookbook.
This post contains sponsored content.