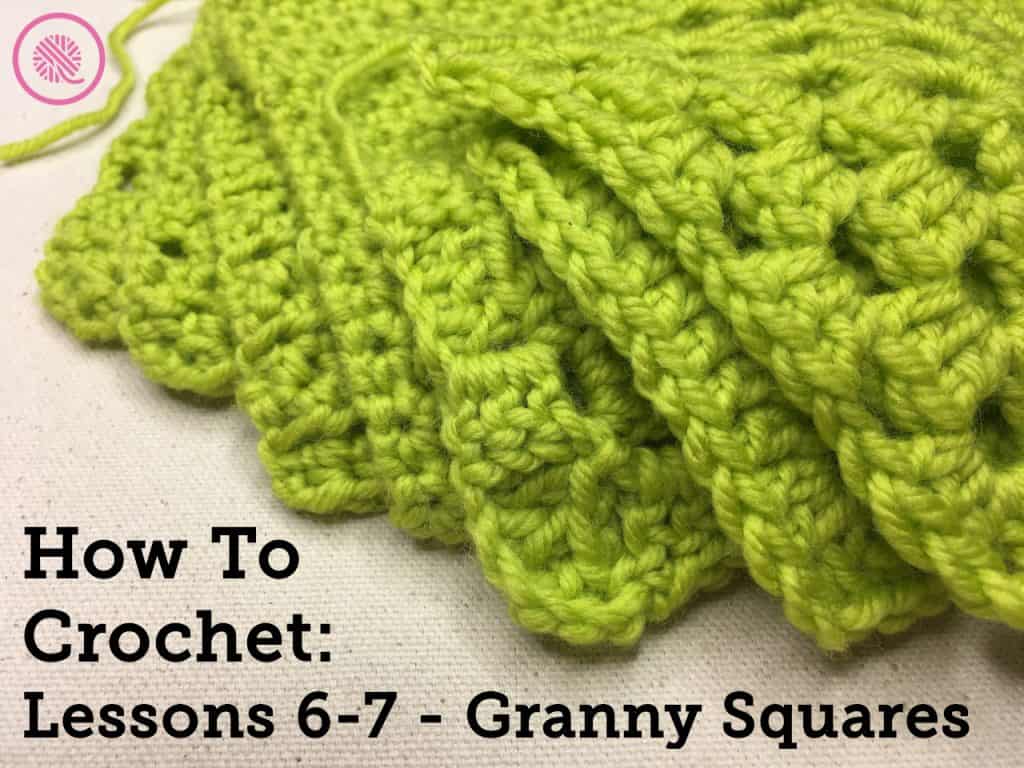
No beginner crochet class is complete without learning how to crochet granny squares. The granny square is as timeless as it is beautiful. It can be made in any size with any yarn to fit any style.
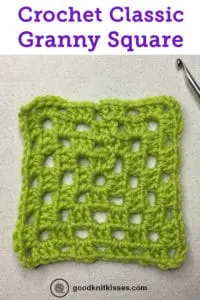
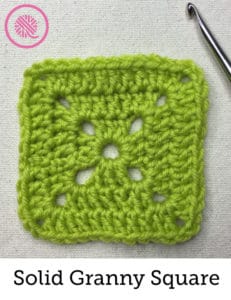
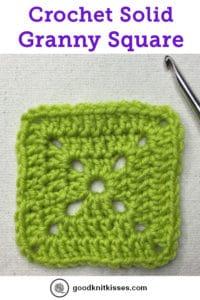
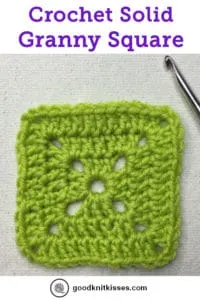
I’ve included two styles of granny squares in this series. The classic granny square feels light, airy and open with alternating blocks and eyelets while the solid granny only has eyelets at the diagonals of each round so it makes a more stable square.
Whichever one you choose you can make small squares and crochet them together to create scarves, cowls, sweaters and, of course, blankets. But if you prefer you can just keep crocheting to size you want and make a never-ending granny square blanket. Let’s make some crochet granny squares
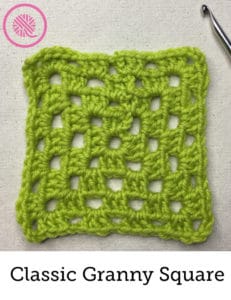
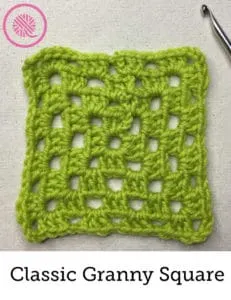
Lesson 6: Classic Granny Square
We’ve got to start with the classic granny! Can’t you just feel the history and nostalgia from seeing a granny square project? Although you can still crochet granny squares out of scrap fabric to make an afghan granny squares are making a comeback in a variety of ways.
You may be thinking, “I don’t really want to make a granny square afghan.” Once you know how to make some simple granny squares you can transform them into almost anything. Purses, totes, slippers, sweaters and so much more. I created a Pinterest board with a variety of granny square projects to spark your creativity. Granny Square Projects!
Skills taught in this tutorial:
• Working in the round • Double crochet stitch • Slip stitch and chain • Go back and fix a mistake
If you need to review the basic stitches, go back and check out the beginning of the series: How to Crochet: Basic Stitches.
Abbreviations:
beg – beginning ch – chain ch 1 space – chain 1 space dc – double crochet sl st – slip stitch
Instructions:
Ch 4. Slip stitch into the 4th chain from the hook to form a ring.
Round 1: Ch3, 2 dc into center circle. Ch3.*3 dc, ch3 into center.* Repeat from * to * two more times. Join with sl st to the 3rd stitch of beg chain.
Round 2: Ch4, (3 dc, ch 3, 3 dc) in corner. Ch1. *(3 dc, ch3, 3 dc) in corner, ch1.* Repeat from * to * once. (3 dc, ch3, 2 dc) in last corner. Join with sl st to the 3rd stitch of beg chain.
Round 3: Ch3, 2 dc in ch 1 space. Ch1. *(3 dc, ch3, 3 dc) in corner, ch1, 3dc in ch 1 space, ch1.* Repeat from * to * two more times. (3 dc, ch3, 3 dc) in last corner, ch1. Join with sl st to the 3rd stitch of beg chain.
Round 4: Ch 4, 3 dc in next ch 1 space, ch1. *(3 dc, ch3, 3 dc) in corner, ch1. [3 dc in ch 1 space, ch1.] Repeat instructions in [ ] until next corner.* Repeat from * to * two more times. (3 dc, ch3, 3 dc) in corner, ch1, 2 dc in ch 1 space. Join with sl st to the 3rd stitch of beg chain.
Round 5: Ch3, 2 dc in ch 1 space, ch1. *[3 dc in ch 1 space, ch1.] Repeat instructions in [ ] until next corner. (3 dc, ch3, 3 dc) in corner, ch1.* Repeat from * to * three more times. [3 dc in ch 1 space, ch1.] Repeat instructions in [ ] until end of round. Join with sl st to the 3rd stitch of beg chain.
Repeat Rounds 4 and 5 until your granny square is the size you desire.
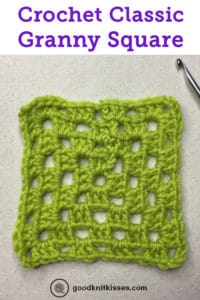
Pin this project!
Watch the video below to learn how to crochet the Classic Granny Square!
Now that you know how to make a classic granny square you’re in for a real surprise …
There are hundreds of different granny square designs!
You’re going to start seeing grannies everywhere. Grannies with round centers, grannies with star centers, grannies with pictures of animals and even granny square alphabet blocks. There is a huge world full of new granny squares for you to try.
One of the basic building blocks of the new granny square designs is the solid granny square. The main difference is that there are only holes at the corners giving the block a denser fabric. While some granny squares can be very complicated the solid granny is a breeze!
Skills taught in this tutorial:
• Working in the round • Double crochet stitch • Slip stitch and chain • Go back and fix a mistake If you need to review the basic stitches, go back and check out the beginning of the series: How to Crochet: Basic Stitches.
Abbreviations:
beg – beginning ch – chain dc – double crochet sl st – slip stitch
Instructions:
Ch 4. Slip stitch into the 4th chain from the hook to form a ring.
Round 1: Ch5, 3 dc into center circle. Ch2. *3 dc into center, ch2.* Repeat from * to * once more. 2 dc and join with sl st to the 3rd stitch of beg chain.
Round 2: Ch3, (2 dc, ch 2, 2 dc) in corner. *Dc in each stitch until the next corner. (2 dc, ch2, 2 dc) in corner.* Repeat from * to * two more times. Dc in remaining sts and join with sl st to the 3rd stitch of beg chain.
Round 3: Ch3. *Dc in each stitch until the next corner. (2 dc, ch2, 2 dc) in corner.* Repeat from * to * three more times. Dc in remaining sts and join with sl st to the 3rd stitch of beg chain.
Repeat Round 3 until your solid granny square is the desired size.
Pin this project!
Watch the video below to learn how to crochet the Solid Granny Square!
Right Handed
Left Handed
How to Seam Granny Squares Video Tutorials
Right handed
Left handed
Be sure to check out all the lessons on the How to Crochet Series:
Do you have a left handed pattern for a heart granny square? I'm having a very hard time finding one.
Jan Coates
Monday 2nd of May 2022
Love your teaching style! I an a newbie and you have helped me!! Thank you!
Manage Cookie Consent
We use technologies like cookies to store and/or access device information. We do this to improve browsing experience and to show (non-) personalized ads. Consenting to these technologies will allow us to process data such as browsing behavior or unique IDs on this site. Not consenting or withdrawing consent, may adversely affect certain features and functions.
Functional
Always active
The technical storage or access is strictly necessary for the legitimate purpose of enabling the use of a specific service explicitly requested by the subscriber or user, or for the sole purpose of carrying out the transmission of a communication over an electronic communications network.
Preferences
The technical storage or access is necessary for the legitimate purpose of storing preferences that are not requested by the subscriber or user.
Statistics
The technical storage or access that is used exclusively for statistical purposes.The technical storage or access that is used exclusively for anonymous statistical purposes. Without a subpoena, voluntary compliance on the part of your Internet Service Provider, or additional records from a third party, information stored or retrieved for this purpose alone cannot usually be used to identify you.
Marketing
The technical storage or access is required to create user profiles to send advertising, or to track the user on a website or across several websites for similar marketing purposes.


Heidi Kozlowski
Thursday 8th of December 2022
Do you have a left handed pattern for a heart granny square? I'm having a very hard time finding one.
Jan Coates
Monday 2nd of May 2022
Love your teaching style! I an a newbie and you have helped me!! Thank you!