
This is my final journey for the Week 4 Mystery Stitch Along for the KAL (Knit Along)
Week 4 Mystery Stitch Along
This last week is also at intermediate level. We will work with a cable needle again and make a large chunky cable. There is NO SEWING to add the cable edge and I’m totally looking forward to learning.
Week 4 Mystery Stitch Along –
Color Change for Clue 4 and Setup.
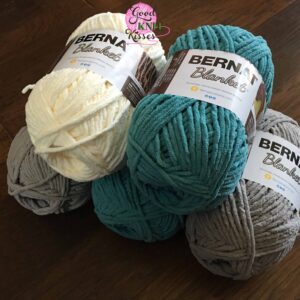
2 balls of Pale Gray
We change to the final color Contrast C this week and I chose Pale Gray. This is the only color difference in my blanket and the Bernat sample shown.
Spoiler Alert, I LOVE how these colors came together. The Pale Grey with the Light Teal and Antique White work really well together.
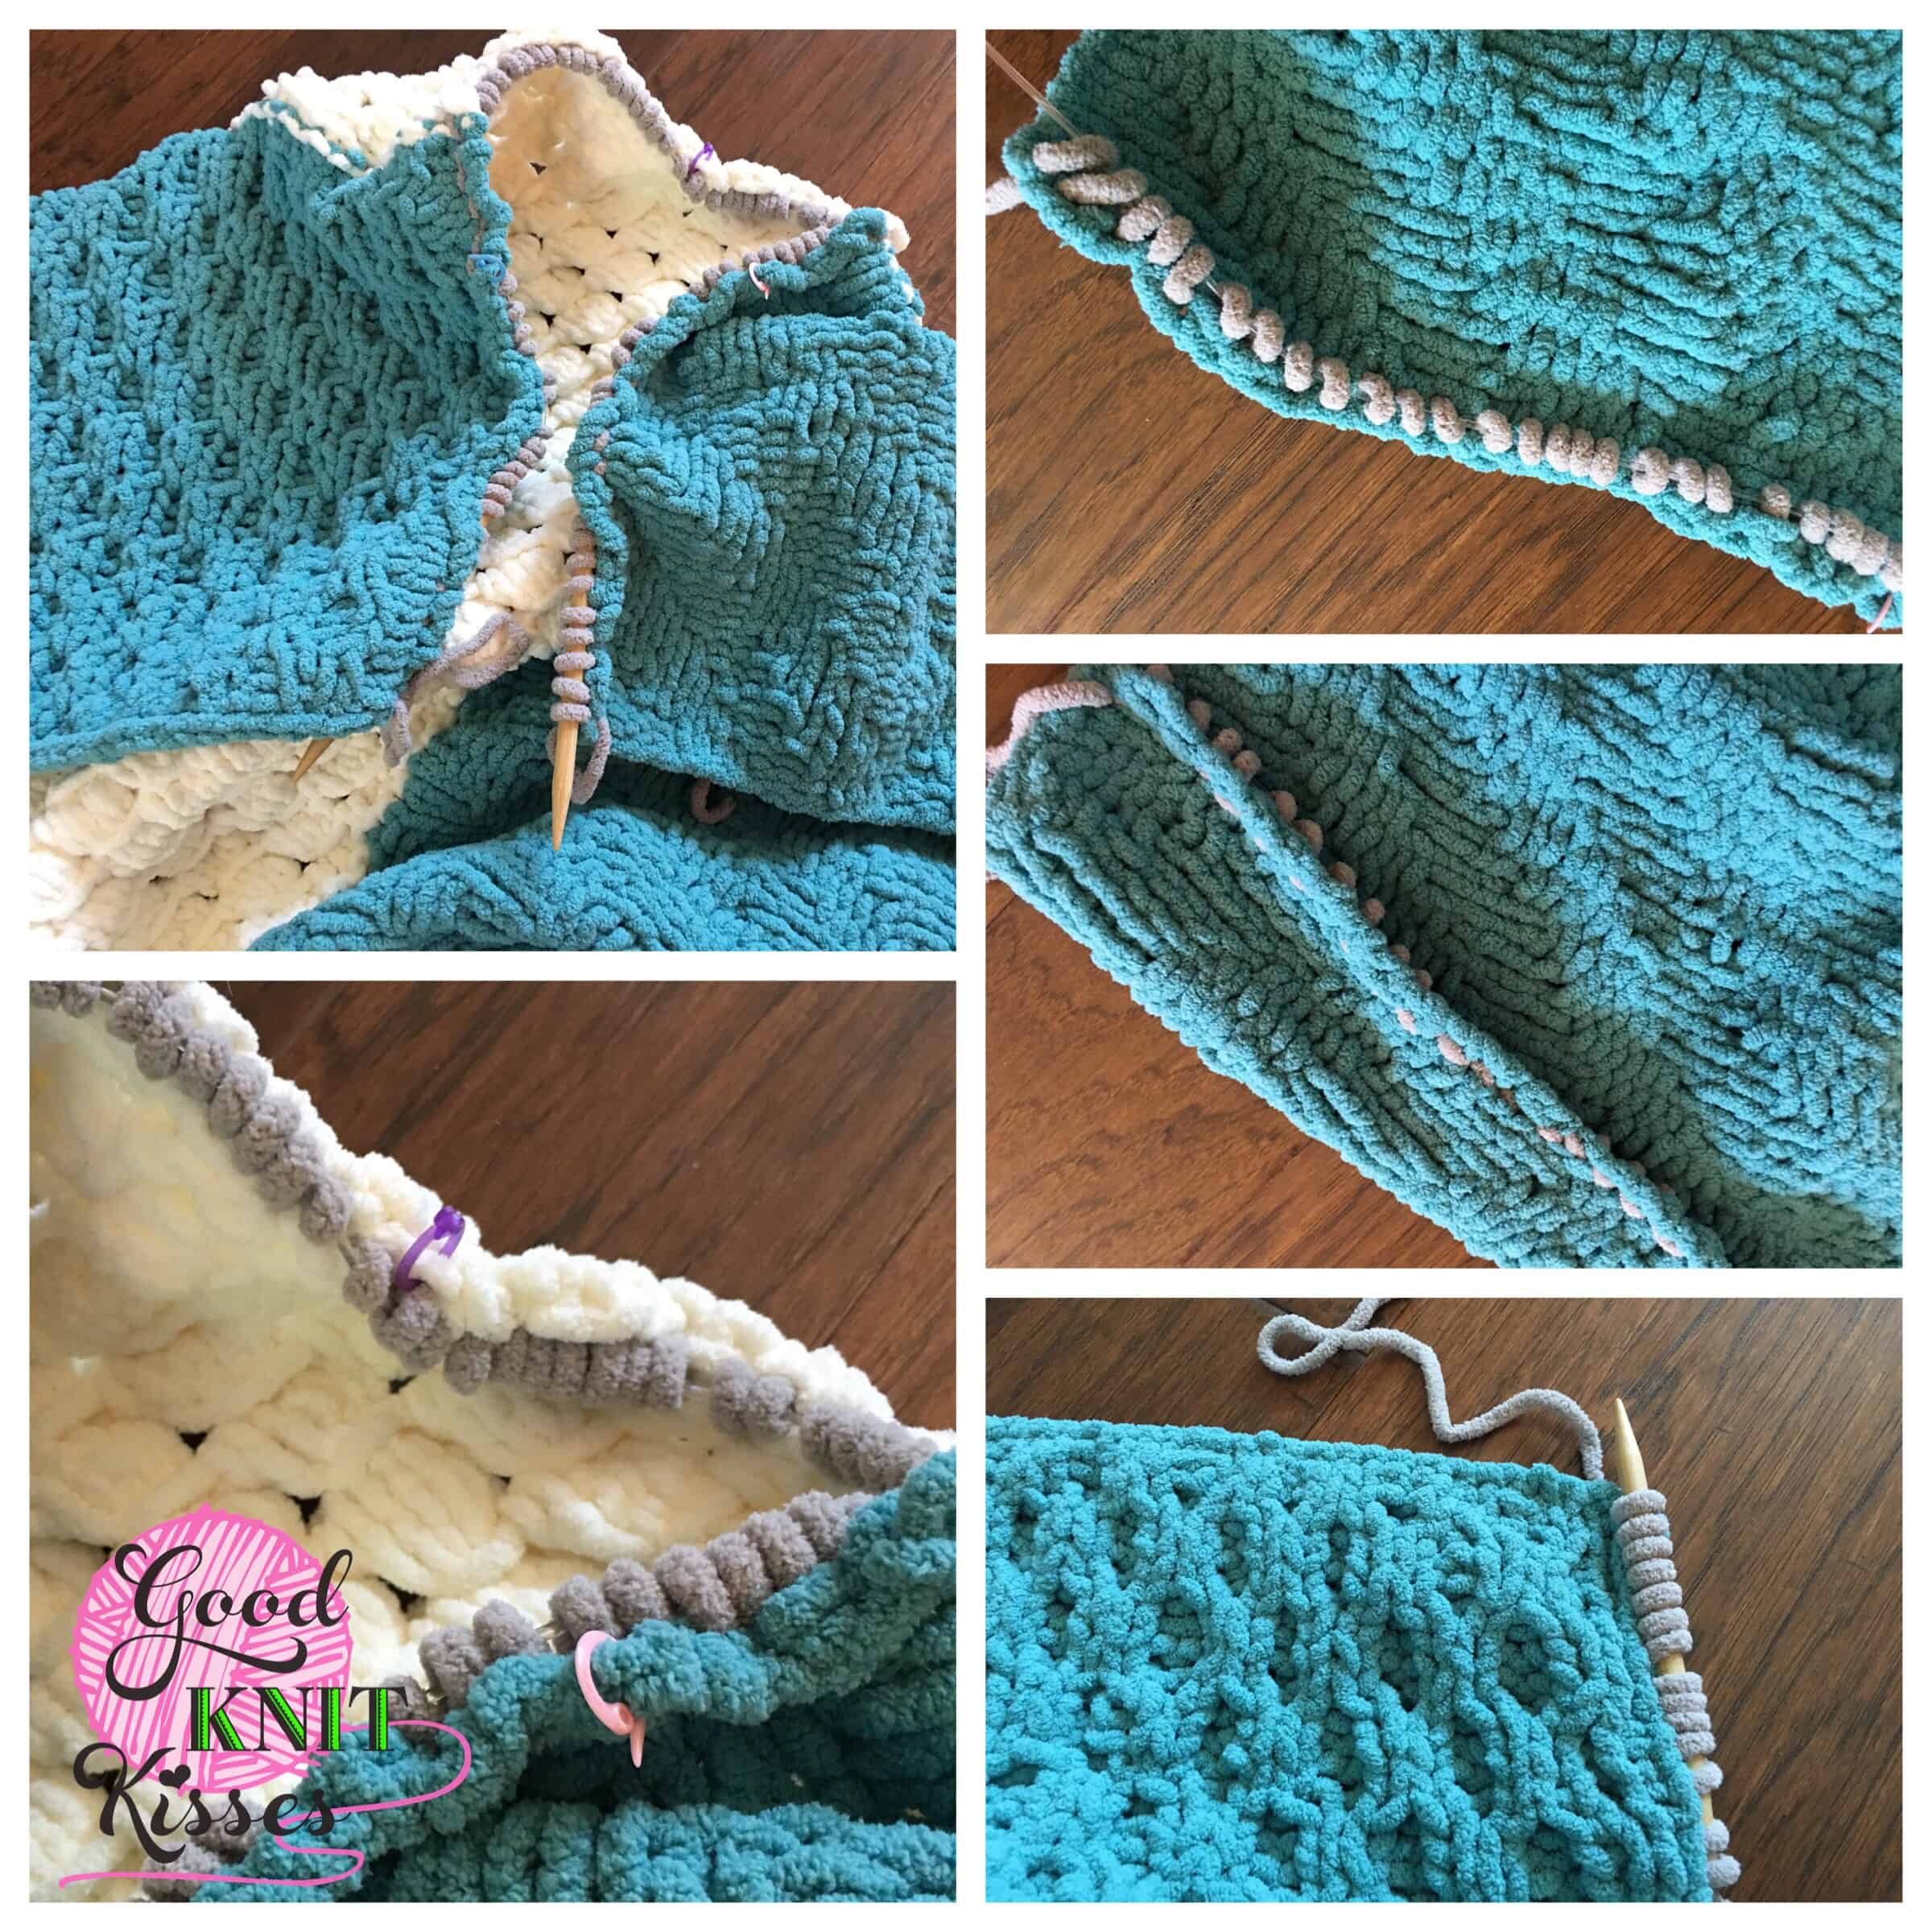
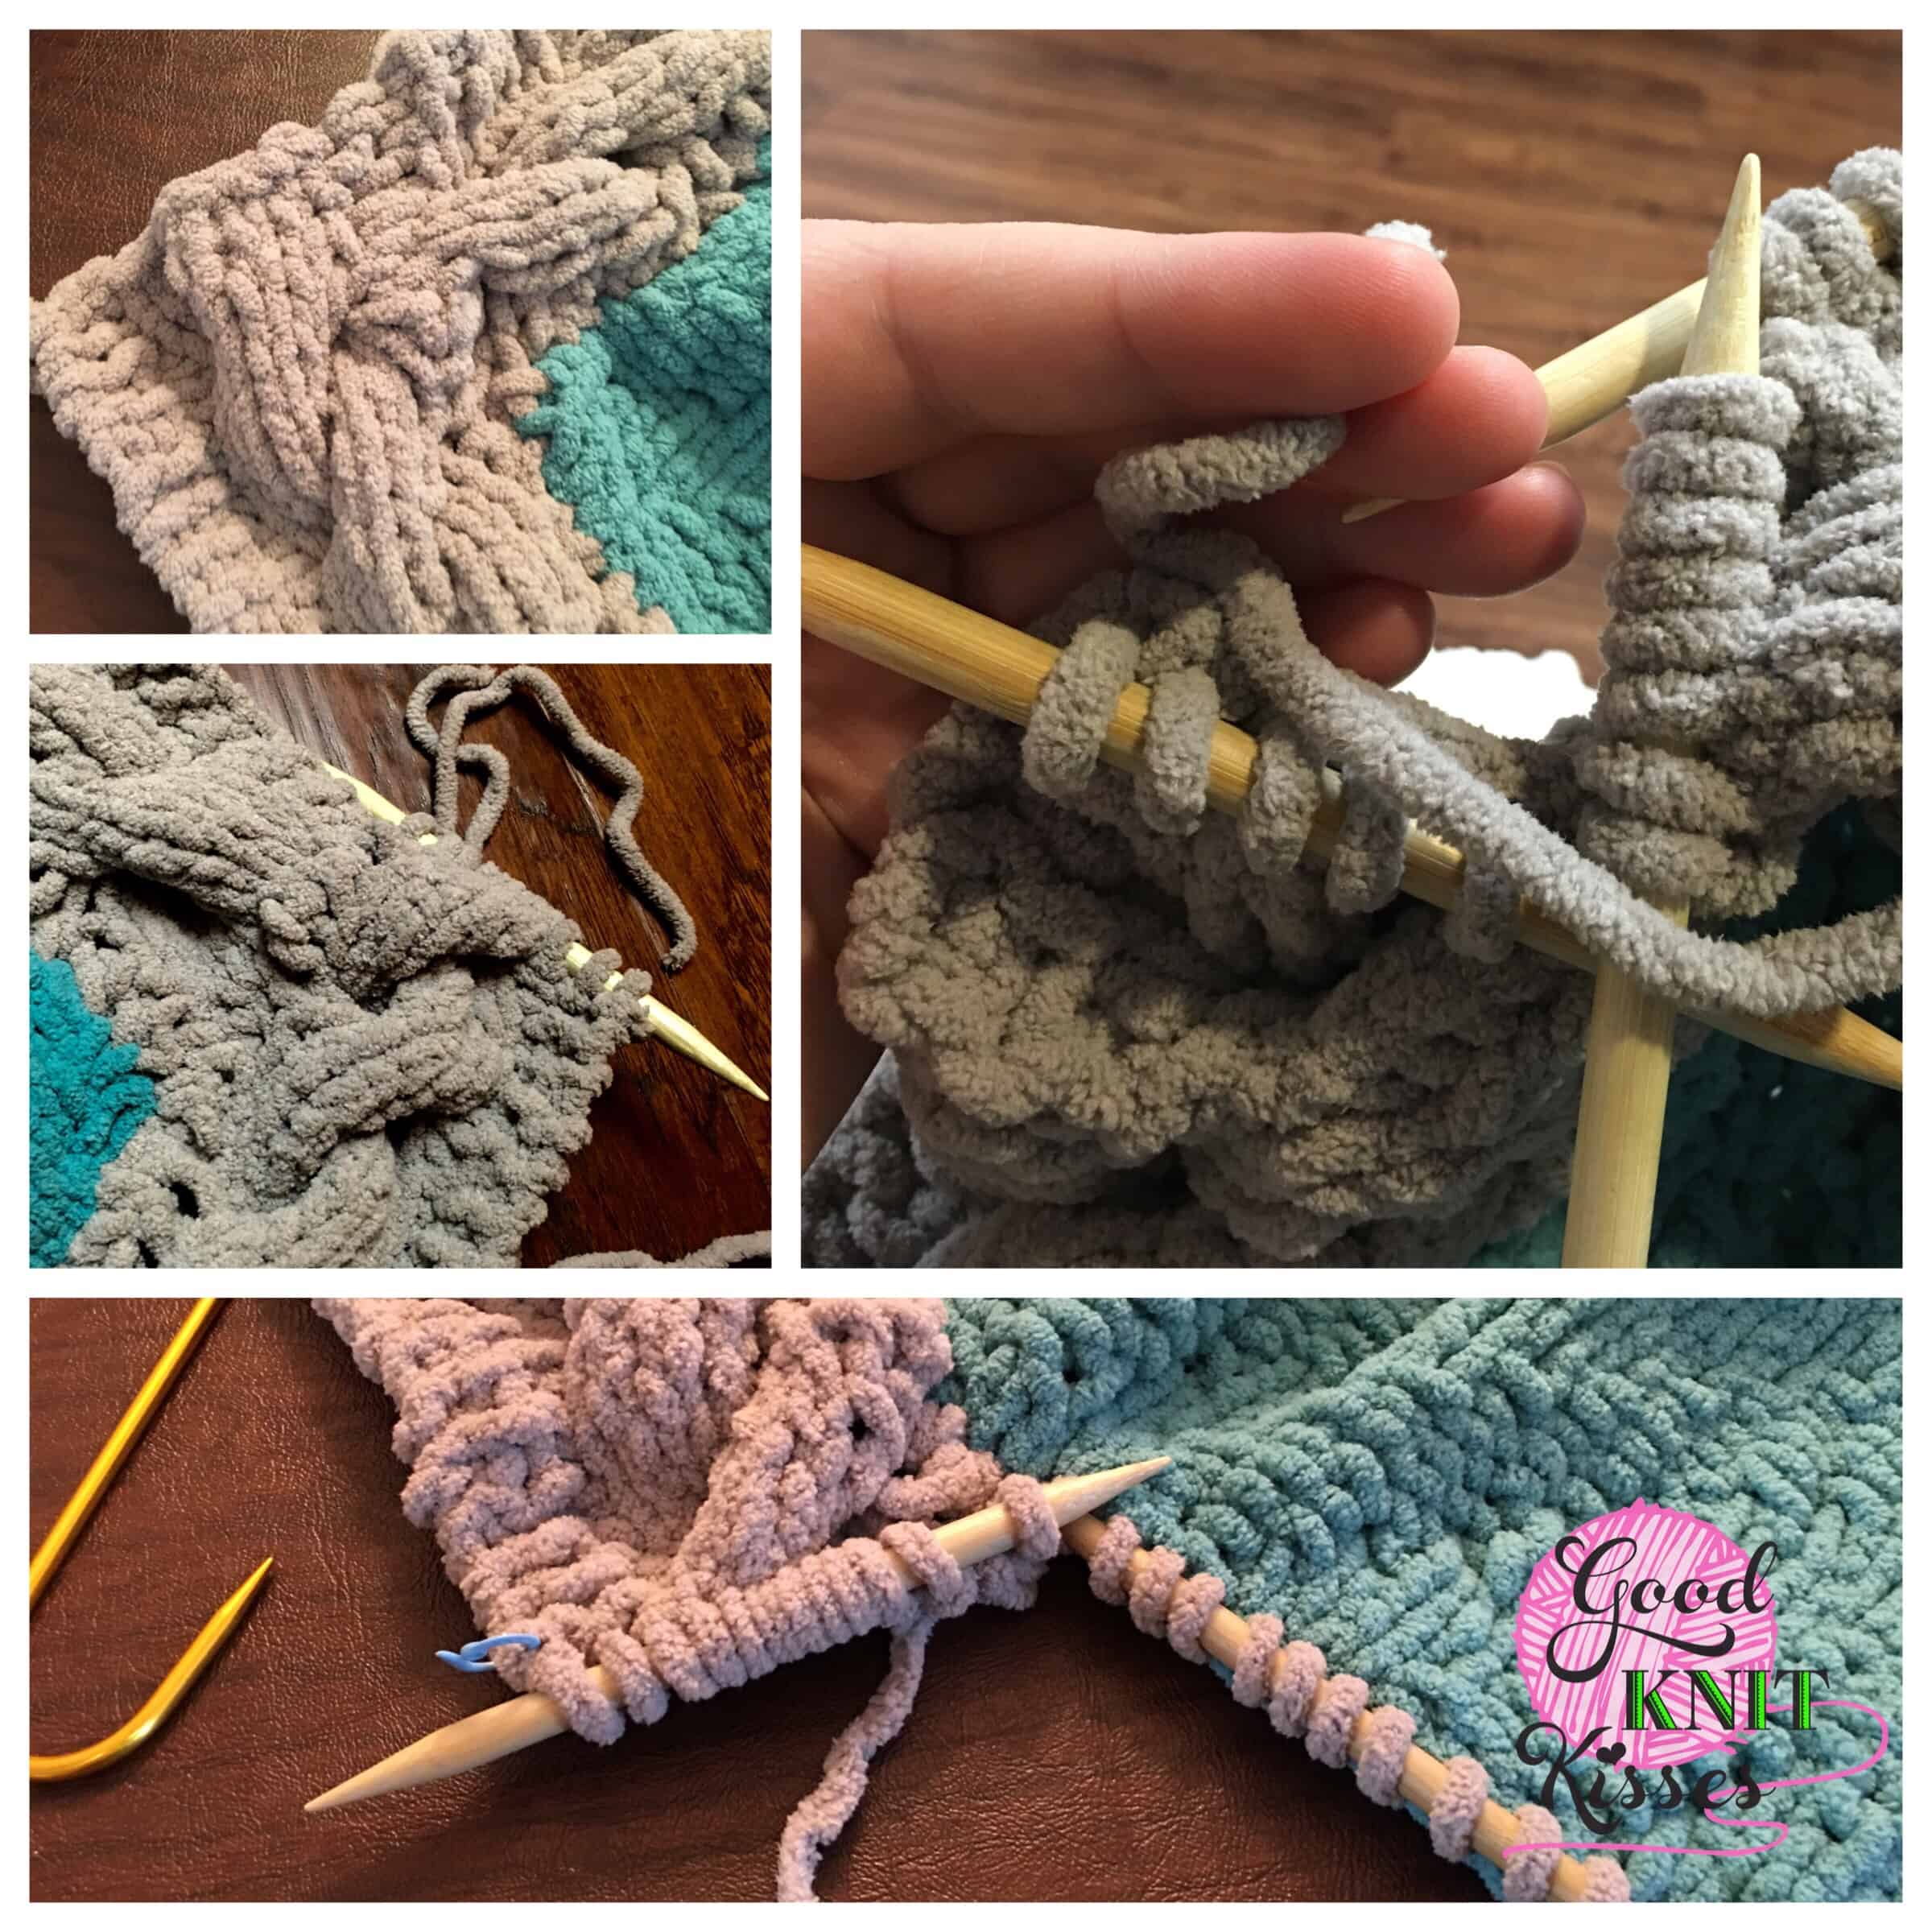
First we start by picking up the stitches along the right edge of the blanket for our week 4 mystery stitch along. It can be a bit tricky to get the right number but Yolanda gives a top to divide your edge up with a few stitch markers and spread out the stitches easier. It works great, you should try it!
I pulled through the new yarn, being careful to have two stitches exposed on the edge to create a strong selvedge so no holes show when the cable trim is added. The circular needle now serves as a massive stitch holder. I break the yarn and get ready to cable as well as add these new stitches on as we go…Eek!
Week 4 Mystery Stitch Along –
The Applied Cable Border.
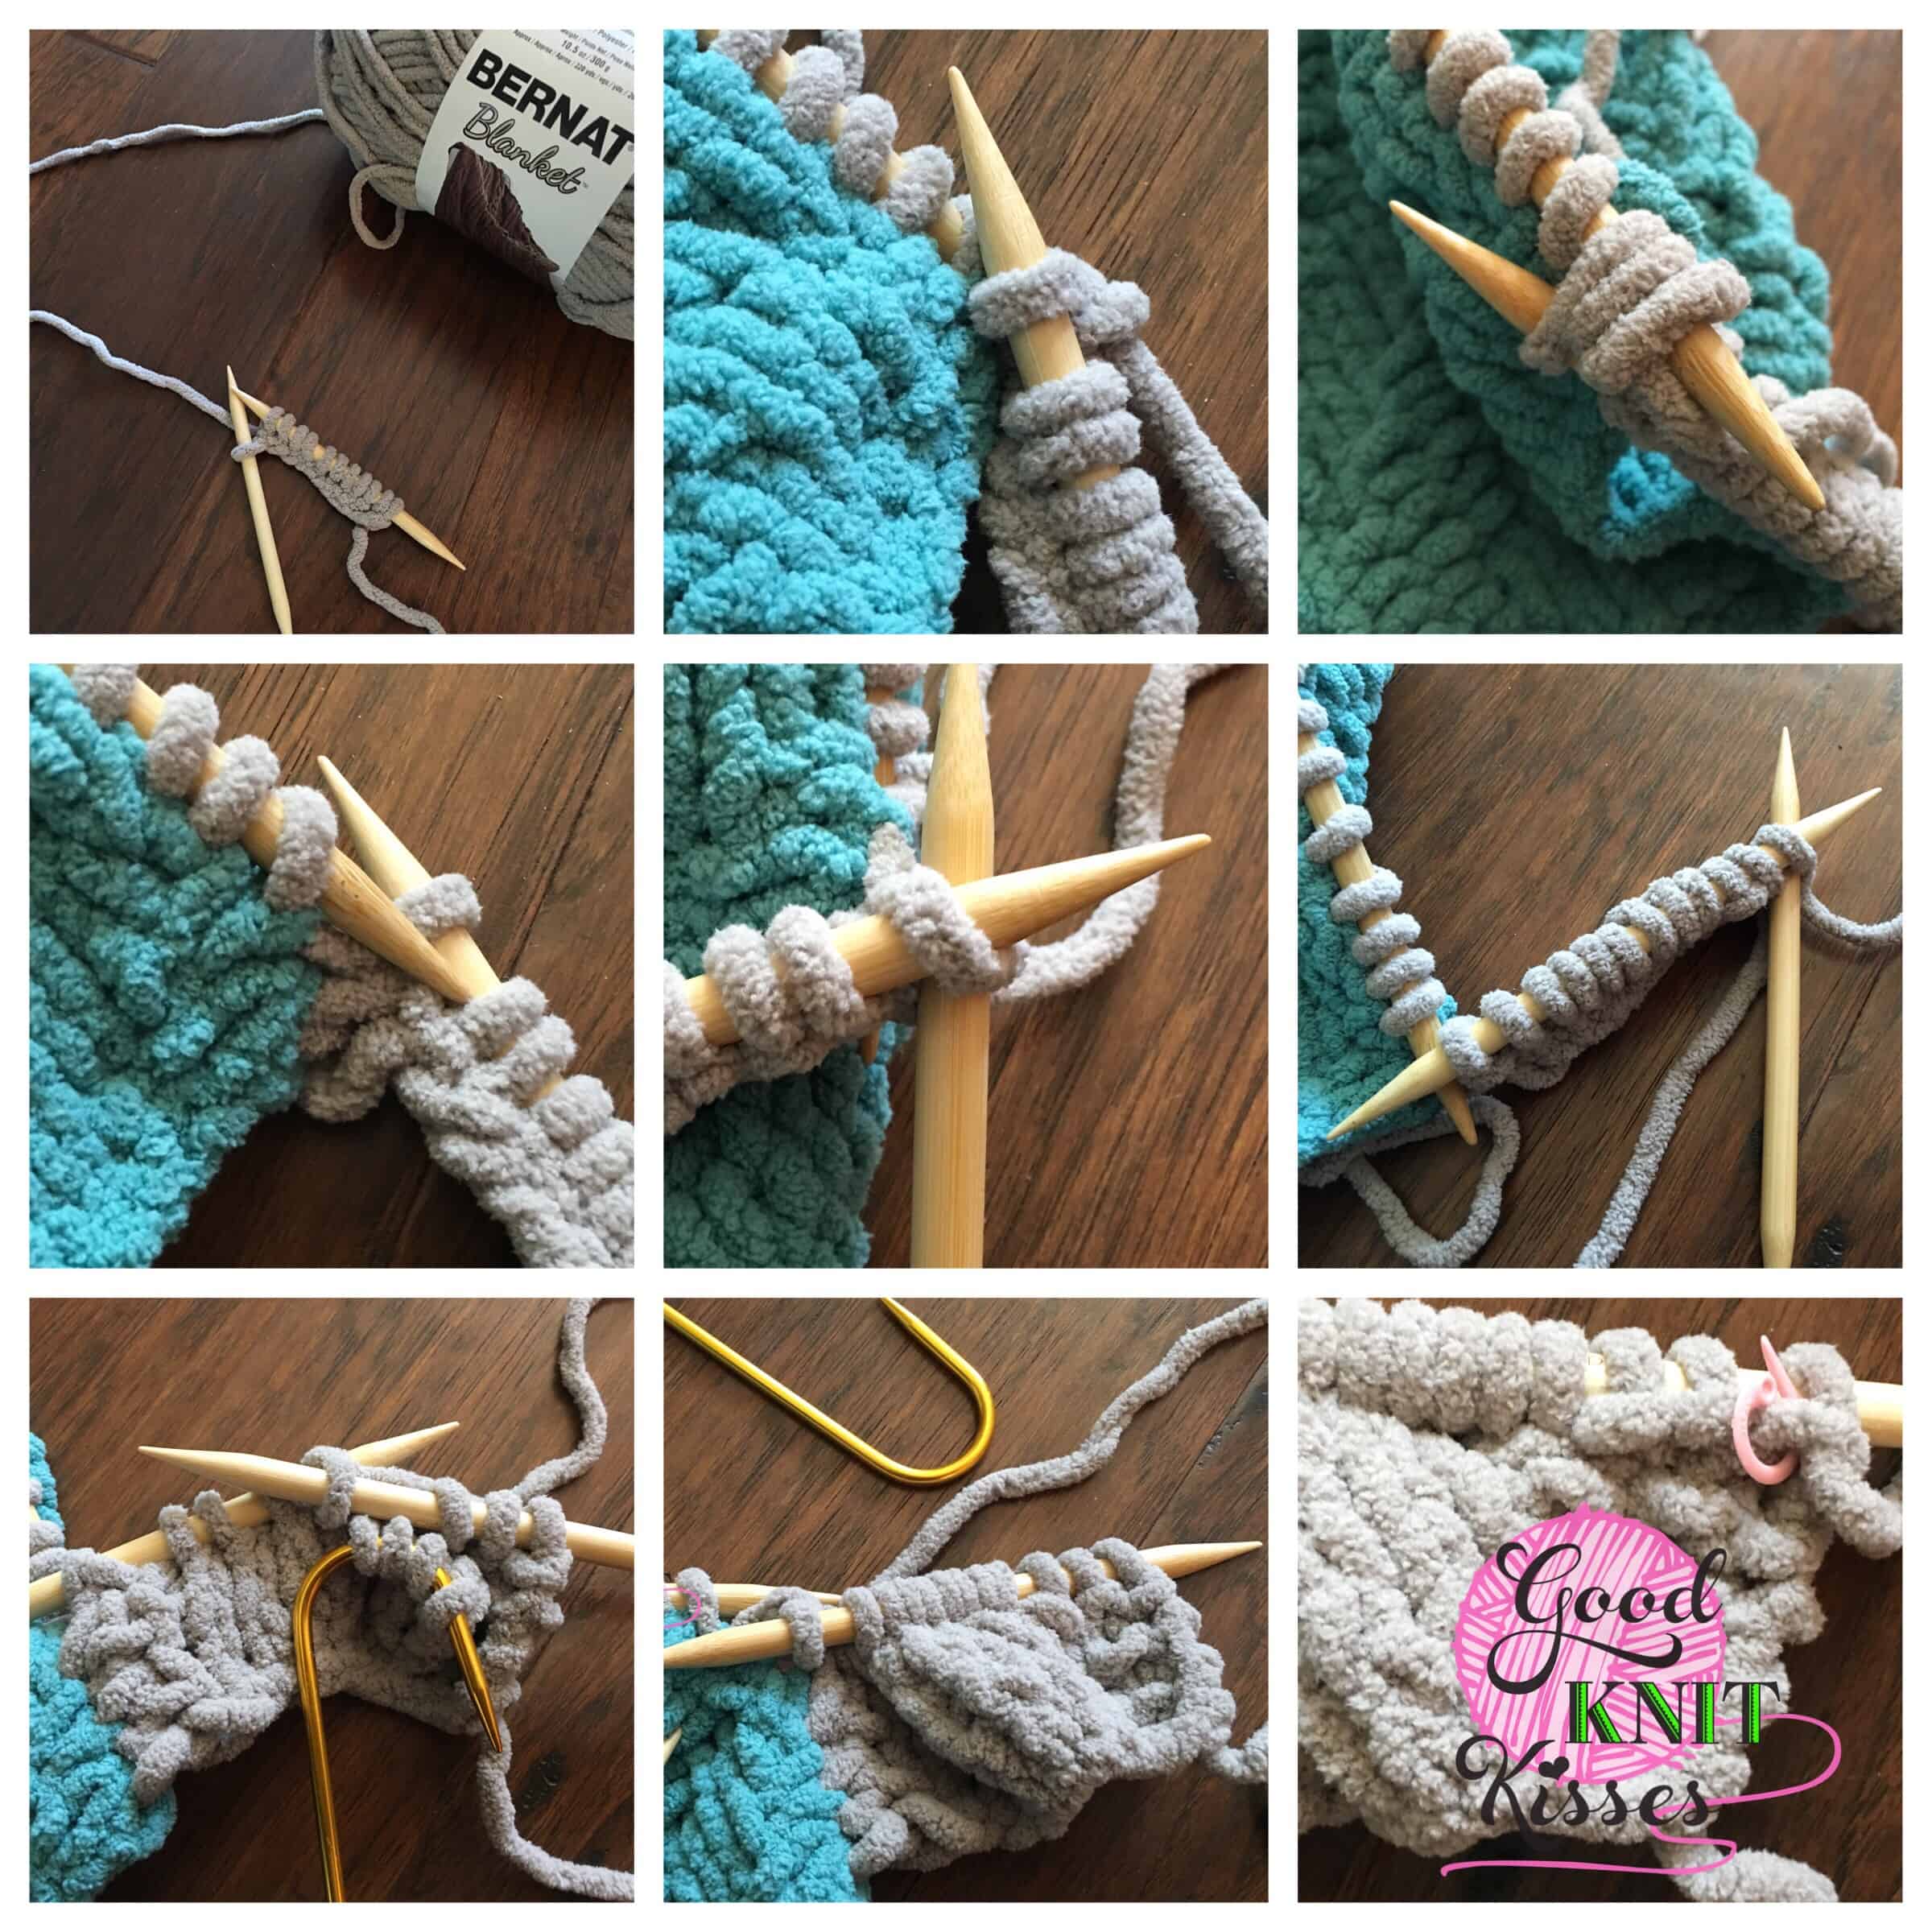
Break out the 2 DPNs and cable needles and some coffee. It’s about to get real!
I cast on and work the 1st row below and join my first stitches to the main blanket. The first join up is 3 stitches together which seems bulky. But when I swing the DPN (Double Pointed Needle) to the left and pull the working yarn to the back, from the right, then I see that it isn’t so big. However I did notice in this yarn the need to tug a bit after working these joining stitches together so that it evened out tension. This is just a product of the yarn being a chenille type and so I just adjusted my technique. No biggie.
A lone wolf…stitch.
After 6 rows was time for the cable front (C8F). This picks up 4 stitches and hold them to the front. The next four stitches are worked and then work 4 stitches from the cable.
Here is where lies a road bump. A lone wolf…er, lone stitch.
There is only 1 stitch left on the left DPN. When working the cable needle it leaves this lone stitch out in the wind with a risk of the DPN dropping out of site. OR INTO MY RECLINER! UGH, LOL.
I solved that hazard later by moving the lone stitch over to the circular needle, as a holder, and setting down the empty DPN. If you don’t want to set it down another solution is to stick it through the blanket front to hold for the next row; that’s what I usually do personally.
The 8 row repeat.
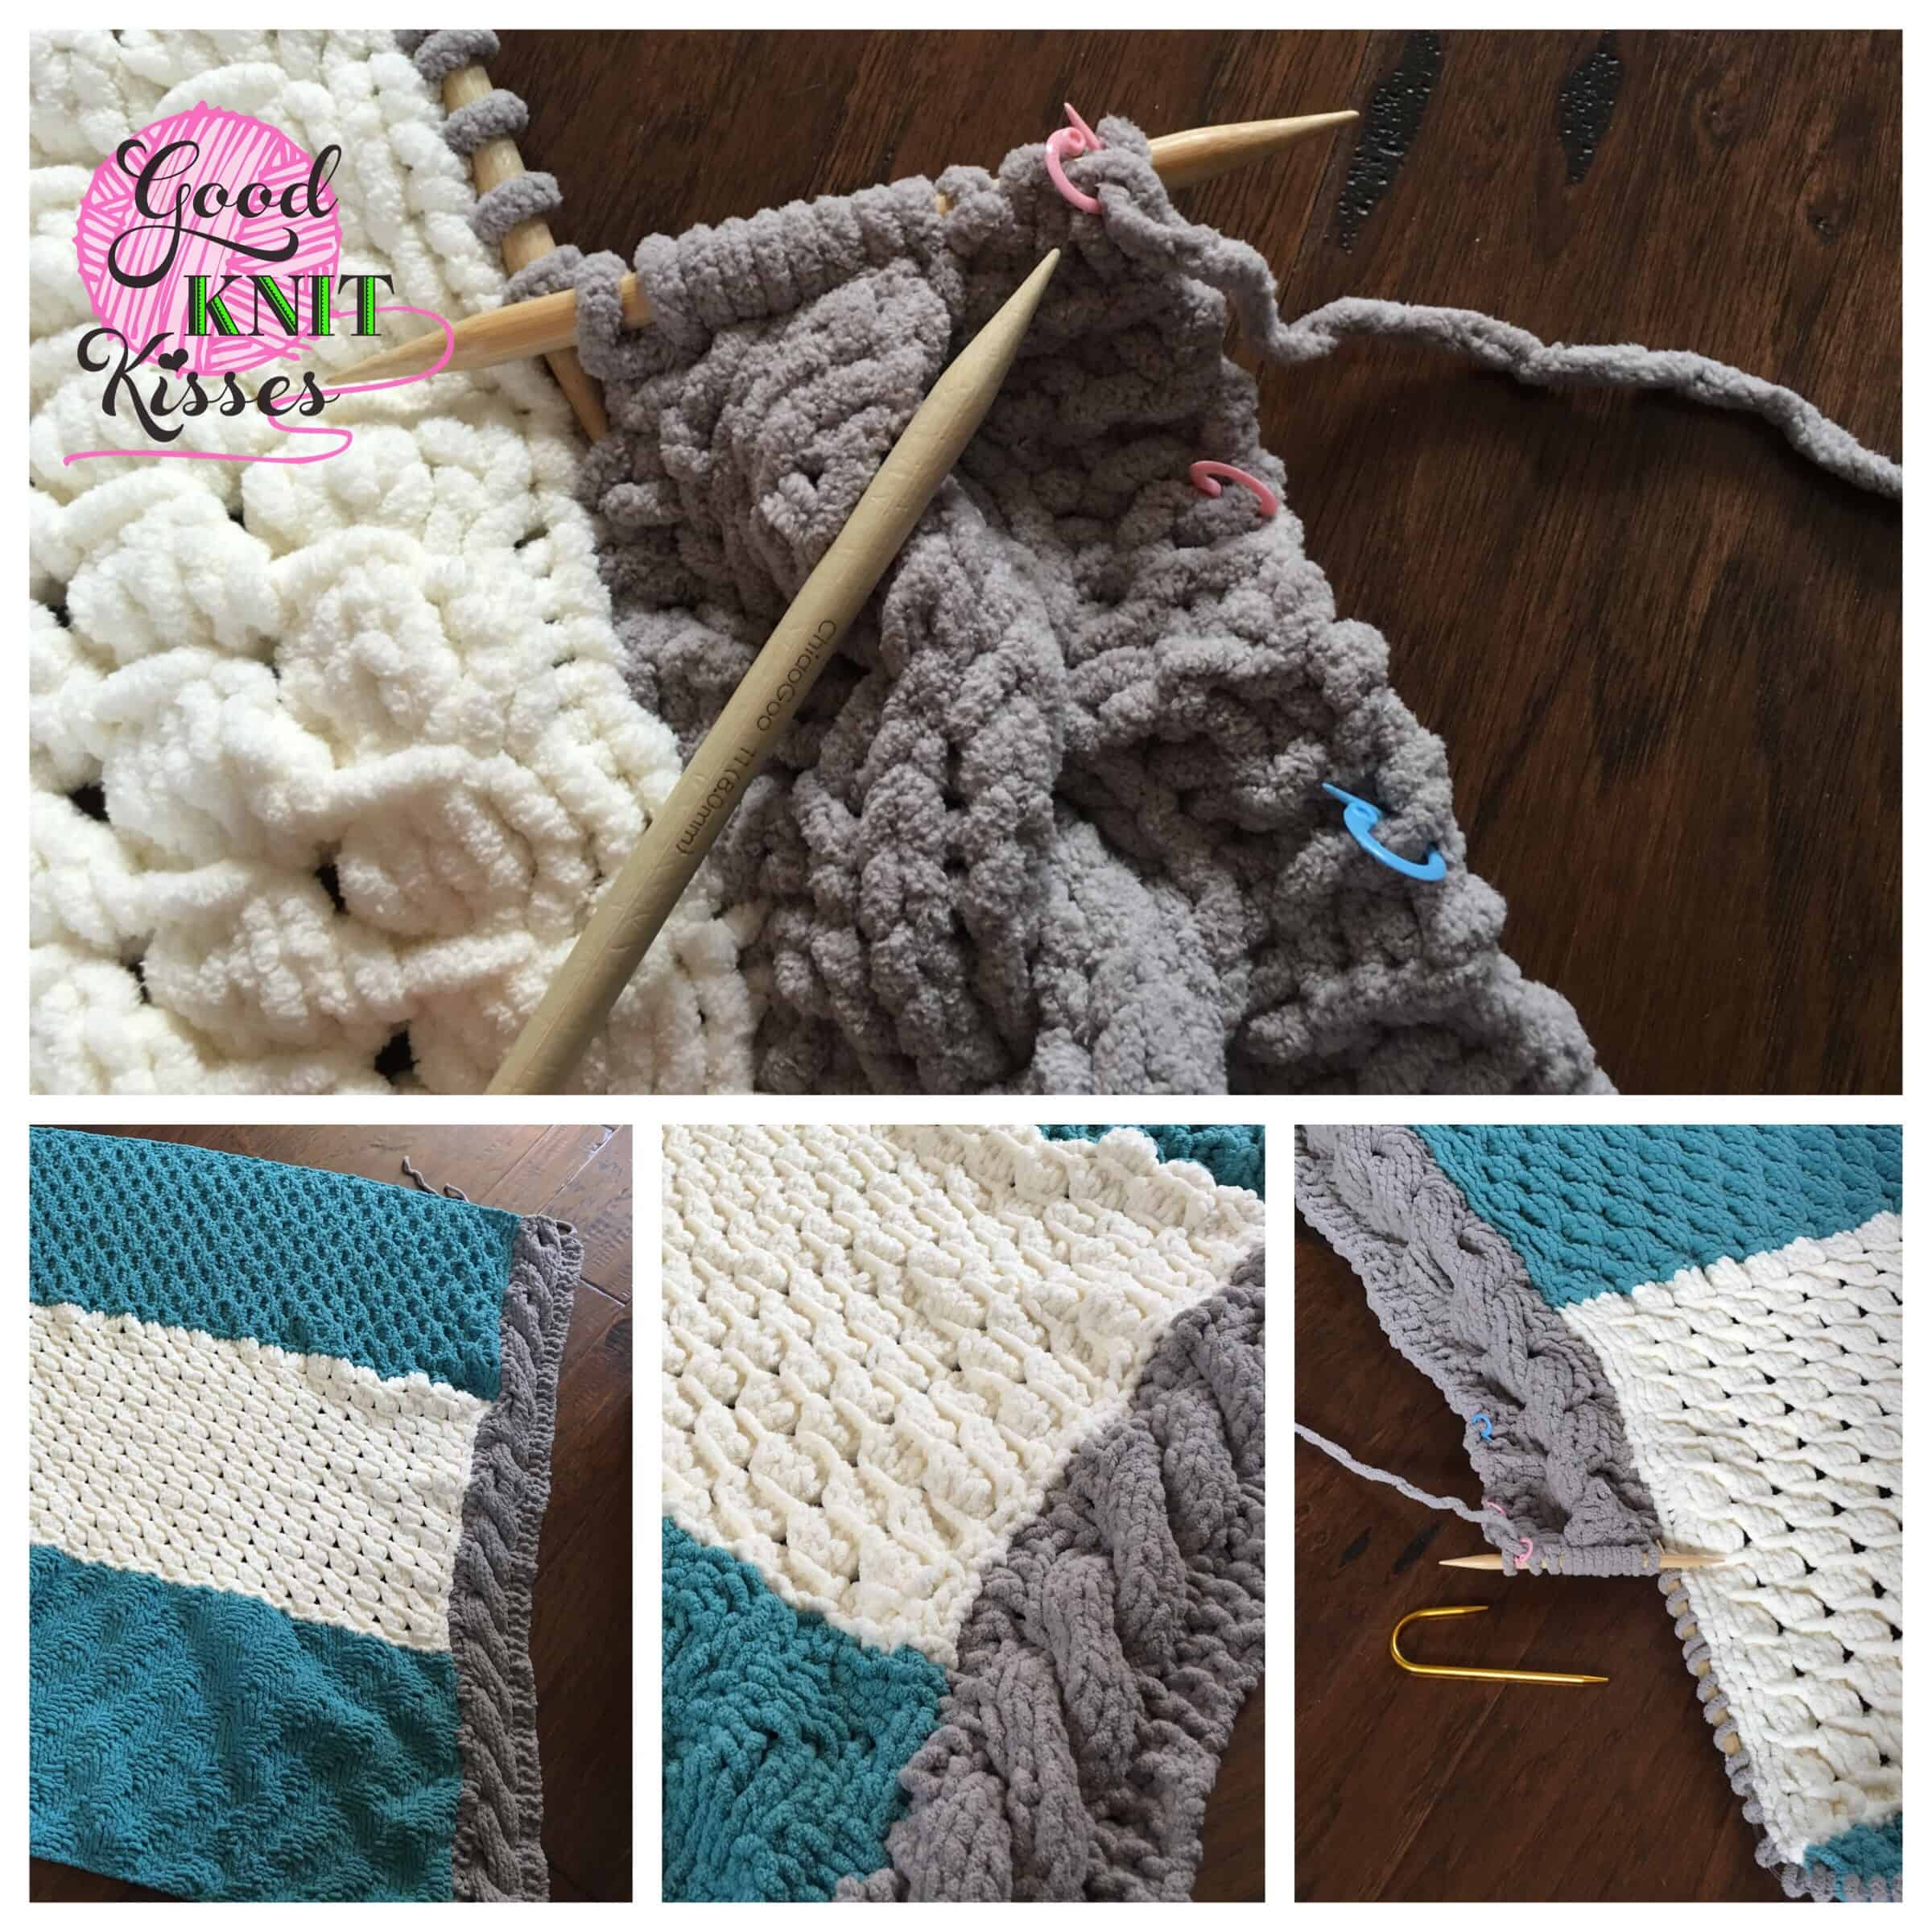
After working row 8 I found it handy to place a stitch marker on the first purl bump (see above photos). This helps keep track of rows for the week 4 mystery stitch along.
Use stitch markers as needed or move 1 up after each 8 row repeat. See Mantra below for help memorizing this border. It really does help.
Now that both sides are nearly done there is a method to the madness I found that really helped!
Week 4 Mystery Stitch Along –
The Mantra for memory help.
In this applied cable border it’s most important to notice the main stitch pattern is stockinette and the right edge is a 3 stitch garter edge…sort of.
The main breakdown:
- Whether working the right, left, top or bottom of the blanket your 3 right edge stitches, on the RS) will make a sort of modified garter stitch pattern. When working WS rows the left 3 stitches are always knit so that the RS will look like 3 purl stitches. On the RS the first 2 stitches are always knit and the 3rd is modified to a purl. That is the only difference.
- Between the “right edge of the RS” modified garter and the last stitch on the left that is used for joining, is a straight-up stockinette pattern. So that means it’s always knit and the WS is always purled. Once you understand that you can remember what stitches get what.
- The last stitch on the RS is always knit but it changes every other row to get attached to 1-2 stitches of the blanket by sliding the stitch over to the circular needle holding all the picked up stitches. The CHART is helpful here to burn in your memory and visualize that 1st & 5th rows are k3tog and 3rd & 7th rows are k2tog. In conclusion every other RS row alternates between the two. On a WS row this stitch simply knit that stitch.
Once you know the above you only really have to pay attention to when a 7th row comes up to cable.
The cabling breakdown:
When it came to the “hardest” row, the mantra seemed to be double-checking the stitch marker placement and counting by 2’s to see if it was time for row 7 yet. It actually helped to see if it was a row to k2tog or k3 tog and never need to look at the pattern. It wasn’t really hard for that row but more fidgety working from a cable needle in a tight spot.
The cable doesn’t really need a breakdown step-by-step. Since the stitch markers were used strategically, coupled with the main pattern breakdown above, it was only necessary to check the written pattern for a few things.
TIPS for success:
- Check is to make sure to pick up the right about of stitches loosely on the correct edge as the pattern calls. (Later realized the stitches picked up on the final edge were way too tight and it caused strain).
- Check if using a cable front or a cable back type of cable for that edge. The difference is wether you hold the first cable stitches to the front or back of the knitting and then work them after 4 stitches.
- Keep moving the stitch marker up to the 8th row purl bump on the RS to tell what row you are on which in turn helps on memory for what row change is next.
- Use a “J” style cable needle. The cable needle that is shaped like a J is how I worked best for a few reasons. The longest part I put through the stitches first and let it hang. Then when ready I would work the first stitch on the short side and slide the stitch off easily versus the long end. I could tell that I didn’t twist my cable this way as well so I recommend this type of cable needle. It also helps the needle is a larger gauge.
I hope that something here helps you, I know it did for me!
The WIP.
Here you can see where two applied borders came together. The finish of each was simply to purl the bind off (cast off) on the WS row right after attaching the last stitch on a RS row. All that is left is a small gap that is easily stitched closed when it’s time for weaving ends.
In the photo below I’m showing where my first ball of Contract C yarn stopped. I was 7 rows shy of finishing the third border. Oh well.
Week 4 Mystery Stitch Along –
The Finish.
The pattern calls for the finished blanket at approximately 46″ x 52″. My blanket measured 41″x 46″. I didn’t try and stretch or block.
My length, after clue 3, was near the same as specified; so with the final measurements it looks like my border was 3″ smaller on each end than the JoAnn sample. I’m a tight knitter and was happy with my results though. I still felt like my border was loose and not stressed therefore I’m happy.
Final thoughts.
The main visible issue is the Clue 1 sample. It is stretched out looking.
I believe it has more to do with that the stitch pattern and would be better used in a different yarn. You can tell it looks like that in the pattern sample so I don’t feel like mine is unique in that conclusion.
If I chose to make this blanket again I would use the Clue 3 week in place of that section (clue 1) using the blanket yarn. This blanket would also be nice with the whole stitch pattern of all in Clue 2 or 3 with the Applied Cable Border around the edging!
The blanket yarn is absolutely cuddly soft for sure and my son is really excited to use it soon!

Overall, I enjoyed the stitch along.
I’d love to have a scarf or cowl out of it each stitch pattern and try in different yarns to test.
Now I’m headed back to Facebook and see if any more brave knitters are finishing up, too. If you didn’t try I’d urge you to test your skills. Try a small sampler in your favorite stitch or even a full section and bind off. You could sew together for a cute cuddly cowl. Alright, now head over to the FB Page. We want to see YOUR work there!
Happy Knitting everyone!
P.S. If you are joining me for the first time, thank you! I am a YouTuber teaching how to loom knit, needle knit and crochet in addition to other fun crafts. Therefore, please join me on the GoodKnit Kisses FB Page for my daily broadcasts and weekly on YouTube. Happy Crafting!

This blog is a Sponsored Post and may contain affiliate links. Using these links helps this website creator, me! LOL
Joann
Tuesday 1st of November 2016
Thanks for talking us through the Mystery Stitch Along. Your mantras were fantastic!
Joann
Tuesday 1st of November 2016
Thanks for talking us through the Mystery Stitch Along. Your mantras were fantastic!
Kristen Mangus
Thursday 27th of October 2016
I hope you enjoyed this blog!
Kristen Mangus
Thursday 27th of October 2016
I hope you enjoyed this blog!