Inside: Easy sweater knit along videos featuring the Easy Going Pullover free pattern from Yarnspirations.
It’s the ultimate test for knitters.
Striped scarf? Easy-peasy!
Lace shawl? No worries!
Sweater? Um…. Yeah, about that.
It’s the one project that brings doubt and intimidation to even experienced knitters. But why? There’s one question every sweater knitters asks herself before starting.
What if it doesn’t fit?
No one wants to spend hours counting rows, marking decreases and picking up stitches evenly along the neckline just to end up with something that doesn’t fit. I sure don’t!
In order to avoid fit problems on your first sweater you have to plan to succeed. I want to be part of your plan.
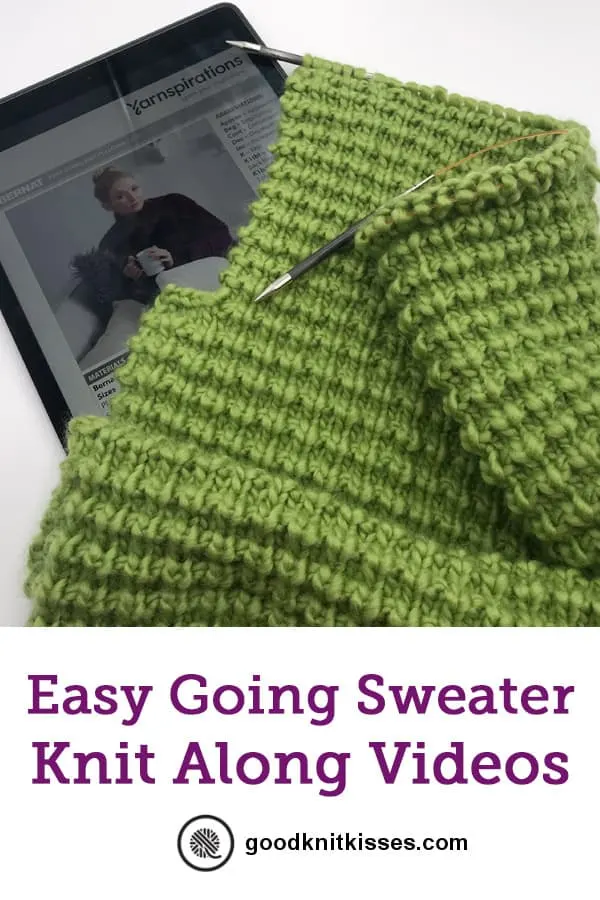
This easy sweater knit along idea started 3 years ago when I partnered with Yarnspirations to create videos for several of their patterns. I made a basic skills video for the Bernat Easy-Going Knit Pullover pattern.
You guys loved it and asked me to make a full tutorial so we could knit through our sweaters together. Yarnspirations gave me permission to use their pattern and I’m excited to guide you on this journey.
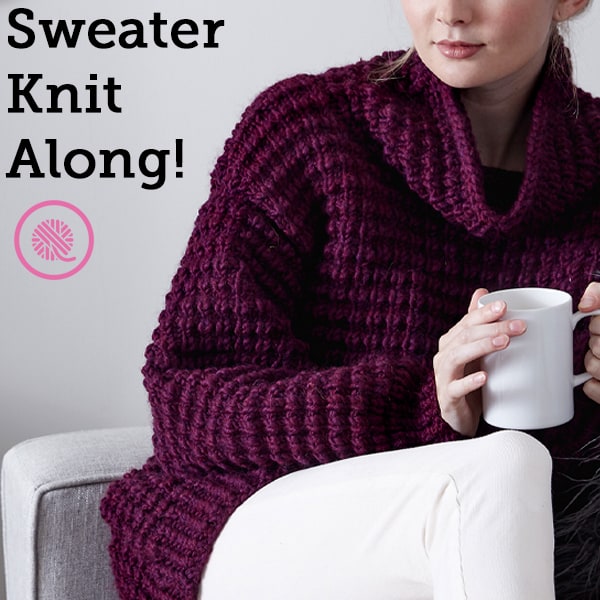
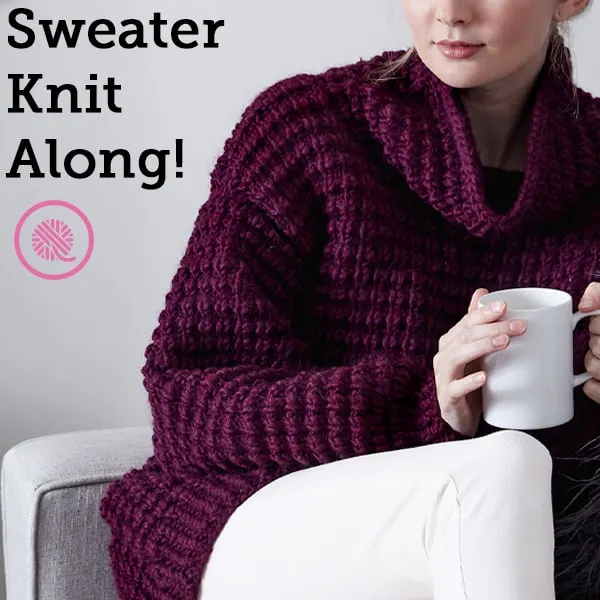
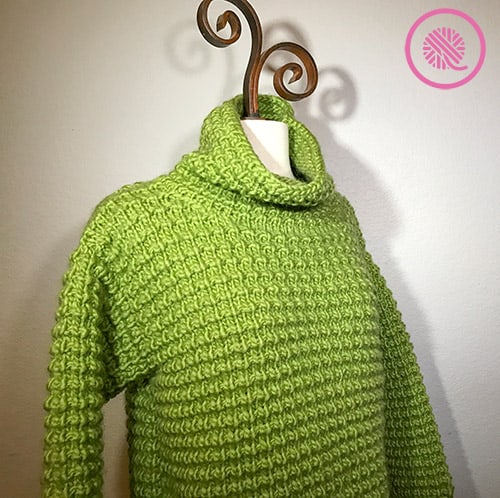
This pattern is ideal for a first sweater because it’s designed to be an over-sized, comfy sweater. The textured stitch pattern, drop shoulder design and bulky cowl collar create a roomy pullover that is very forgiving. By choosing a pattern without waist shaping or sculpted necklines you’re setting yourself up to succeed on your first sweater.
I also like this sweater in particular because the pattern is sized from XS to 5XL! It really is a sweater that anyone can wear and look great.
I’m knitting a size Small in the videos. When I started working through the pattern it made sense to me to break up the tutorial into parts to make it more manageable. You don’t want to get the front and back knit and then have to scroll through 38 minutes of video to find out how to shape the sleeves, right?
Easy-Going Sweater Knit Along Tutorial Breakdown:
Part 1: Introduction to the pattern, supplies, sizing and how to knit the ribbing, main stitch pattern and the back of the sweater
Part 2: Front of sweater
Part 3: Sleeves
Part 4: Seaming, picking up stitches and how to knit cowl collar
Part 5: Seaming and finishing

If you love the sweater, you really should make the matching hat! Easy Going Knit Hat
Let’s get our easy sweater knit along started!
First, head on over to Yarnspirations to get your free Easy-Going Knit Pullover pattern.
Next, gather your supplies:
- Size 10.5 circular knitting needles
- Bernat Roving yarn (Check pattern for number of balls of yarn needed for size.)
- Stitch markers for marking increases/decreases
- 2 Stitch holders (or extra circular needle, scrap yarn, etc.) to hold neck edge stitches
- Tapestry needle for weaving in ends and seaming


All 5 videos are presented in both right-handed and left-handed format. Whenever possible I like to flip my videos so my lefties can see the pattern from the proper perspective.
Select videos are available to GoodKnit Kisses YouTube members only. To get exclusive access to GKK VIP-only content, free PDF patterns, weekly Zoom meetup and more, sign in to YouTube and join as a VIP Member today! Find out more about GKK Membership HERE!
Part 1: Introduction & Sweater Back
The introduction includes supplies, sizing and a review of the written pattern. Following along is a great way to learn how to read pattern. The back of the sweater tutorial portion includes cast on, ribbing, learning the Texture Pattern and shaping the armholes with bind off. (NOTE: Specific stitches in the Abbreviations section are covered as we use them in the tutorial.)
Note the following timestamps to help you navigate the video more quickly:
- 00:00:50 Pattern introduction, supplies and sizes
- Working the BACK
- 00:06:34 Long tail cast on
- 00:10:05 Twisted ribbing using Ktbl and Ptbl
- 00:14:51 Troubleshoot problems with ribbing
- 00:16:08 Texture Pattern stitch using K1below including how to undo the stitch if needed to fix a mistake
- 00:22:24 Shape armholes with knit bind off and purl bind off
- 00:27:16 Continue BACK of sweater to finish armhole
- 00:28:03 Shaping shoulders with knit and purl bind off and finish BACK
Part 2: Sweater Front
The front of the sweater includes not only armhole shaping, but neck shaping to create both shoulders. Below are some timestamps that follow the pattern instructions to help you follow along while you’re knitting:
Part 2 Timestamps:
(Pattern instructions quoted to help you follow along.)
Starting the FRONT up to armholes:
- 00:01:46 How to follow pattern instructions as for BACK
- 00:02:53 ‘Shape armholes:’ Knit bind off and purl bind off shown
- 00:06:30 ‘Cont even in pat until armhole measures … end on WS row.’
1st shoulder:
[NOTE: Pattern doesn’t denote this section as the 1st shoulder. That is my note to help you understand the pattern.]
- 00:07:22 ’Shape neck: Next Row (RS)’
- 00:09:42 ’Turn’ Work only the first ‘…’ sts leaving the rest unworked on spare needle
- ‘Cont in pat, dec 1 st at neck edge on next 4 Rows.’
- Decreases at neck edge of 1st shoulder [NOTE: I recommend working the decrease 1 stitch in from the edge to give you a smoother look and make it easier to pick up sts for the collar. Work the edge stitch K on RS, P on WS.]
- 00:10:16 FIRST dec at neck – on a ‘Row 2 or 4′ as follows (P1, k2tog. Complete Row in pat.)
- 00:12:02 SECOND dec at neck – on a ‘Row 1 or 3’ as follows (Knit to last 3 sts, k2tog, k1).
- 00:13:10 THIRD dec at neck – on a ‘Row 2 or 4’ as follows (P1, P2tog. Complete Row in pat.).
- 00:14:00 FOURTH dec at neck – on a ‘Row 1 or 3’ as follows (Knit to last 3 sts, k2tog, k1).
- ‘then on following RS rows twice more.’
- 00:14:26 Work WS rows as usual except purl first 2 sts to keep stockinette at neck.
- 00:15:20 FIFTH dec at neck on RS row
- 00:16:53 SIXTH (last)) dec at neck on RS row
- 00:17:03 Check stitch count of 1st shoulder with pattern. Instructions to complete first shoulder length end on a WS. (Use Back panel row count as guide.)
- 00:18:45 ‘Shape Shoulder’ Knit bind off 1st shoulder in parts.
2nd shoulder:
- 00:20:00 ‘With RS facing, slip next ‘…’ sts onto stitch holder…’ join yarn and cont in pat.
- ‘Cont in pat, dec 1 st at neck edge on next 4 Rows.’
- 00:22:38 FIRST dec at neck – on a ‘Row 2 or 4’ as follows
- Row 2: (Cont in pat to last 3 sts, ssk, p1) OR Row 4: (Cont in pat to last 3 sts, ssp, p1).
- 00:24:23 SECOND dec at neck – on a‘Row 1 or 3’ as follows (K1, ssk, knit across).
- 00:25:20 THIRD dec at neck – on a ‘Row 2 or 4’ as followsRow 2: (Cont in pat to last 3 sts, ssk, p1) OR Row 4: (Cont in pat to last 3 sts, ssp, p1).
- 00:26:06 FOURTH dec at neck – on a ‘Row 1 or 3’ as follows (K1, ssk, knit across).
- ‘then on following RS rows twice more.’
- 00:26:37 Work WS rows as usual except purl first 2 sts to keep stockinette at neck.
- FIFTH & SIXTH dec same as FOURTH dec at time as 00:26:06 (K1, ssk, knit across).
- 00:27:11 Check stitch count of 1st shoulder with pattern. Instructions to complete first shoulder length end on a RS. (Use Back panel row count as guide.)
- 00:29:10 ‘Shape Shoulder’. Purl bind off 2nd shoulder.
Part 3: Sleeves
The sleeves begin at the cuff then gradually widen to the halfway point. They are then knit straight to the bind off. The only tricky part of working the sleeves is keeping track of your increases while you knit in pattern.
So far on the front and back you’ve seen the instructions to “Cont in pat”, or continue in pattern. When you’re increasing it’s important to pay attention to the columns of stitches of the Texture Pattern to make sure you’re beginning and ending your rows with the correct stitch.
Part 3 Timestamps:
(Pattern instructions quoted to help you follow along.)
- 0:00:24 TIP: Marking increase rows (4th row or 6th row depending on size) using stitch markers (8-12 stitch markers needed)
- 0:02:18 Review pattern
- 0:02:57 How to count increase rows
- 0:04:58 Demo – Increase on Row 1 of Texture Pat (using Kfb)
- 0:06:30 How to place stitch marker for increase row
- 0:07:13 Demo – How to ‘Cont in pat’, or Continue in pattern on Row 2 of Texture Pat after an increase
- 0:08:18 Row 3 of Texture Pat (no increases)
- 0:09:20 Demo – Row 4 of Texture Pat shown with increase (using Pfb) NOTE: Some sizes will not increase on this row.
- 0:10:39 Demo – Row 1 of Texture Pat (Also 5th row after increase for some sizes.) NOTE: If you just worked an increase row place stitch marker to mark your increase.
- 0:12:58 Demo – Row 2 of Texture Pat (Also, 6th row after increase for some) Increase using Kfb and how to ‘cont in pat’
- 0:14:48 TIP: Place stitch marker for increase and tips for making it easier to not have to look at pattern.
- 0:17:14 Demo- How to increase on Row 4 of Texture Pat (Purl row)
- 0:19:05 Notes for next steps
- 0:21:10 Reviewing stitch counts for each size after increases
- 0:21:45 End of Increases; PATTERN CORRECTION. Notes on sizes and schematic.
- 0:25:25 Weave tails in ribbing and main stitch pattern
Part 4: Seaming & Cowl Collar
You followed the instructions perfectly. Your armholes measure the right size. Your neck edge has just the right curve. Now it’s time to take those pieces and start putting them together.
Congrats on making it this far! Now we’re getting the part of sweater knitting that strikes fear into the heart of knitters everywhere.
SEAMING!
But it’s no problem for you, because I have tips on how to seam smoothly. In today’s tutorial I talk about how to take that jagged stair step shoulder bind off and seam it into a smooth, consistent join.
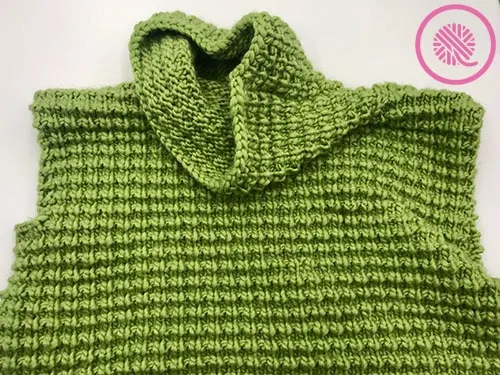
I also teach you how to evenly pick up stitches along the neck edge so your collar is even. Plus we’ll be knitting the entire collar in the textured stitch pattern and seam it.
Now you could stop here and have a stunning cowl-neck poncho. But you’re so close to being able to have those “Why, yes. As a matter of fact, I did knit this sweater!” bragging rights. (But feel free to pop your sweater over head at this point and see how amazing it looks!)

Instead of the working the collar as written try one of these variations:
1. Work only 2-3 pattern repeats of the Texture Pat (ending after a Row 2) for short collar.
2. After knitting the collar seam up the left shoulder only and leave the collar open.
3. Leave the collar open and add a decorative toggle and i-cord closure for days when you want to button it up.
Part 4 Timestamps:
- 0:00 Part 4 Collar and shoulder seams
- 0:00:35 Review instructions ‘FINISHING Sew Right shoulder seam.’
- 0:01:06 Line up FRONT and BACK panels
- 0:01:30 Seam Right shoulder (How to seam the stair step bind off.)
- 0:09:01 How to pick up stitches. ‘… pick up and knit 12 stitches along left front neck edge…’
- 0:13:18 Knit sts from FRONT neck stitch holder.
- 0:13:42 Pick up next 12 stitches along right front neck edge.
- 0:14:40 Knit sts from BACK neck stitch holder and increase at center.
- 0:15:51 Knit Collar using Texture Pat.
- 0:17:23 Seam Left shoulder.
- 0:22:51 Seam Collar.
- 0:27:58 Weave in tails.
Part 5: Seaming & Finishing
You made it! You’re about to cross the finish line and experience the unbridled joy that only your fellow sweater knitters understand.
Today we sew in the sleeves and sides. I’ll also cover how to ease the fullness if every row and column don’t line up exactly. Easing the fullness simply means adjusting the pieces you are seaming so you don’t have any bulky spots along your seam.

Detailed Timestamps:
- 00:01:11 TIP: How much yarn do you need for each seam?
- 00:02:19 Review pattern ‘Sew in sleeves placing rows above markers …’
- 00:03:30 Begin sewing in sleeve.
- 00:20:22 Seam sides and sleeves
Karen
Sunday 7th of November 2021
What kind of yarn did you use to sew up the seams? I can see it’s not the roving yarn we used for the sweater but if you said what kind I missed it. I’m ready to try to put it together but not sure what type to use.
Hope Morales
Tuesday 20th of July 2021
I would love a loom knit video of this or Any sweater! Especially one with a large hood. I can't read patters so the videos are invaluable! Thanks so much!
Gail
Sunday 21st of March 2021
Hello. With reference to my comment about no acknowledged of the question I sent in of 10 March, you did not show how to actually do the second bit of casting off for the shoulder. How is this done with regards to the textured pattern. In other words, do we cast off doing the Knit 1 below or just a normal Knit stitch on the 2nd Row? Please reply - I can't proceed until I know, and I really want to finish, and use this lovely sweater. Thank you.
Gail
Wednesday 10th of March 2021
There was no acknowledgment that myjust created comment was processed for moderaton. Did it actually go through?
Trish
Sunday 17th of May 2020
I read all the way to the supplies needed before it said this wasn't for loom knitters. Please - for the love of pancakes - would someone do a loom knitting sweater series? I'm in Florida - I'll even take a short-sleeved tee?
Joann Gay
Friday 22nd of May 2020
Kristen is already working on converting this pattern to the loom for later this year!