Inside: Learn how to crochet ribbing: 1 x 1 and 2 x 2 rib stitch patterns that look like knitting. See the written patterns and tutorial videos below.
Hat brims, cuffs, blankets and more!
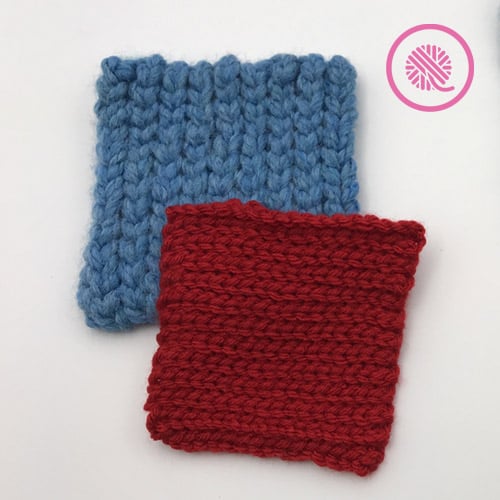
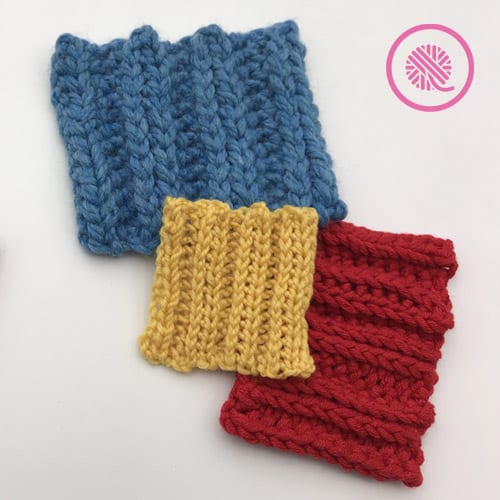
Ribbing is the term we use for a stretchy knit fabric. Now you can create that same look and function on your crochet projects.
In knitting ribbing is created by alternating stitches to make columns. When you alternate one knit stitch with one purl stitch your fabric has a very tight columns of stitches.
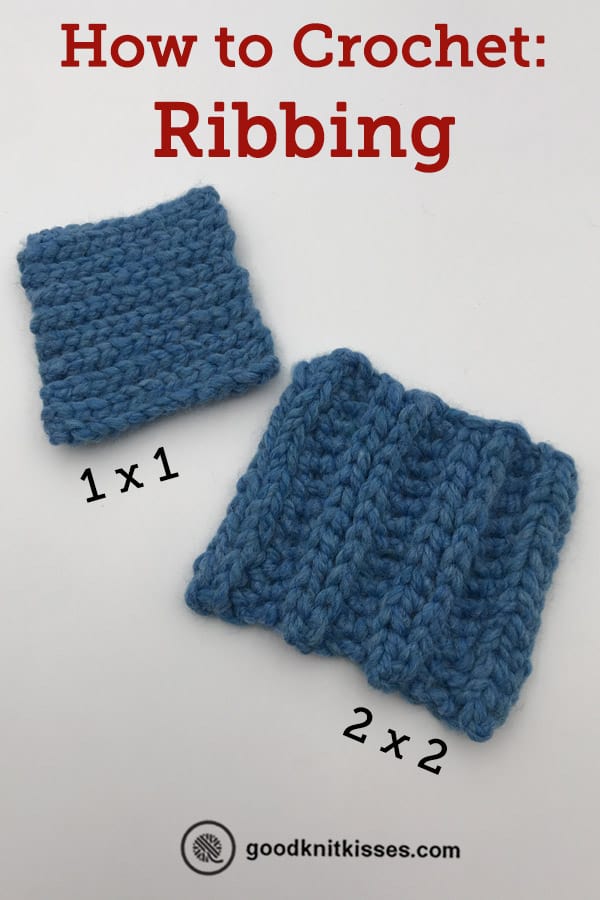
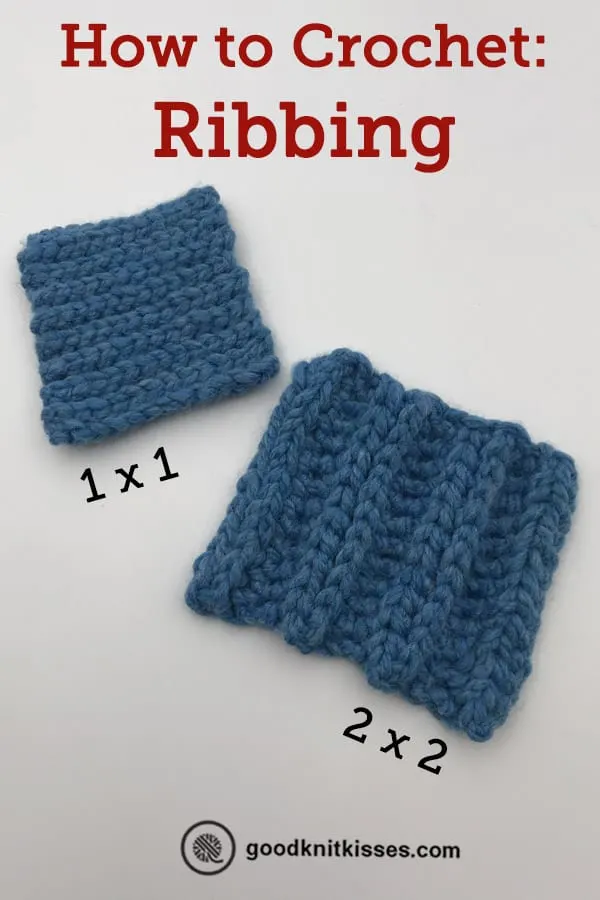
Rib stitches are named by the number of knits and purls used. So, 1×1 rib is 1 knit and 1 purl; 2×2 is 2 knits and 2 purls; 1×3 is 1 knit and 3 purls, and so on.
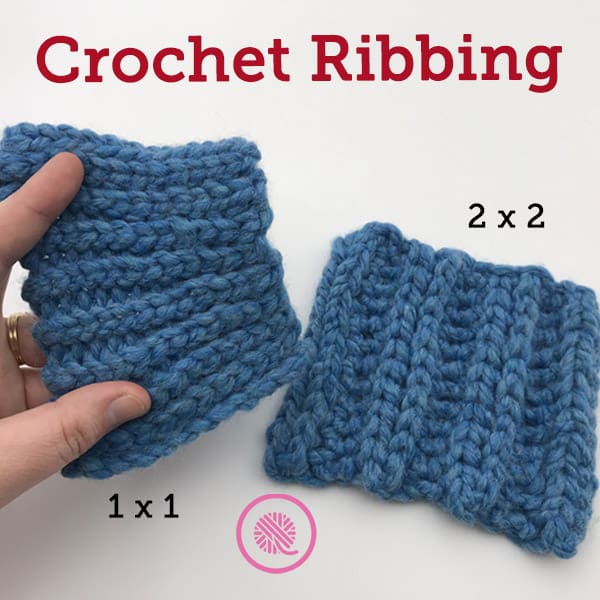
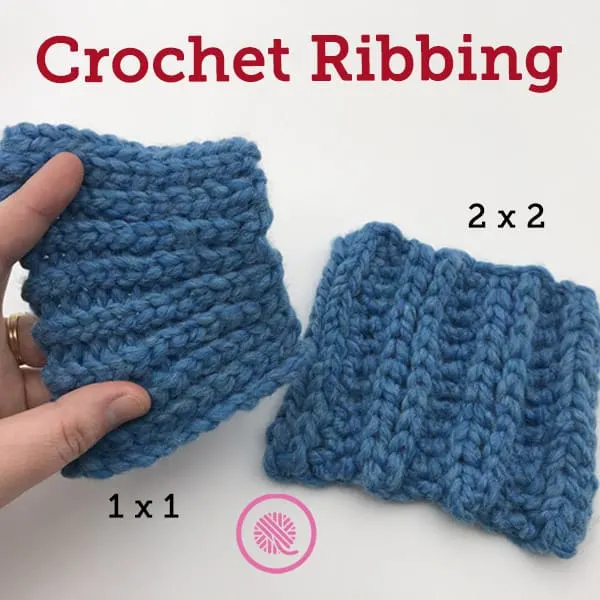
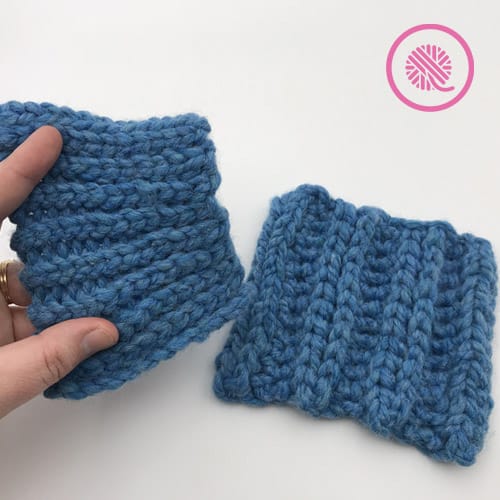
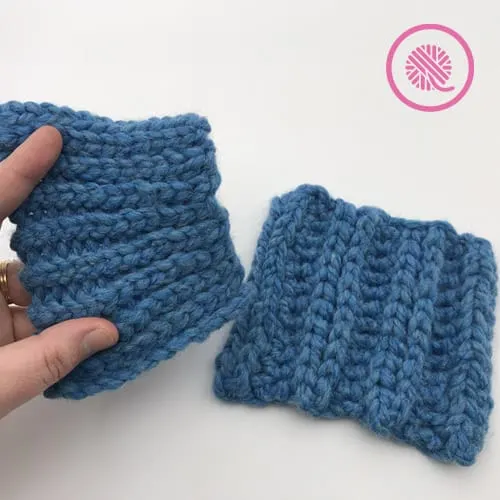
I’m only going to cover the two most common variations: 1×1 and 2×2 rib stitches.
You may already be thinking to yourself,
“But, Kristen, crochet doesn’t use knits and purls.”
As usual, you’re right. We can’t just substitute a crochet stitch for the knits and another stitch for the purls. Crochet is too different from knitting. But we CAN use crochet stitches and techniques to create the look of ribbing.
When you crochet you create a recognizable line of “V” stitches along the top of your row. This row of Vs looks like a column of knit stitches! So you’re already halfway there. By using a few special techniques you can mimic knit ribbing. But first, you need to understand how the stitches work.
The biggest fundamental difference when working rib stitches using crochet instead of knitting is this:
When crocheting rib stitches you work sideways!
That means instead of alternating knits and purls across a row you will work all the “knit stitches” of a column on one row and then the “purl stitches” on the next row. In the photo below, I crocheted the 1×1 sample I’m holding from the bottom to the top.
If you need a refresher, be sure to check out my How to Crochet series!
1 x 1 Ribbing

Ch = Chain
BL = Back loop from top chain from previous row
FL = Front loop from top chain from previous row
Sl St = Slip Stitch. Insert hook in loop, yarnover and pull new loop through loop on hook. Make sure working yarn has loose tension.
Rep = Repeat
St(s) = stitches
Chain to desired length of ribs. Ch 1 for turning chain.
Row 1: Sl St in 2nd ch from hook in BL. Repeat across all sts. Ch 1 and turn.
Rep Row 1 until desired length. and fasten off. Weave in tails.
2 x 2 Ribbing

Ch = Chain
Yo Sl St = Yarn over Slip St (Yarn over and insert hook in to loop. Yarnover and draw up loop. Slip loop through both stitches on hook.
BL = Back loop from top chain from previous row
FL = Front loop from top chain from previous row
BF = Bottom loop below Front Loop; 3rd loop formed below top chain stitches from previous row.
Sl St = Slip Stitch. Insert hook in loop, yarnover and pull new loop through loop on hook. Make sure working yarn has loose tension.
Rep = Repeat
St(s) = stitches
Chain to desired length of ribs. Ch 1 for turning chain.
Foundation row: Yo Sl St in 2nd ch from hook in BL. Repeat across all sts. Ch 1.
2×2 Rib Stitch 4 row rep:
Row 1: Yo Sl St in BL across all sts. Ch 1.
Row 2: Rep Row 1
Row 3: Yo Sl St in BF across all sts. Ch 1.
Row 4: Rep Row 3
Rep rows 1-4 until desired length.
Rep Row 1 for final row and fasten off. (Last row not needed if connecting in the round).
How to Crochet Ribbing Tutorial Videos
If any of the videos below do not show they may be restricted to GoodKnit Kisses YouTube members only. Find out more about GKK Membership HERE!
Both the 1×1 and 2×2 ribbing stitch patterns are demonstrated on this video from start to finish including weaving in the tails. As always, I’ve included both a right and left handed video so you can see the correct viewpoint when learning the technique.
Laura Quigley
Wednesday 25th of August 2021
Hi! Thank you for this! Do you have a. Ideo on how to connect this ribbing to the sweater or hat? All the videos online have you adding the ribbing directly whereas now I have two things to connect. Is it as simple as joining with a tapestry needle and yarn? I’m afraid it won’t lay nicely.
Arlene Ulrich
Saturday 7th of November 2020
I Love your videos but lately they have been real scratchy. This one didn’t do it until the end.This was great I knew there was a way to do this but but you explain it so well