
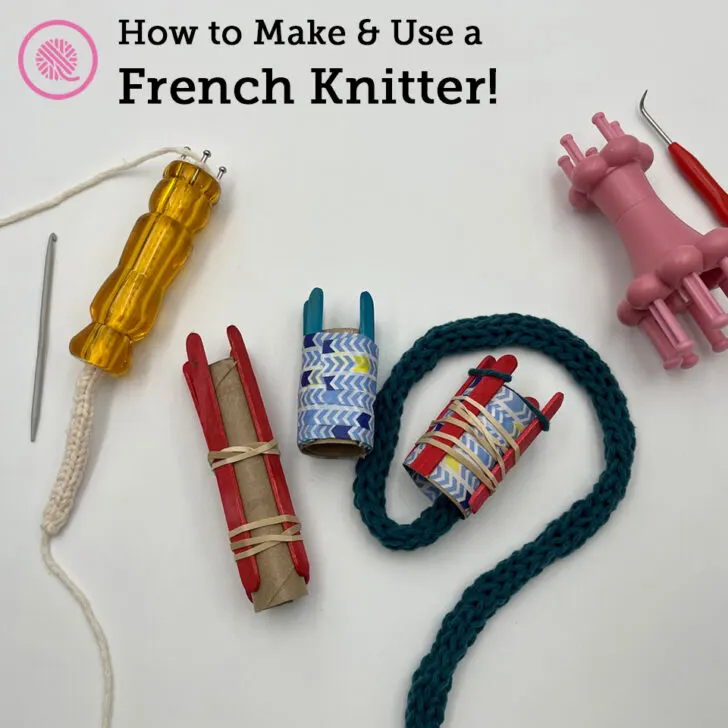
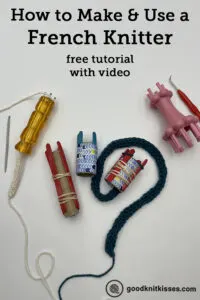
Inside: Learn how to make and use a French knitter or spool loom. Includes detailed, simple instructions and a video tutorial.
So, what do YOU call it?
I think most common name is a French knitter, but it can also be called a spool loom or knitting nancy. Many versions of this tool have been used for centuries to knit a basic cord. Early versions used a wooden spool and four nails, in other words, whatever you had on hand.

Today, I’m going to teach you how to knit an i-cord on a French knitter and I also include a bonus segment on how make your own DIY French Knitter. This kid-friendly craft is simple enough for a child to master quickly.
How to Use a French Knitter
First, you need to know that all French knitters, or spool looms, are not the same. They can be made using a variety of materials like plastic, wood and acrylic. What they all have in common is the basic shape. They are a hollow cylindrical tube with 4 or more pegs or pins at one end. As you knit the i-cord comes out of the bottom of the tube.
Next, different size French knitters will give you different size i-cords. Just like with a knitting loom, the space between the pegs will determine the size of your stitches. More space between the pegs means a larger i-cord even if your using the same yarn.
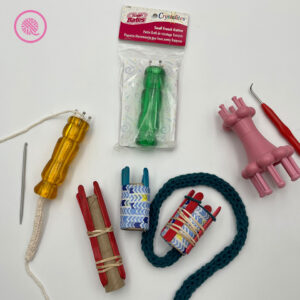
If you want to buy a French knitter, there are dozens available. I show you two of mine in this video: the Susan Bates Crystalite French Knitter and my Boye Spool Loom. The Boye loom has 2 sides, one with 5 pegs and one with 8. While a French knitter typically has 4 pegs, I’m including it here since it does the same job. Clover also makes a French knitter and there are dozens of custom designs on Etsy for handmade designs.


Boye spool loom (right)
Instructions:
These instructions teach how to work with a traditional 4-peg French knitter. For a larger spool loom, you may want to use a loom knit drawstring cast on, then continue with Step 7.
- Feed the end of the yarn through the middle of the French knitter until you have a 4-6″ yarn tail hanging down.
- Holding your French knitter with one peg facing you, wrap the yarn around the front of the peg, then around the outside of the peg on the opposite side and back around the front of the peg of the first peg. NOTE: You will have 2 loops on your starting peg, 1 on the peg opposite and 2 pegs on either side that are empty. (See image below.)

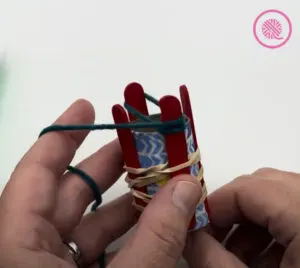
- Pick up with bottom loop on your starting peg and lift it up and over the top loop and off the peg. Pull on the yarn tail to tighten. NOTE: You can do this with your fingers on a larger knitter or with a loom tool or crochet hook.
- Rotate the French knitter so the yarn wraps across the front of the empty peg.
- Rotate again to wrap the yarn across the front of the next peg above the existing stitch. As before, pick up the bottom stitch and lift it over the top.
- Rotate the knitter again to wrap the front of the next empty peg. Now all 4 pegs have yarn loop on them.
- Rotate the French knitter, wrap the yarn in fron the next peg, lift the bottom loop over the top. Tug the yarn from the bottom to tighten.
- Repeat Step 7 until your i-cord is the length you need.
- To finish, cut your yarn leaving a 6-8″ tail.
- Wrap and knit over the next peg. Pull the yarn tail through the stitch. You have 1 empty peg.
- Repeat Step 10 until all the pegs are empty. NOTE: Make sure when you move to the next peg you don’t wrap the yarn around the empty peg.
- Once all stitches are bound off, pull the yarn tail to close the end of the cord.
Tip: If you need to put your French knitter down before you finish, you can ut a rubber band around the tops of the pegs to keep the yarn in place.
How to Make a French Knitter:

Making your own French knitter is simple with a few craft supplies you may already have around your house. This is a great project for kids and adults!
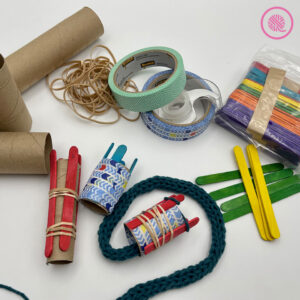
Supplies:
- cardboard tube (toilet paper or paper towel tubes work great)
- popsicle/craft sticks (I used these colored craft sticks.)
- rubber bands (Get a variety pack with multiple sizes.)
- washi/masking tape and or regular clear tape (I like the 3M Expressions designs, but plain tape works just as well.)
- scissors
Instructions:
- First, cut the cardboard tube lengthwise to open it up. This lets us overlap the edges to make the tube smaller. We do this for 2 reasons. First, to make the french knitter stronger. You can use the tube the way it is, but I noticed the cardboard wants to bend and fold between the pegs. Second, it will make the cord you knit tighter if the tube is smaller.
- Next, roll the cardboard back into a smaller tube and tape it around the middle to secure it.
- Tape around the openings of the tube so you have smooth edges that won’t catch on the yarn. Optional: Cover the entire tube with decorative tape.
- Now let’s add the first pair of pegs. Put one craft stick on opposite sides of the tube with about 1″ sticking up above the edge of the tube and secure in place with a rubber band.
- Add the next 2 craft sticks across from each other by sliding them under the rubber band.
- Optional: Tape over the rubber bands to create a smooth surface.
Tip: To make a the shorter version, after Step 1 cut the tube to the desired length. Using strong scissors, cut the craft sticks to !” longer than your tube.
How to Make and Use a French Knitter Tutorial Videos
Select videos are available to GoodKnit Kisses YouTube members only. To get exclusive access to GKK VIP-only content, free PDF patterns, weekly Zoom meetup and more, sign in to YouTube and join as a VIP Member today! Find out more about GKK Membership HERE!