
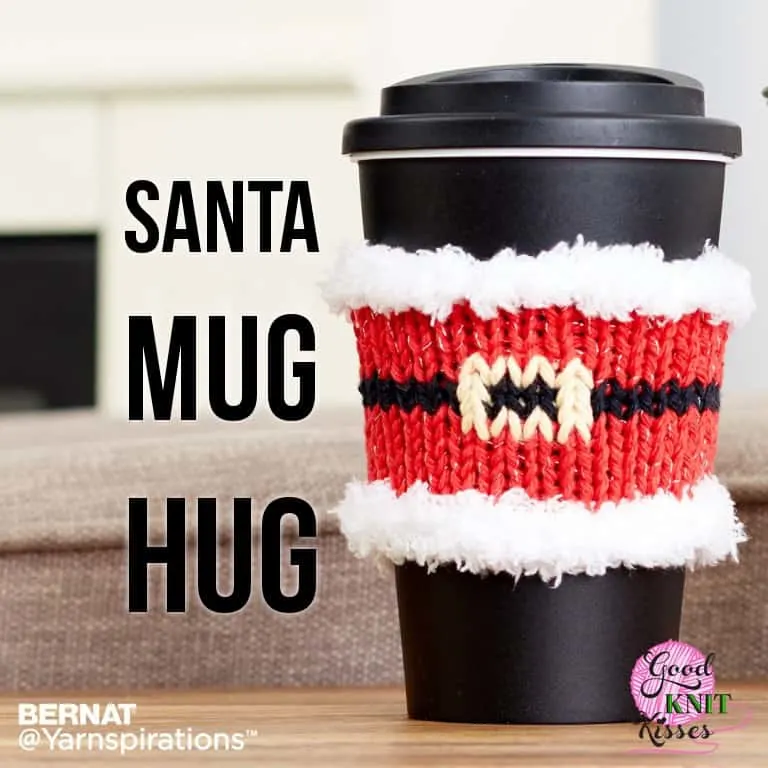
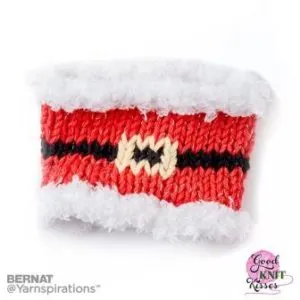
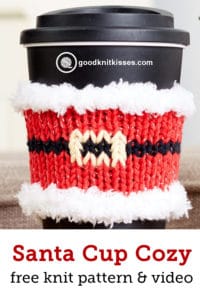
Santa Mug Hug | Yarnspirations

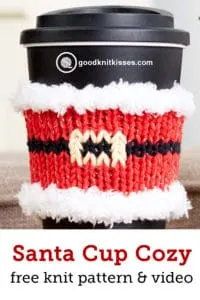
You don’t want to end up on the naughty list, do you? Let’s keep Santa extra jolly this year with a Bernat Knit Santa Mug Hug from my sponsor, Yarnspirations. I designed this fun, whimsical cup cozie to slide onto your mug so it’s great for an on-the-go treat whether you’re just out shopping or pulling an all-nighter delivering gifts around the globe.
This pattern is knit using the Bernat family of yarns: Bernat Handicrafter Holidays and Bernat Handicrafter combine vibrant colors with the easy care of cotton and no Santa suit is complete without the soft furry trim from Bernat Pipsqueak.

Pattern:
Yarn:
Bernat® Handicrafter® Holidays™ (2.8 oz/80 g; 138 yds/126 m)
Contrast A Red Sparkle (48705) 1 ball or 45 yds/41 m
Bernat® Pipsqueak™ (3.5 oz/100 g; 101 yds, 92 m)
Contrast B Whitey White (59005) 1 ball or 6 yds/5.5 m
Bernat® Handicrafter® Cotton™ (1.75 oz/50 g; 80 yds/73 m)
Contrast C Black Licorice (01040) 1 ball or 5 yds/4.5 m
Contrast D Pale Yellow (01030) 1 ball or 2 yds/1.8 m
Note: 1 ball each of A, B, C and D makes approx 3 Hugs
Needles and supplies:
Size U.S. 7 (4.5 mm) knitting needles or size needed to obtain gauge.
Tapestry needle for seaming and duplicate stitch
Size:
Approx 3″ [7.5 cm] diameter x 2½”[6 cm] long.
Gauge:
20 sts and 26 rows = 4″ (10 cm) in stocking st with A.
Skills taught in this tutorial:
Backward loop/thumb cast on
Knit stitch
Purl stitch
Kfb increase – knit into the front and back of the stitch
Bind off
Seaming
Duplicate stitch
PIN IT
Let’s get JOLLY!
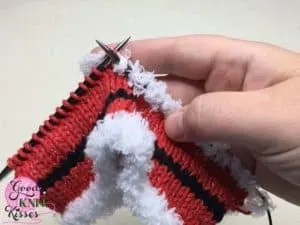
This pattern includes a chart to show the placement of the duplicate stitch belt buckle, but the row instructions are also important so pay close attention. Start with a backward loop cast on. I usually prefer the longtail cast on, but I want the Bernat Pipsqueak to stay super fluffy so a loopy cast on is perfect. You just knit one row with the Pipsqueak yarn and then we switch colors and begin our red section.
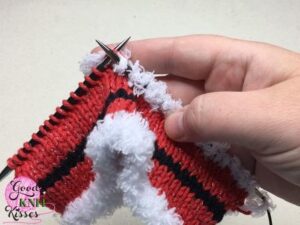
The main body of the mug hug is all stockinette stitch. That means knit on the right side of your work and purl on the wrong side. Once you get a few rows knit is very easy to see which side you are on. There are a couple Kfb increases to widen the mug hug as you knit. This shaping allows for a perfect snug fit.
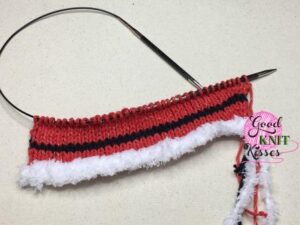
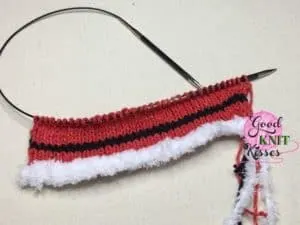
Before you know it you’ll be ready to switch to black for the belt. Since you sew the seam when you finish you can just keep your red yarn attached and carry it up the side. No extra yarn tails to weave in! After the two belt rows are finished switch back to red and continue. Before you know it you reach the top and switch back to the pipsqueak to finish it off.
Finishing touches
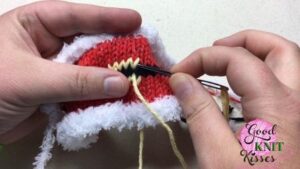
Once you finish knitting it’s time to add the belt buckle using the duplicate stitch. This technique uses a yarn and needle to sew a contrast color on top of the existing stitches. It is a great way to add some pops of color and fine details without having to switch colors while knitting.

Last, seam up the sides using a tapestry needle a red yarn tail! You want to make sure to keep your black belt rows lined up when you are seaming. After you seam, weave in the yarn tails and you are done.
Wasn’t that fun, fast and easy? Check out the video below for the full tutorial:
Thanks for joining me to make the Santa Mug Hug! If you make this or any of my projects please share them with me on social media using #goodknitkisses.
Happy Holiday Knitting!!
This post and video are sponsored by Yarnspirations.