
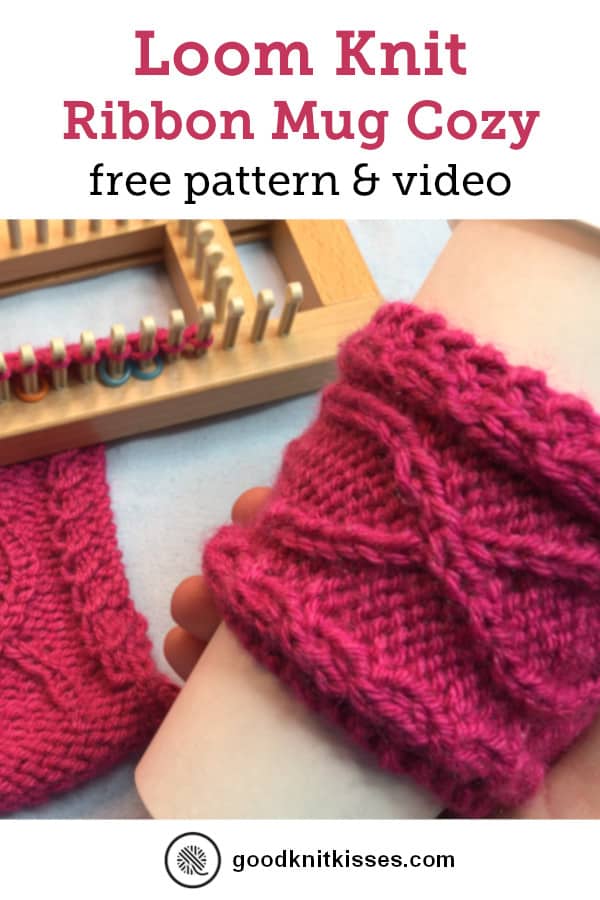
Loom Knit Ribbon Mug Cozy – Pattern Conversion
Support your favorite cause with a mug cozy in your favorite ribbon color. This pattern is Inspired by the needle knit mug cozy in Knitting for a Cure by Kay Meadors and published by Leisure Arts. This pattern book has 18 designs to offer support and encouragement. If you want to see them all you can find the book here: Knitting for a Cure (affiliate link)
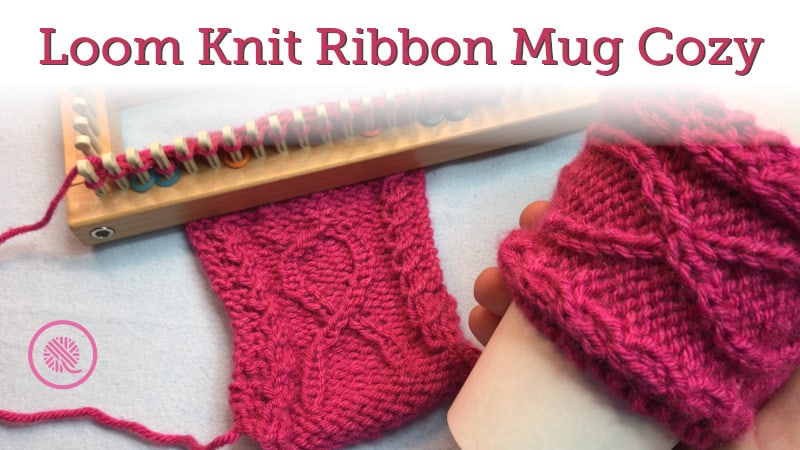
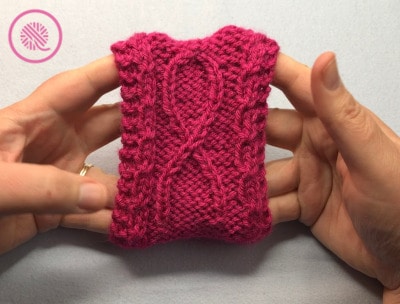
With permission from Leisure Art I converted the pattern to the loom and filmed a video tutorial that will teach you how to read a pattern and instruct in some special stitches that may be new to you. The video walks you through the simpler parts of the pattern and provides detailed instructions for the more advanced techniques. The Ribbon Mug Cozy includes twisted ribbon borders and two large support ribbons loom knit using a cable cross and twisted stitches.
Needle knitters, you can find the original needle knit version of the pattern here: Ribbon Mug Cozy | Knitting for a Cure
Breast cancer awareness is a cause dear to my heart. My great grandmother, Ethel Williams, had breast cancer and sadly passed too soon. It is vital to catch it early with the help self-exams and mammograms. I don’t know of anyone whose life hasn’t been touched by this disease. I’m also encouraged to know so many survivors and celebrate with them! Please make and share with others who are fighting or surviving. Don’t forget to use one as well to show your support. And feel free to use another color to support other causes near and dear to your heart.
PIN IT!

Loom Knit Ribbon Mug Cozy Pattern
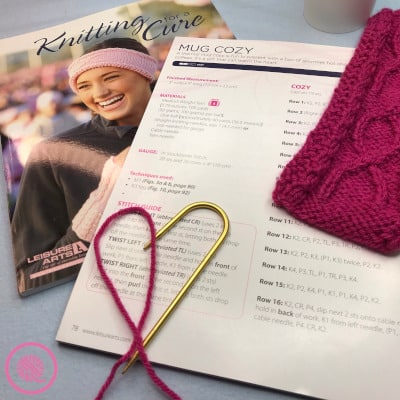
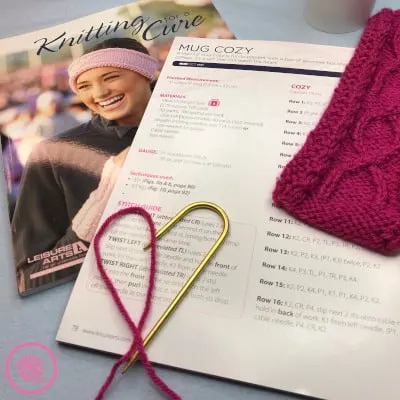
MATERIALS
Medium weight yarn (approx 40 yds). Lion Brand Vanna’s Choice color Raspberry (3.5oz /100g /170 yds /156 m) used in sample.
Small Gauge (⅜”) loom with at least 19 pegs. Knitting Board Sock Loom 2 was used.
Loom Hook
Cable Needle
Stitch Marker(s) or small rubber bands.
Tapestry Needle
ABBREVIATIONS
CR = Cross Right (see Special Stitches)
EK = Ewrap knit
K = Knit; Use EK or UK as preferred (see Notes)
UK = Uwrap knit
M1P = Make 1 Purl (see Special Stitches); pick up bar from previous row, place, then purl.
P = Purl
P3tog = Purl 3 together (see Special Stitches); purl all 3 loops together on same peg.
St(s) = Stitch(es)
TL = Twist Left (see Special Stitches)
TR = Twist Right (see Special Stitches)
SPECIAL STITCHES
CR = Cross Right (worked over 2 pegs)
Skip first peg. Ewrap second st on the left. Then knit the first stitch passing yarn behind first peg around front (clockwise), and between the two pegs to back. Knit over both pegs. This is similar to a figure 8 pattern. Lift first peg with fingers as it is loose with the working yarn attached. Lift second stitch with hook and move to first peg. Place first stitch in hand on empty peg.
TL = Twist Left (worked over 2 pegs)
Skip first peg. Purl second peg and do not place on peg. Move first peg to empty peg and place purled stitch on empty peg. Knit new second peg.
TR = Twist Right (worked over 2 pegs)
Skip first peg. Bring yarn back around second peg as to Ewrap, continue holding yarn in front of both pegs. Purl first peg. Knit over second peg. (Similar to the CR except the first stitch is purled). Lift first peg with fingers as it is loose with the working yarn attached. Lift second stitch with hook and move to first peg. Place first stitch in hand on empty peg.
M1P, K1, P3tog, K1, M1P (worked over 5 pegs; see Row 27)
Work first 7 pegs…move peg 9 to 10, move peg 11 to 10 (peg 10 is ready for a P3tog), move peg 8 to 9, move 12 to 11. Pegs 8 and 12 ready for an M1P. Pegs 9 and 11 ready for K1…complete row as written.
GAUGE
4 sts x 6.5 rows in 1” in reverse stockinette
SKILL LEVEL Intermediate
SIZES One Size
MEASUREMENTS 4” w x 9” l (7.5 cm x 23 cm) approx.
NOTES
Stitch markers or small rubber bands can be used in this pattern to indicate the ribbon border. Set up two stitch markers (or 1 small band around the pair of pegs) on pegs 3 and 4 as well as pegs 16 and 17. A different colored stitch marker could be used on pegs 7 and 13 to mark the start of the support ribbon.
The Longtail cast on method is preferred. Alternately you can use the True Cable Cast on. If you use Ewrap cast on, make it a double Ewrap Cast on so your Peg 1/ Row one begins on the left.
This pattern can use the Ewrap Knit stitch or the Uwrap knit stitch. The Uwrap knit will more closely resemble the needle version. The final size for Ewrap will be slightly bigger and have more stretch.

INSTRUCTIONS
Longtail Cast on 19 stitches beginning on right. Row 1 will work to the left.
Row 1: P2, K2, P 11, K2, P2.
Row 2: K4, P 11, K4.
Row 3: P2, K2, P 11, K2, P2.
Row 4: K2, CR, P 11, CR, K2.
Row 5: P2, K2, P2, K1, P8, K2, P2.
Row 6: K4, P8, K1, P2, K4.
Row 7: P2, K2, P2, K1, P5, K1, P2, K2, P2.
Row 8: K2, CR, P2, K1, P5, K1, P2, CR, K2.
Row 9: P2, K2, P2, K1, P5, K1, P2, K2, P2.
Row 10: K4, P2, K1, P5, K1, P2, K4.
Row 11: P2, K2, P2, K1, P5, K1, P2, K2, P2.
Row 12: K2, CR, P2, TL, P3, TR, P2, CR, K2.
Row 13: P2, K2, P3, (K1, P3) twice, K2, P2.
Row 14: K4, P3, TL, P1, TR, P3, K4.
Row 15: P2, K2, P4, K1, P1, K1, P4, K2, P2.
Row 16: K2, CR, P4, slip 2 sts onto cable needle and hold in back of work, K1 and move to rightmost empty peg, place 2 sts from cable needle onto empty pegs in order , P1, K1, P4, CR, K2.
Row 17: P2, K2, P4, K1, P1, K1, P4, K2, P2.
Row 18: K4, P3, TR, P1, TL, P3, K4.
Row 19: P2, K2, P3, (K1, P3) twice, K2, P2.
Row 20: K2, CR, P2, TR, P3, TL, P2, CR, K2.
Row 21: P2, K2, P2, K1, P5, K1, P2, K2, P2.
Row 22: K4, P2, K1, P5, K1, P2, K4.
Row 23: P2, K2, P2, K1, P5, K1, P2, K2, P2.
Row 24: K2, CR, P2, K1, P5, K1, P2, CR, K2.
Row 25: P2, K2, P2, K1, P5, K1, P2, K2, P2.
Row 26: K4, P2, TL, P3, TR, P2, K4.
Row 27: P2, K2, P3, M1P, K1, P3tog. K1, M1P, P3, K2, P2.
Row 28: K2, CR, P4, slip 2 sts onto cable needle and hold in back of work, P1 on next st and move to rightmost empty peg, place 2 sts from cable needle onto empty pegs in order, P6, CR, K2.
Rows 29-32: Repeat Rows 1-4.
Cozy needs to be smaller than the mug, so that it fits around mug snugly and does not fall off. You may need to take project off loom with scrap yarn to measure accurately. Measure around your mug; then measure the length of your cozy and multiply it by 2. If it needs to be a little longer, repeat Rows 1-4 once more. If not, then continue with remaining rows.
Rows 33-59: Repeat Rows 5-31.
Bind off in all sts in pattern (K4, P11, K4 as you bind off instead of all knits), leaving a long tail for sewing.
Thread yarn needle with long tail. Matching sts, sew short ends together. Weave all remaining tails.
Marcia Newcomb
Sunday 13th of December 2020
Hi Kristen, I been looming hats/beanies for my daughter-in-laws 6th grade students now for two years. Sshe gives the hat/beanies to her students before they leave for their Christmas Holiday vacation. It has been as very rewarding for me as well as fun. Each hat is unique, no duplicates with the patterns and/or yarn combinations. . Your video here is challenging me to try new stitches and techniques for next year's hat/beanie project. I have a feeling I will be watching this video many times as well as referencing your book until I am comfortable with these more advanced stitches.
I try to stay current with your videos, but somehow this gem has eluded me until now. Thank you for sharing your talent and knowledge. Sincerely, Marcia Newcomb