
Inside: Instructions and tutorial video shows you how to meaurem, cut, sew and add a fabric lining to a knit or crochet bag. Includes optional inside pocket!
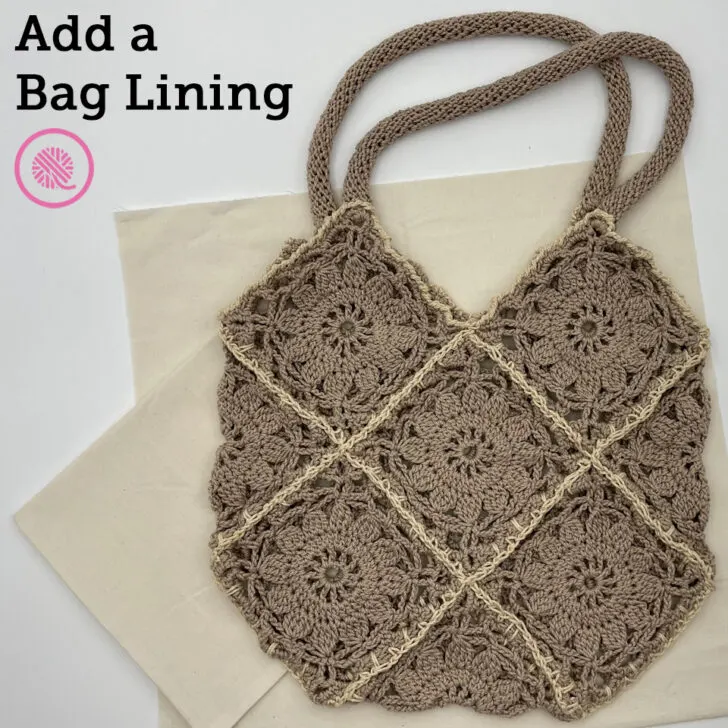
I love a beautiful crochet or knit bag!
But sometimes the beautiful lacy deisgn, like in my Sunflower Bag, isn’t practical for holding small items. The last thing you want is a pen or makeup brush poking out between the stitches.
But it’s easy to add a fabric lining to the bag with this tutorial. The pictures show a crochet bag, but the method works the same way for loom or needle knit projects.
These instructions teach you how to measure, cut out and sew a bag lining. I also included an optional interior pocket.
So what do you need to get started?
First, you need a finished bag. Make sure all yarn tails are already woven in because you won’t be able to weave them in on the inside of the bag once the lining is sewn in. The bag should be a style that lays flat since you are making a flat lining.
Next, you need fabric. While most fabrics will work, I recommend a lightweight cotton or cotton blend. This makes a strong lining without adding too much weight to your bag.

But how much fabric do you need? You will need 1 piece of fabric that when folded in half is at least 1″ larger than your bag on all sides. Do not include the handles in the measurement. If you’re using scrap fabric and have 2 separate pieces the correct size that will also work. You may also want some extra if you want to add a pocket on the inside.
Since you will see the lining color through any eyelets in your project choose a color that complements your yarn.

Last, gather your basic sewing supplies.
- spool of thread that matches your fabric/yarn colors
- scissors
- iron and ironing board (or towel to lay on a counter) for pressing the fabric
- straight pins to secure the lining to the bag before sewing
- sewing needle (like I used in the video) or a sewing machine
- straight edge ruler (optional)
How to Add A Lining INSTRUCTIONS
- Iron your fabric smooth and flat before measuring and cutting.
- Measure the width and height of your bag while it is laying flat.
- My sample is 16″ wide x 16″ tall from bottom to top.
- Figure out how big to cut your lining fabric. You need to cut your lining fabric bigger than your finished bag to allow for the seams.
- Add 2″ to the width of your bag. Add 2″ to the height of your bag then double that number. (16 + 2 = 18 x 2 = 36″) I need my lining fabric to be at least 18″ x 36″, but if it’s larger than that that’s okay.
- If using 2 separate fabric pieces, do not double the height. For my sample, I’d use two 18″ x 18″ pieces and sew them together along the bottom edge to make one large lining piece.
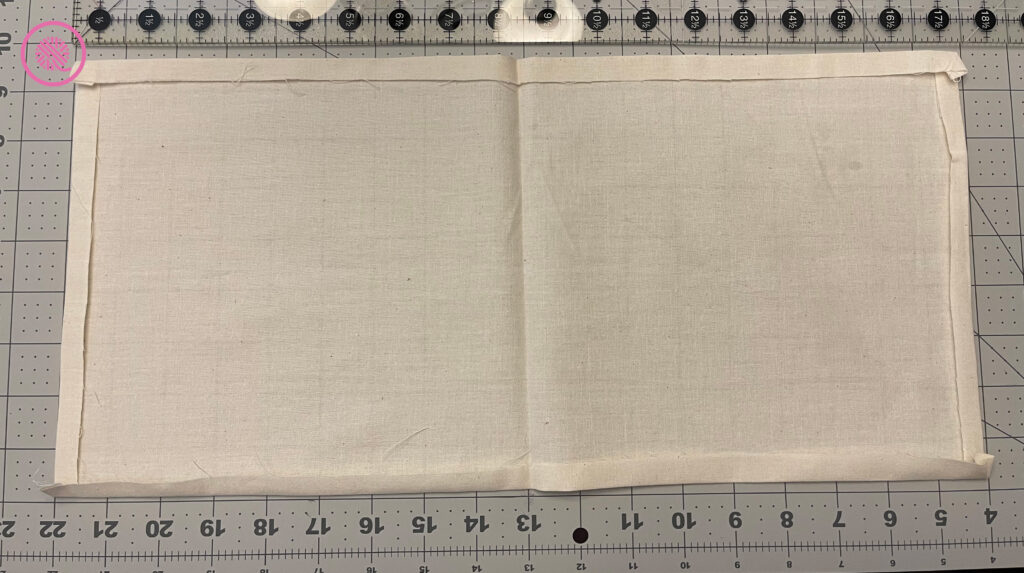
- Cut 1 rectangle out of your fabric (at least the size you calculated in the last step) and fold it in half so the fold will be along the bottom edge of your bag. Press fabric along fold line.
- Lay flat bag on top of fabric with fold at the bottom of the bag.
- Using a pencil or chalk, mark the fabric about ½” away from the edge of the bag. I recommend using a straight edge ruler when marking if you have straight edges on your bag. If your bag is curved mark your fabric following the curve of the bag.
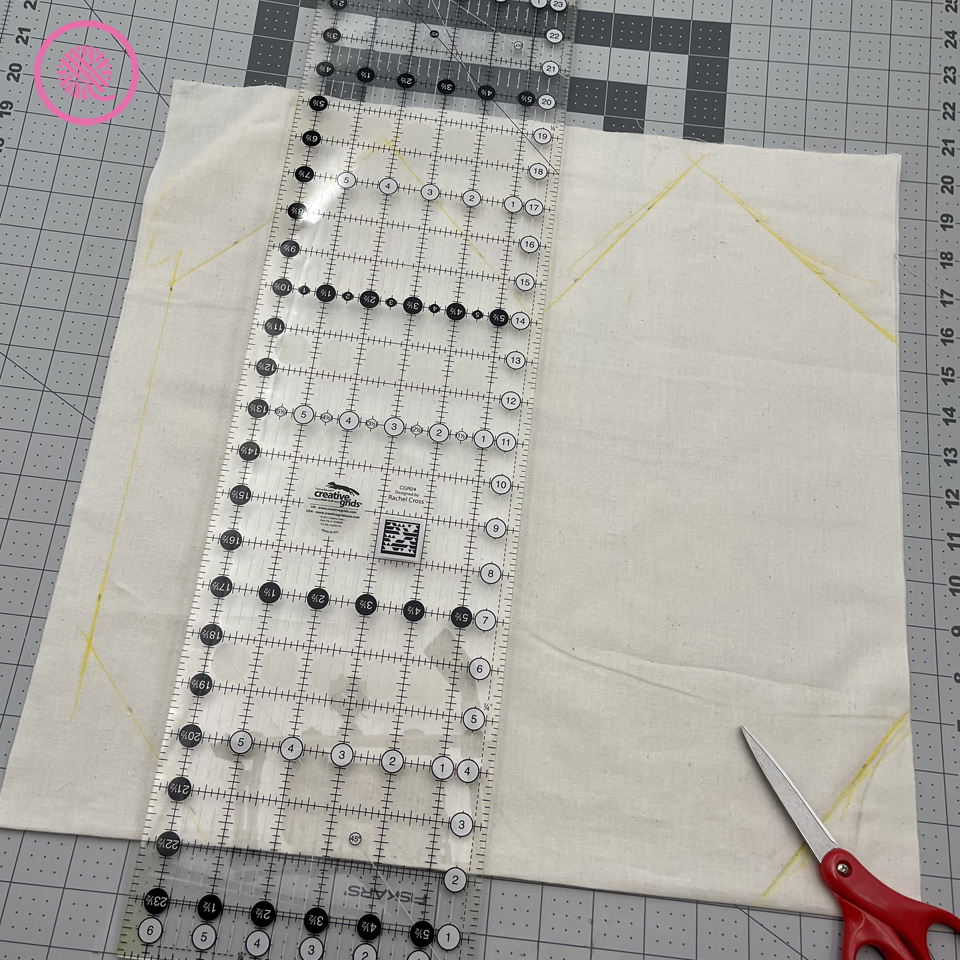
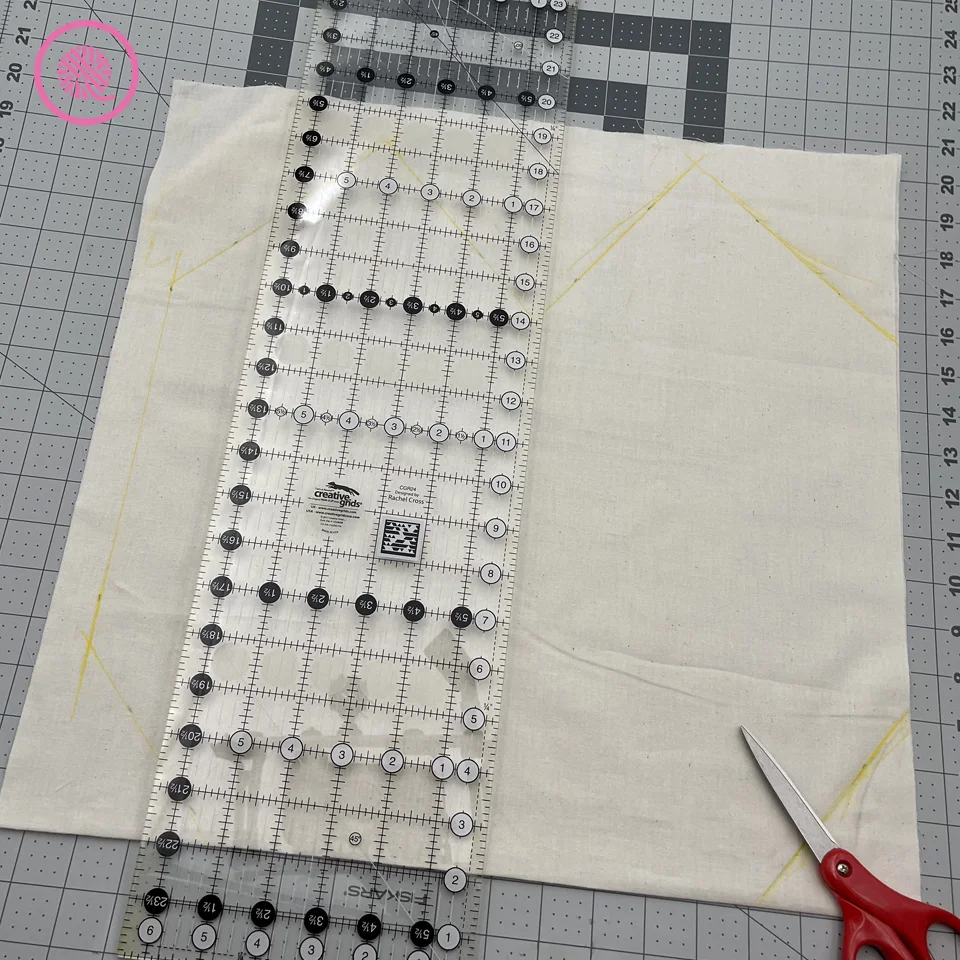
- Cut out bag lining along marked lines making sure to cut through both layers of fabric.
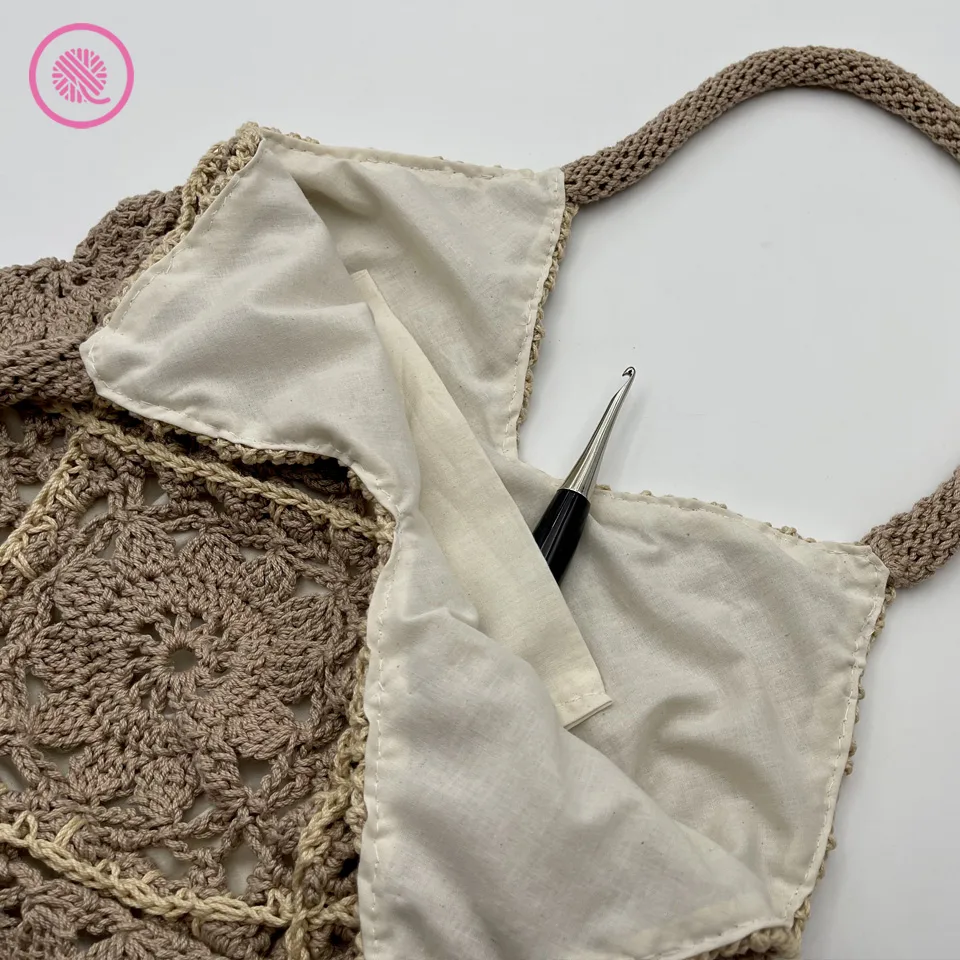
- [Optional Pocket] Using the leftover fabric cut out a single rectangle that will fit inside your lining. Fold over ½” along each edge and press with iron. Fold pocket in half with folded edges on the inside to make a square and press fold flat.
- [Optional Pocket cont.] Unfold bag lining piece and lay pocket on inside of bag with pocket fold toward the top of the bag. Make sure the pocket is at least 1” below the top edge of the bag lining. Pin pocket to lining with straight pins. Using needle and thread or machine sew pocket to lining along side and bottom edges only leaving the top open.
- Fold bag lining along bottom edge with pocket on the inside and align top edges. Pin side and bottom angled edges of bag lining through both layers. Sew bag lining edges.

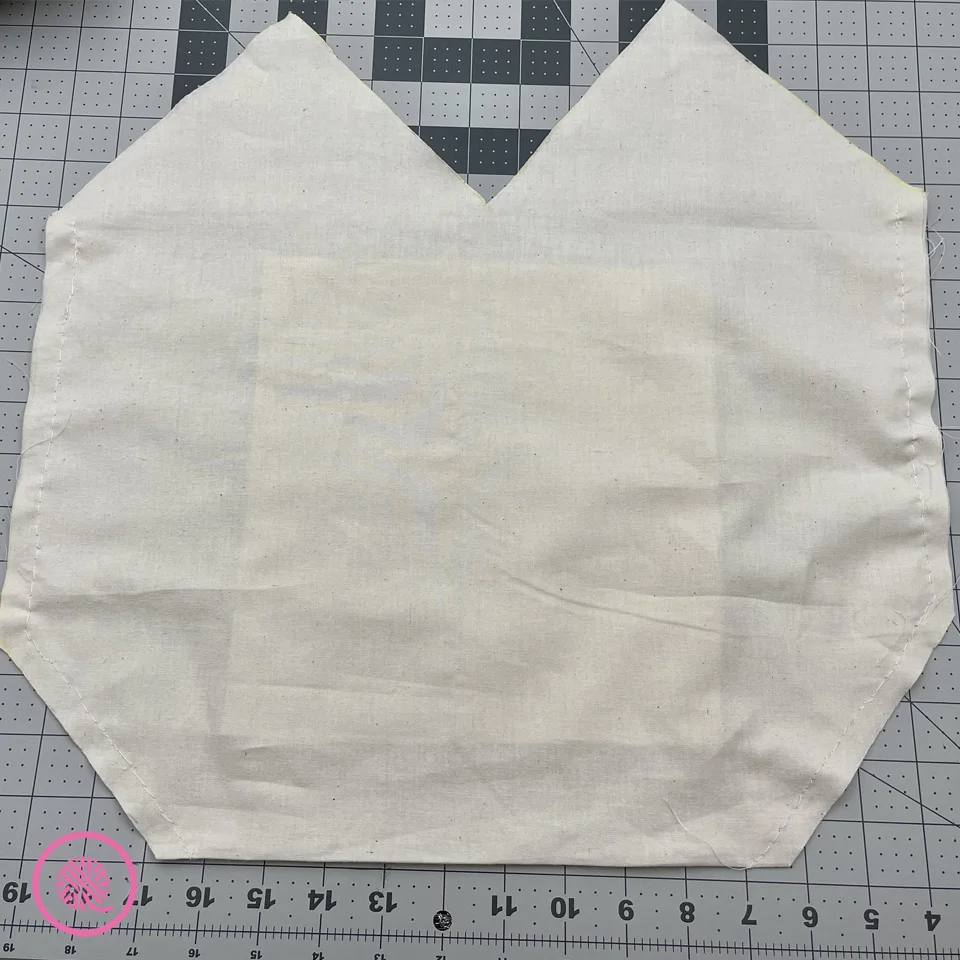
and side seams sewn.
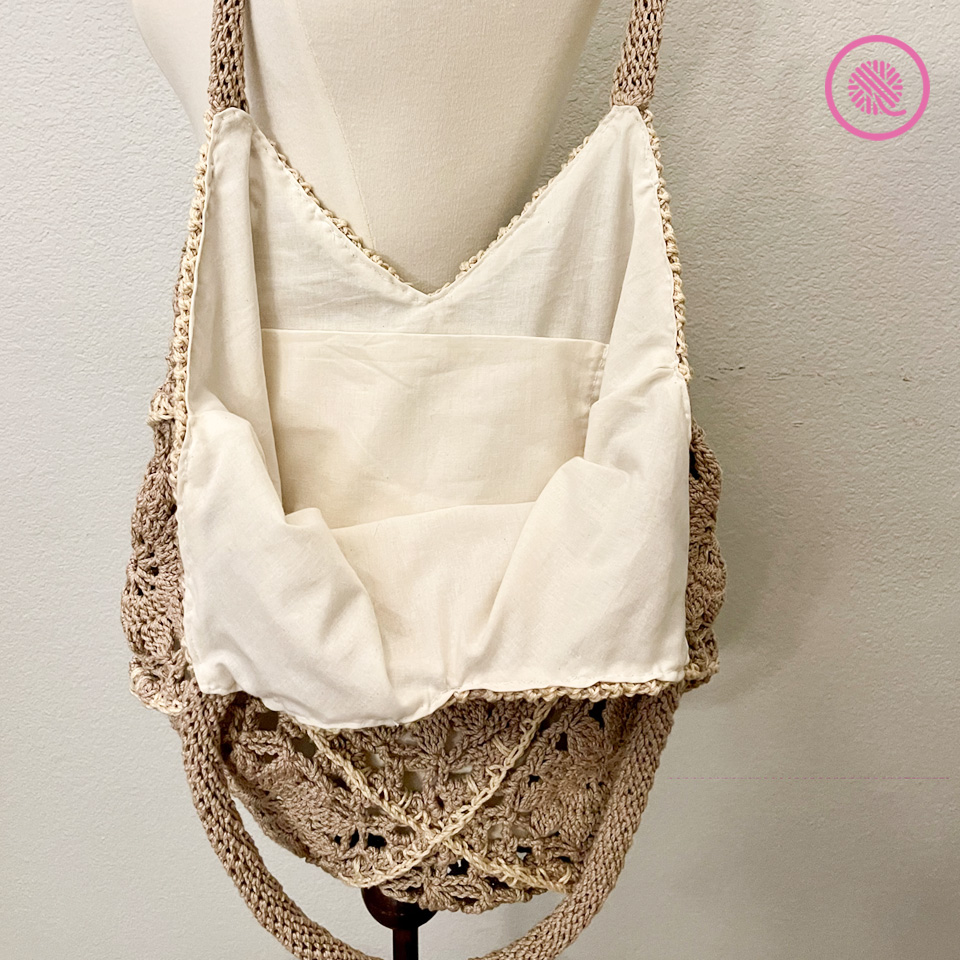
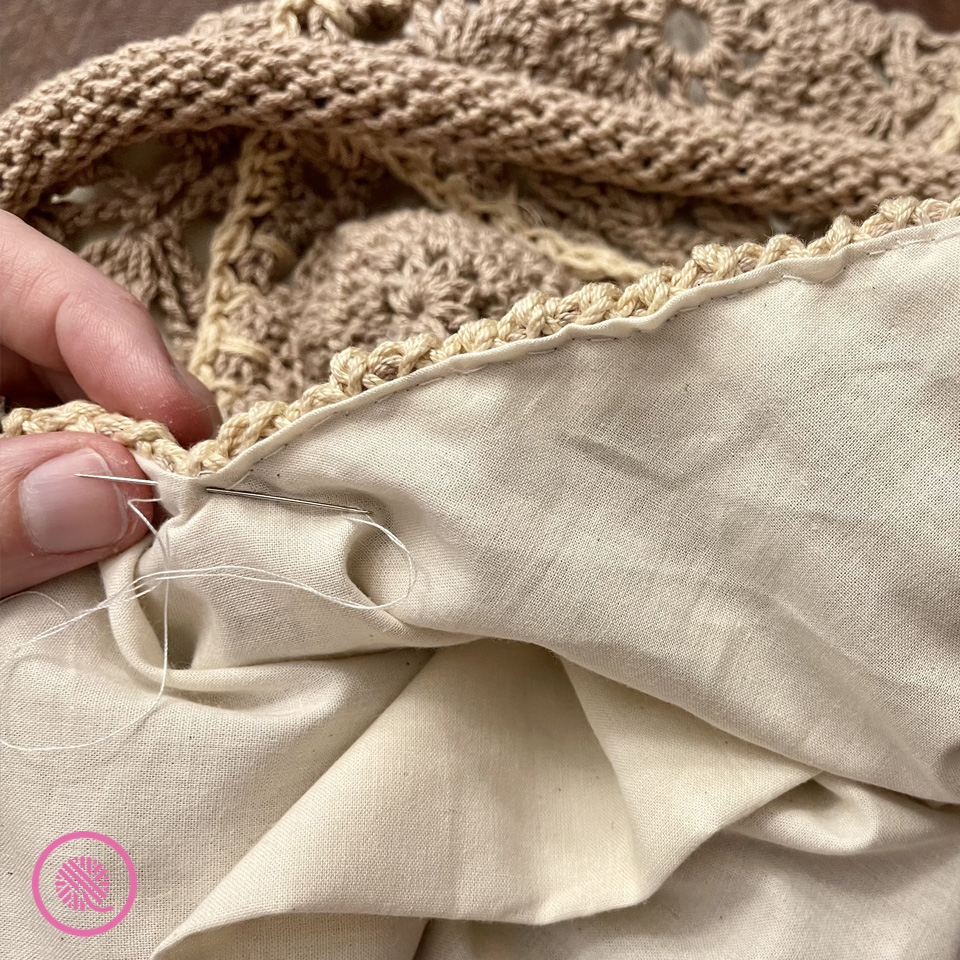
- Place bag lining inside bag lining up top edges and side seams. Starting at a side seam, fold top edge of lining over about ½” and pin to bag with folded edge between the lining and the bag.
- Continue all the way around the top edge folding over and pinning.
- My bag did not have a flat, smooth edge around the top of the bag. The handles attached at points so had to adjust how I sewed the lining. At the top points where handles were, I snipped the point off the lining to get a smooth edge when I folded the lining over. At the bottom “valley” between the points I snipped a straight line ½” deep to allow me to fold over the edge.

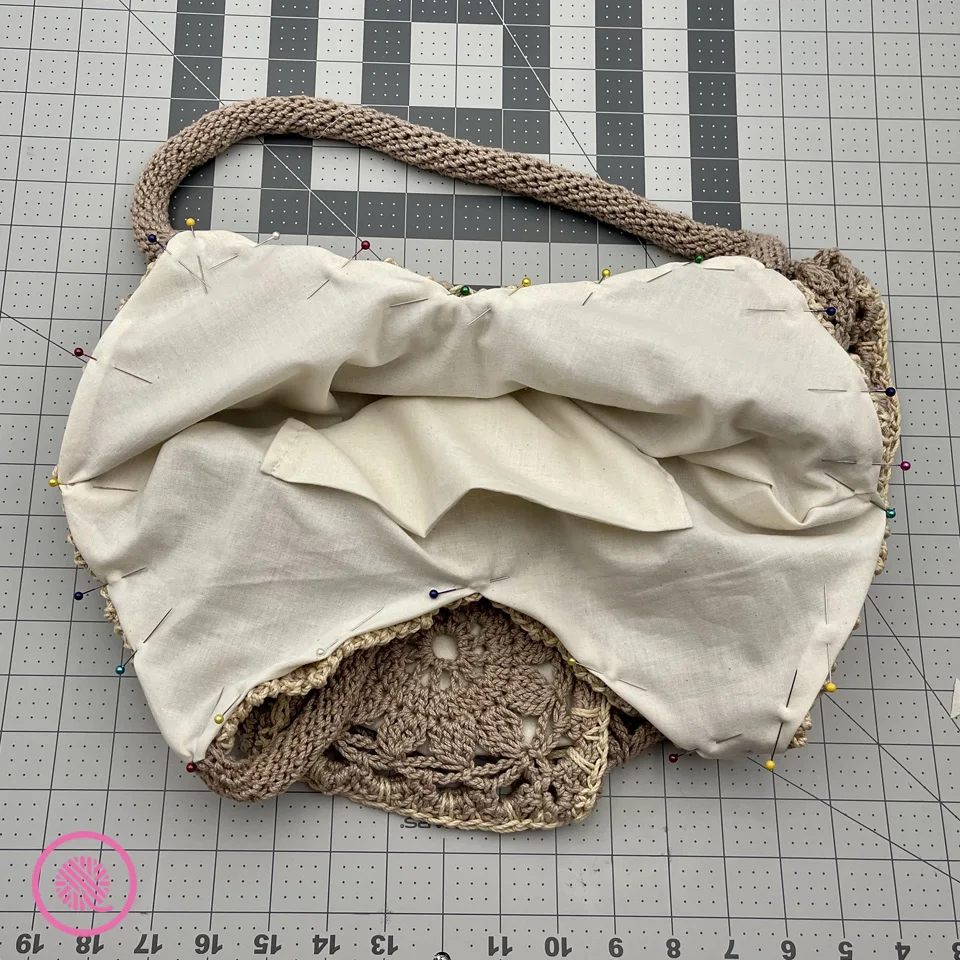
- Sew lining to bag just under the edging along top of bag.

How to Add a Lining to a Bag Video Tutorial
Select videos are available to GoodKnit Kisses YouTube members only. To get exclusive access to GKK VIP-only content, free PDF patterns, weekly Zoom meetup and more, sign in to YouTube and join as a VIP Member today! Find out more about GKK Membership HERE!