By Kristen Mangus
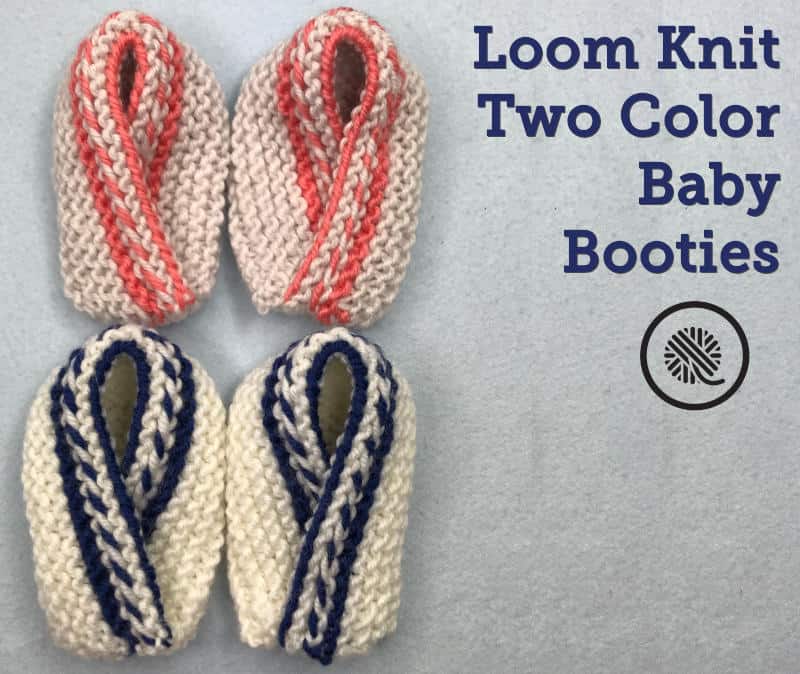
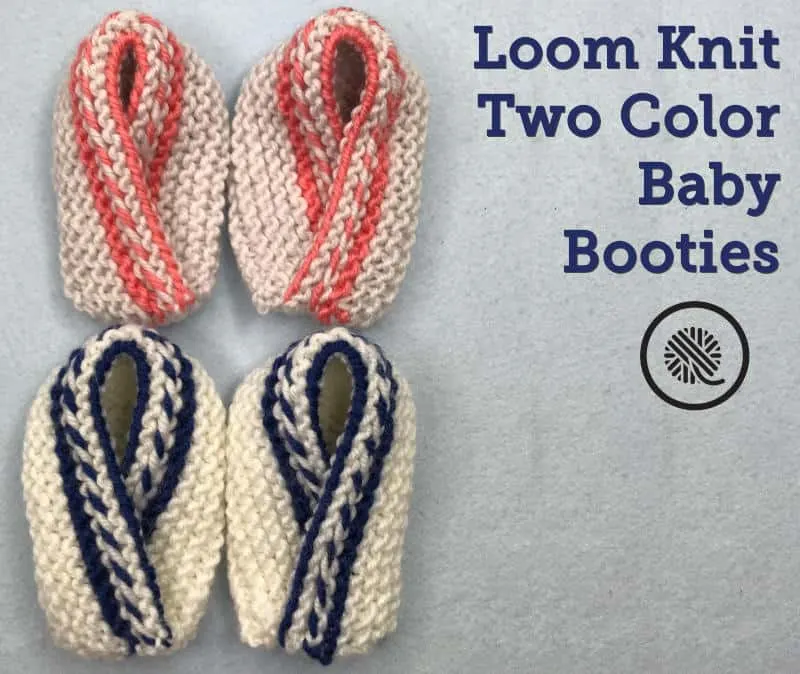
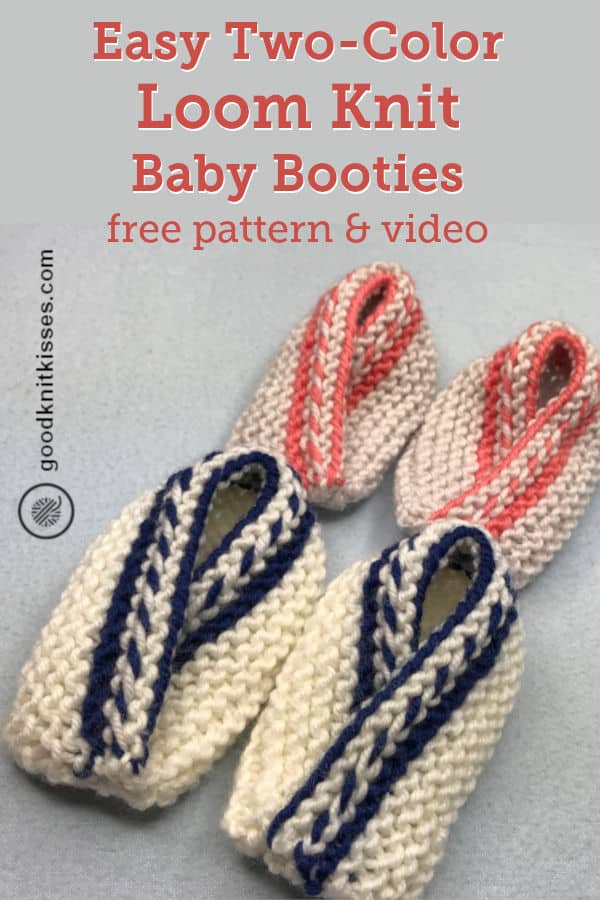
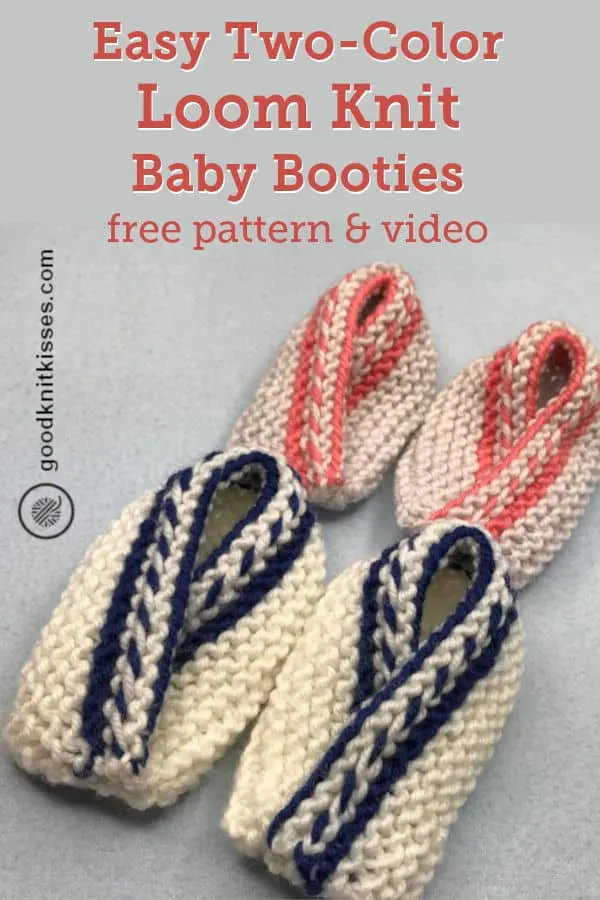
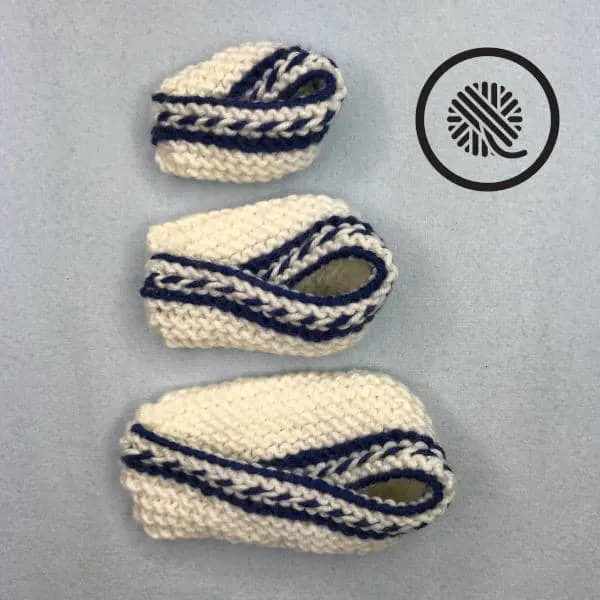
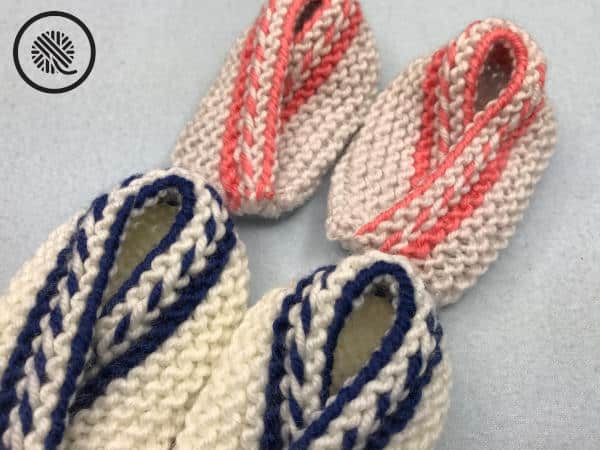
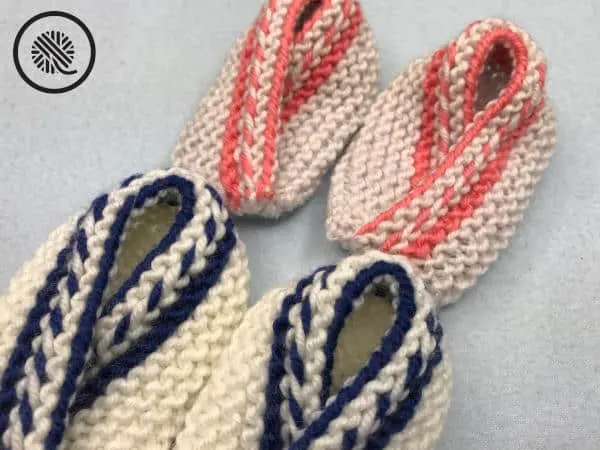
Fold over baby booties with a twist! These simple baby booties are a classic foldover design with an added pop of color and texture. The Half Latvian Braid gives them a decorative rope trim that stands out against the garter stitch background.
Hey, needle knitters! You can keep your baby’s toes cozy too because I’ve got a needle knit version of the pattern just for you.
Two-Color Loom Knit Baby Booties Pattern
An ad-free downloadable PDF of this pattern is available for purchase in my GoodKnit Kisses online store, Etsy or Ravelry at the links below:


MATERIALS
Materials list may contain affiliate links to products I use.
Contrast A Red Heart Chic Sheep (100g / 3.5oz, 170 m / 186 yards) Lace [white]; 35 yards
Contrast B Red Heart Chic Sheep (100g / 3.5oz, 170 m / 186 yards) VIP [blue]; 8-10 yards
3/8” Small gauge (SG) loom with at least 56 pegs. KB Looms Baby-Knit Looms “Baby Round Loom Set” used in sample.
Tapestry needle
ABBREVIATIONS
K = Uwrap knit
K2tog = knit 2 together
P = Purl
Rep = Repeat
St(s)= Stitch(es)
GAUGE
4.5 sts x 11 rows in 1” (2.5 cm) in garter stitch
SKILL LEVEL
Easy+
MEASUREMENTS
0-3 month(s) – 1.75” x 2.25” long (4.4 x 5.7 cm)
3-6 months – 2” x 3.25” long (5 x 8.3 cm)
6-12 months – 2.125” x 4.25” long (5.4 x 10.8 cm)

NOTES
Two Color Long Tail Cast On
Leaving a 6” tail in contrast B and an 18” tail in contrast A, tie a slip knot with both strands held together. Place slip knot on peg before Peg 1 (This will not be included as part of your cast on and will be removed later.)
*With B Ewrap next peg, with A Uwrap and knit over same peg. Repeat from * until all stitches are cast on.
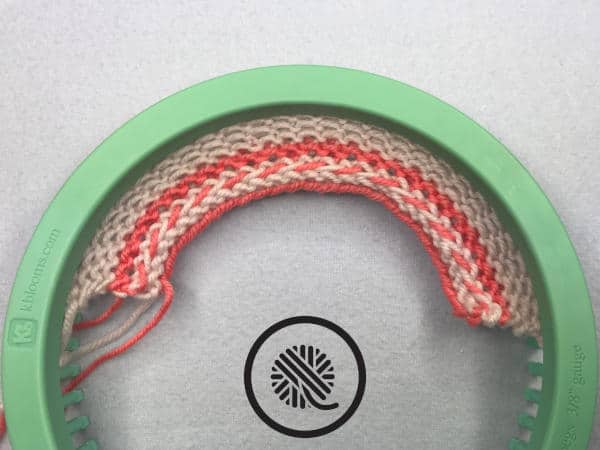
Half Latvian Braid: This two-color technique is similar to Fair Isle knitting and creates a twisted rope of color on the right side of your fabric. It involves alternating two colors while twisting the strands between each stitch. It’s a simple technique that has a striking look. You need to be sure to always pick up the new color from under the color you just used. This will twist your two working strands as you purl. See my note below about using a butterfly bobbin to make this easier to manage.
To work this on the loom do as follows:
- With Color A P1 but before placing stitch back on peg bring working yarn B behind the peg. Place the stitch on the peg “trapping” yarn B between the stitch and the peg.
- Pick up working yarn B from under working yarn A.
- With B P1 but before placing stitch on peg bring working yarn A behind the peg. Place the stitch on the peg trapping yarn A between the stitch and the peg.
- Pick up working yarn A from under working yarn B.
- Repeat steps 1-4 to continue the braid across the row.
Using a Butterfly Bobbin: Make a butterfly bobbin with Color B to make working the Half Latvian Braid easier since your yarn will get twisted. You will need about 8-10 yards. See my video for making the butterfly bobbin here: https://youtu.be/ZfENMppCYiA
INSTRUCTIONS
Cast on 28 (34, 44) stitches after your slip knot. Remove slip knot.
Row 1: With A, P to last st.
Row 2: K to end.
Half Latvian Braid (see Notes above)
Row 3: *With A P1 trapping working yarn B behind the peg. With B P1 trapping working yarn A behind the peg. Rep from * across row picking up new yarn from under last color used.
Accent color rows
Row 4: With B, K to end.
Row 5: P to end. Cut B leave tail to weave.
Switch back to Color A
Row 6: With A, K to end.
Row 7: P to end.
Rep Rows 6-7 3 (4, 5) more times.
Bottom edge of bootie
Row 8: Bind off 10 (13, 17). K18 (21, 27) sts.
Row 9: Bind off 10 (13, 17). P to end. 8 (8, 10) sts remain.
Bootie Sole
Rep 6-7 10 (16, 22) times.
Toe decrease
Row 10: K1. K2tog. K2 (2, 4). K2tog. K1.
Row 11: P6 (6, 8).
Bind off. Weave in all B tails before seaming.
Seaming Bootie:
Follow diagram to sew seams. Seam on the outside of the bootie. Seam as follows:
- Place bootie piece with right side of fabric face down on your work surface.
- Fold one side over the top of the Footbed/Sole.
- Stitch Side C to Side D (blue lines in diagram) first.
- Align Toe A to Toe B (red lines in diagram) and stitch together.
- Repeat Steps 2-4 with other side of bootie. (See NOTE below.)
NOTE: You will need to overlap each bootie differently to get a right and left bootie.
Right Bootie: To make the right bootie seam the Left Side FIRST then overlap the Right Side and seam it.
Left Bootie: To make the left bootie seam the Right Side FIRST then overlap the Left Side and seam it.
Baby Bootie Assembly Diagram
(Right side of fabric face down)

Denise
Saturday 18th of May 2019
Can this be converted to adult size ?
Denise
Saturday 18th of May 2019
Can this be converted to adult size ?