
by Kristen Mangus
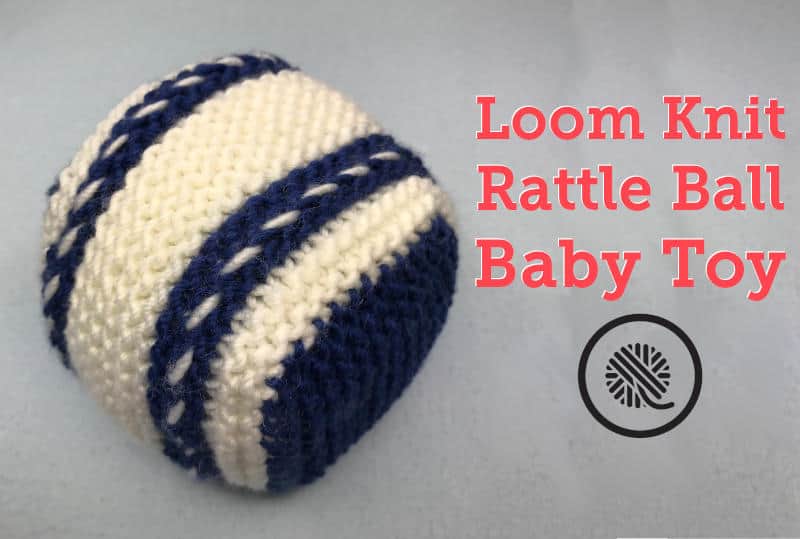
There are few things in life more joyful than a baby’s laugh. Those unhindered, high-pitched squeals and giggles can brighten your day like nothing else. I want to help you share that joy with my new needle knitting pattern: the easy knit Rattle Ball Baby Toy.
I have the honor of being part of a wonderful group of crafters through Red Heart Yarns called the Joy Creators. We’re all independent designers and instructors, but we all share a love of knitting and crochet and, of course, YARN.
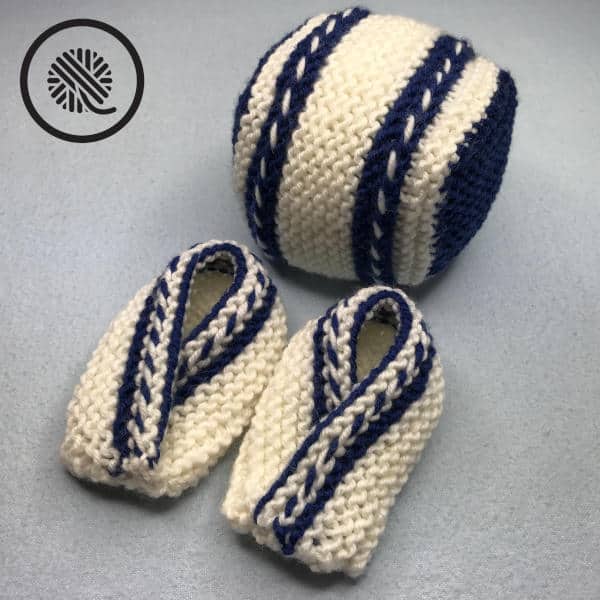
One of my fellow Red Heart Joy Creators, Nadia Fuad of YARNutopia, is expecting a baby so several of us got together to design knit and crochet baby gifts for her shower. (She was sooo surprised! You can see all the gifts as she opened them HERE on the YARNutopia blog!)
I knew I wanted to make some colorful baby booties, but I also knew I wanted to include something else. I played and played and played around with my yarn until it dawned on me that playing is fun and a toy would be the perfect thing to go with the booties.

Needle knitters, grab your free pattern and tutorial video for these projects here:
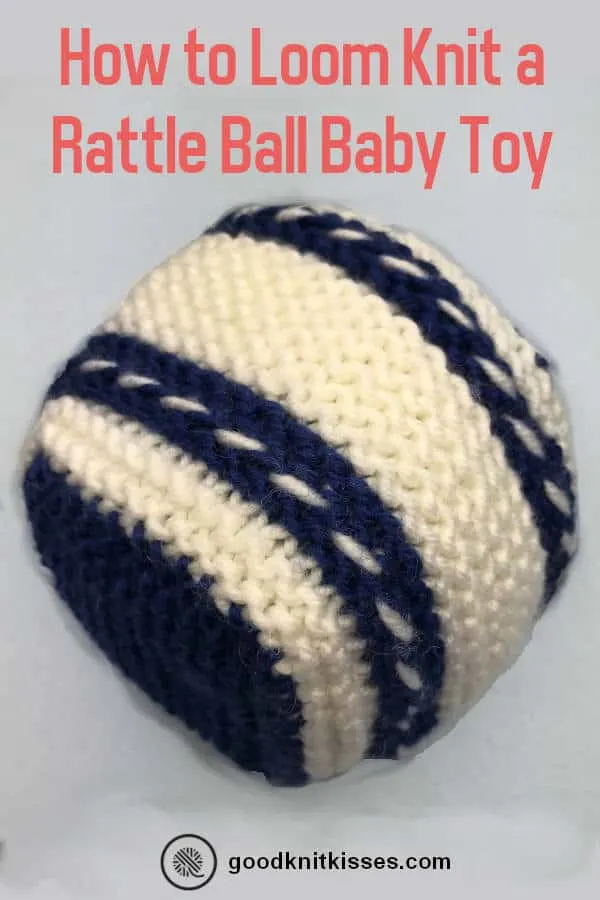
The Rattle Ball Baby Toy provides hours of roly-poly, jingly fun for your baby. The soft, rounded cube has a solid colored top and bottom with a two-toned middle including an eye-catching rope design.
The ball is loom knit as a flat panel then filled and seamed. I included a jingle bell for sound, but you can use crinkle paper or even leave out the sound component. (I know some moms like quiet toys for baby!)
Enjoy loom knitting this fun rattle ball and the giggles you’ll hear as your baby plays with it.

Easy Loom Knit Rattle Ball Pattern
A downloadable PDF of this pattern is available on Ravelry.com.
MATERIALS
Materials list may contain affiliate links to products I use.
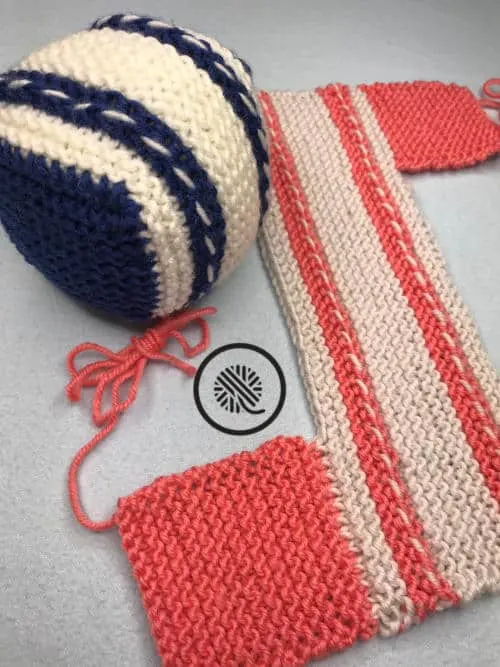
Contrast A Red Heart Chic Sheep (100g / 3.5oz, 170 m / 186 yards) Lace [white]; 35 yards
Contrast B Red Heart Chic Sheep (100g / 3.5oz, 170 m / 186 yards) VIP [blue]; 35 yards
3/8” Small gauge (SG) loom with at least 46 pegs. KB Looms Baby-Knit Looms “Baby Round Loom Set” 56 peg loom used in sample.
1” Jingle bell or other item to add sound like crinkle paper (optional)
Fiber Fill or other filling of your choice
Tapestry needle
ABBREVIATIONS
K = Uwrap knit
P = Purl
Rep = Repeat
St(s) = Stitch(es)
GAUGE
4.5 sts x 11 rows in 1” in garter stitch
SKILL LEVEL
Easy+
MEASUREMENTS
Approx. 3” cube
NOTES
Beginning Cast On: You may use the cast on of your choice. I recommend True Cable Cast On, Long Tail Cast On or Modified Ewrap* Cast On (Beginning at Peg 1 Ewrap all pegs then flat knit each peg back to Peg 1). For right-handed loom knitters you will want your working yarn to be on the LEFT after you cast on. Left-handed loom knitters will want the working yarn on the RIGHT.
Mid-row Cast On: This occurs in Row 3 of the pattern. You will cast on additional stitches at the end of row. I recommend the Double Ewrap Cast On* or True Cable Cast On.
*Shown in tutorial video.
Half Latvian Braid: This two-color technique is similar to Fair Isle knitting and creates a twisted rope of color on the right side of your fabric. It involves alternating two colors while twisting the strands between each stitch. It’s a simple technique that has a striking look. You need to be sure to always pick up the new color from under the color you just used. This will twist your two working strands as you purl. See my note below about using a butterfly bobbin to make this easier to manage.
To work this on the loom do as follows:
- With Color A P1 but before placing stitch back on peg bring working yarn B behind the peg. Place the stitch on the peg “trapping” yarn B between the stitch and the peg.
- Pick up working yarn B from under working yarn A.
- With B P1 but before placing stitch on peg bring working yarn A behind the peg. Place the stitch on the peg trapping yarn A between the stitch and the peg.
- Pick up working yarn A from under working yarn B.
- Repeat steps 1-4 to continue the braid across the row.
Using a Butterfly Bobbin: Make a butterfly bobbin with Color B to make working the Half Latvian Braid easier since your yarn will get twisted. You will need about 8-10 yards. See my video for making the butterfly bobbin here: https://youtu.be/ZfENMppCYiA

INSTRUCTIONS
Bottom Square:
Leaving a long tail for seaming, with B cast on 13 sts.
Row 1: K all.
Row 2: P all.
Rep. Rows 1 and 2 14 more times Cut B.
Main Rectangle:
Row 3: With A K to end. Cast on 33 sts. (46 sts total)
Row 4: P all.
Row 5: K all.
Rep Rows 4 and 5 once more.
Contrast Color Band:
Row 6: With B K all.
Row 7: P all.
Half Latvian Braid (see Notes above):
Row 8: *With A P1, With B P1 rep from * across row carefully pulling new yarn from under last color used.
Row 9: With B K all.
Row 10: P all. Cut B.
Row 11: With A K all.
Row 12: P all.
Rep Rows 11-12 6 more times. Rep Row 11 once more.
Rep. Rows 6-10 once more.
With A rep Rows 11-12 twice.
Row 13: Bind off 33 sts. K to end of row. (13 sts rem.)
Top Square:
Row 14: With B K all.
Row 15: K all.
Row 16: P all.
Rep Rows 15-16 13 times.
Bind off leaving a long tail for seaming. Weave in smaller tails. Wash & block.
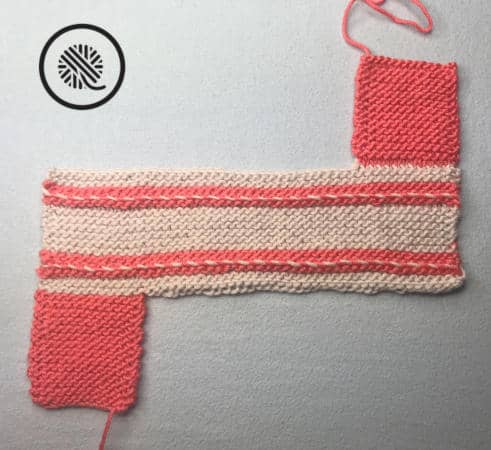

Assembly:
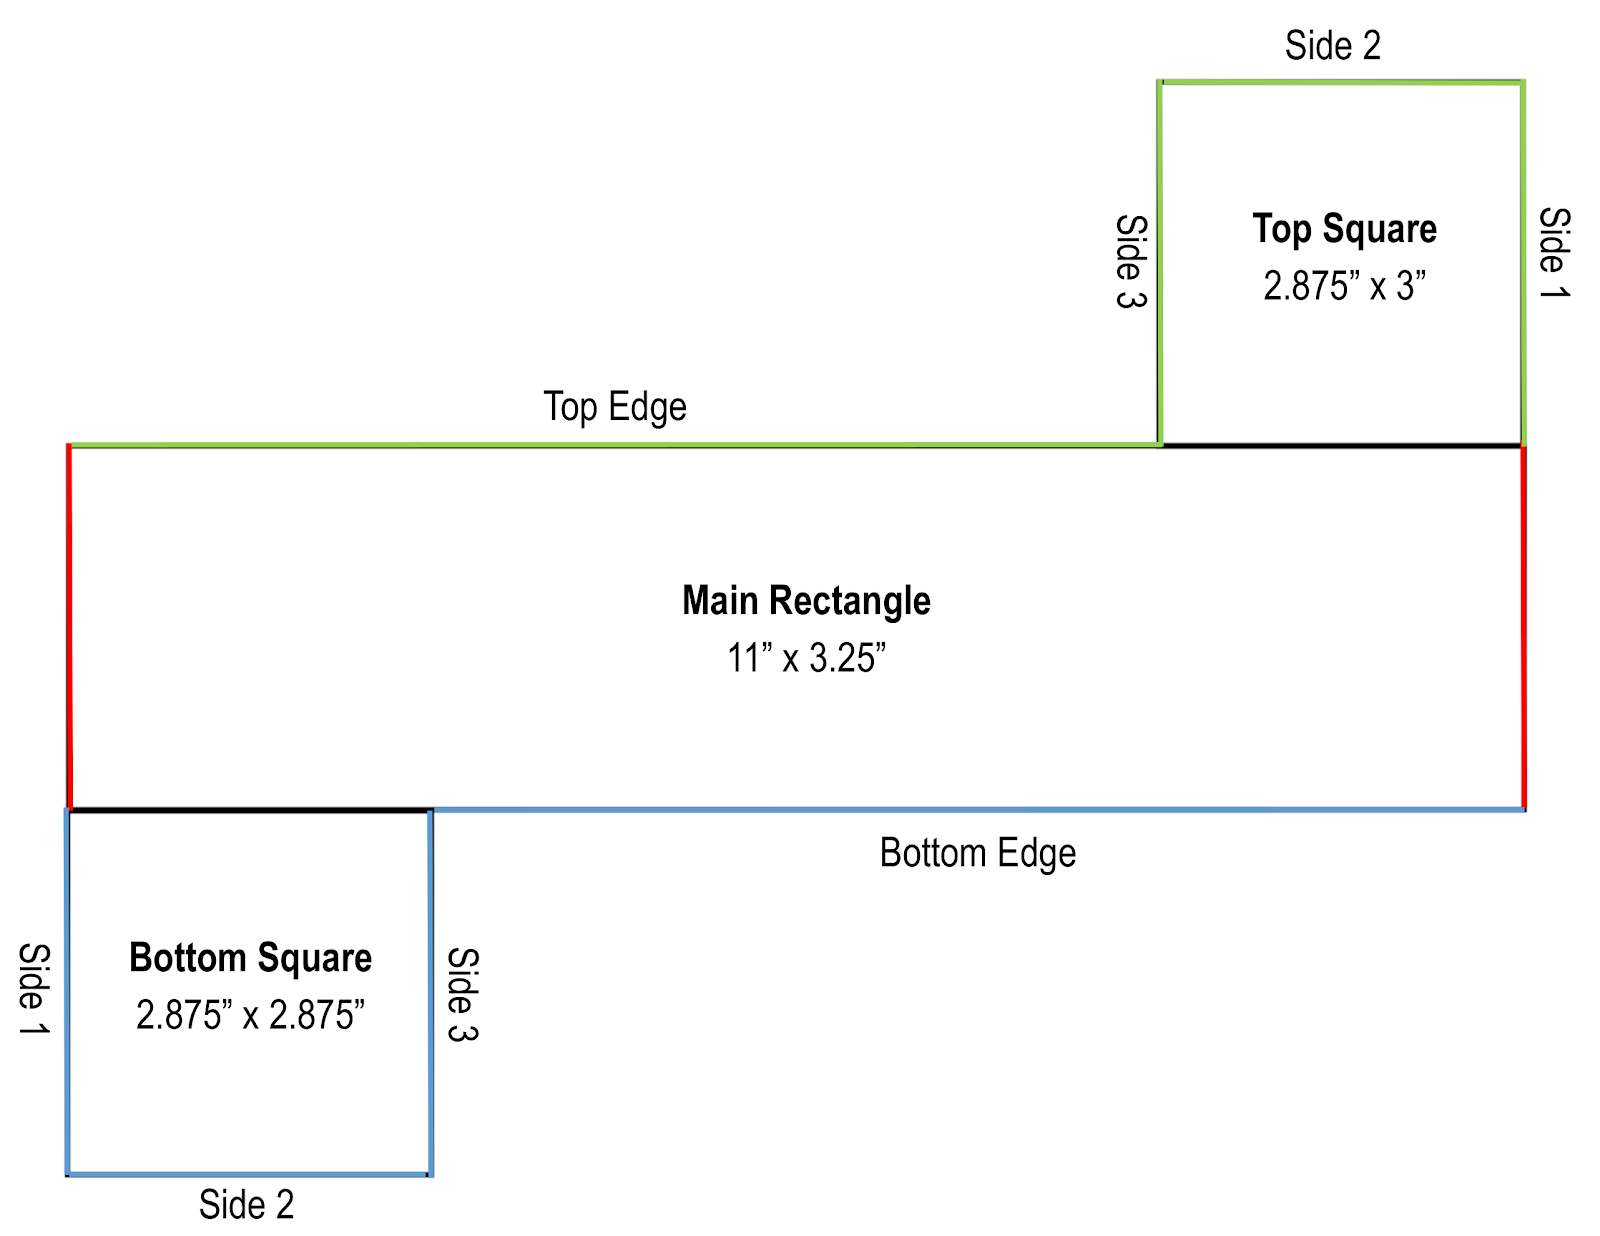
Shape Box:
Using tapestry needle and long tail from Bottom Square, seam the remaining 3 edges of the square to long bottom edge of main rectangle using whip stitch. This will form a box shape. See diagram.
Close Side:
Seam main rectangle together along edges with Bickford or invisible seam. See diagram. Weave in tail from bottom square now.
Fill Box:
Stuff the inside of the box with polyfill to desired fullness placing jingle bell or other rattle as desired in the center. Make sure the polyfill surrounds the bell/rattle evenly on all sides. In sample a 1” jingle bell was used.
Sew Top Square:
Using a tapestry needle and yarn, whip stitch around the remaining 3 sides of the Top Square to close.
To weave in tail pass the needle through the middle of the toy and stuffing to the other side. Then pass through again at different spots until tail is gone.
Sharon Borgesano
Thursday 27th of February 2020
Kristen, just have to tell you that you are very creative and your video tutorials are amazing and easy to follow ???? Sharon Weckerle Borgesano Williams. That is my facebook name. Sharon Borgesano is my legal name! I follow GoodKnit Kisses! ❤️U