
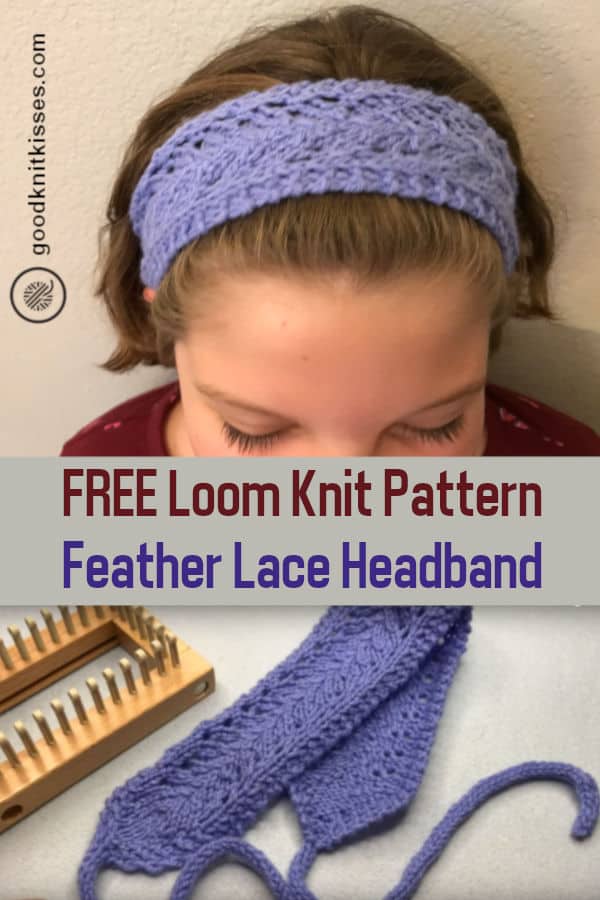
Inside: Loom knit easy lace headband pattern with free tutorial video
I’ve got girls. Girls have hair. Lots and lots of shiny, thick hair.
If I had a nickel for every time I said, “Get your hair out of your face. I want to see that smile!” …
What’s a mom to do?
Sometimes in the midst of the shuttling kids back and forth to practices, answering emails and remembering to put on lipstick before I start filming I get a brainstorm.
It came to me while I was working on the sample for the Lacy Baby Blanket video. I’m constantly measuring and double checking my numbers to make sure the pattern will be accurate. I jotted down 2.5″ wide.
2.5″ is the exact width of one repeat of the Feather Lace Stitch. Typically, I make my pattern notes and move on, but then it hit me.
[cue the lightbulb above my head]
Use one repeat of the lace and turn it into a headband.

Necessity really is the mother of invention so I designed the Feather Lace Headband. (Maybe we should change it to invention comes from the necessity of mothers.)
So how easy is it?
I’m not gonna lie. It’s not as easy as an all ewrap hat with no brim. But nothing else is that simple.
The loom knit easy lace headband pattern is a technique powerhouse. If you want to build your loom knitting skills grab your your loom and yarn get to work on this pattern. This small, quick project teaches you:
- increases (make 1 right, make 1 left and yarn over)
- decreases (knit 2 together and slip, slip knit)
- 3-peg icord
- Ewrap, uwrap and flat knit stitches
I know it seems like a lot. And it is. However, I demonstrate each technique in the tutorial video below so you can learn and master each one.
1 small headband pattern = 1 power-packed loom knitting class
Ready to get started?

Feather Lace Headband Pattern
By Kristen Mangus
An ad-free downloadable PDF of this pattern is available for purchase in my GoodKnit Kisses online store, Etsy or Ravelry at the links below:


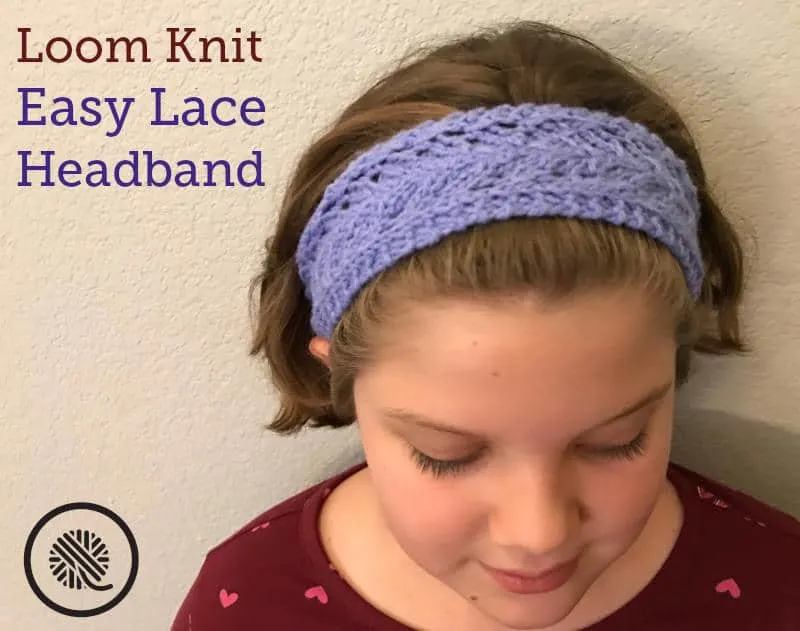
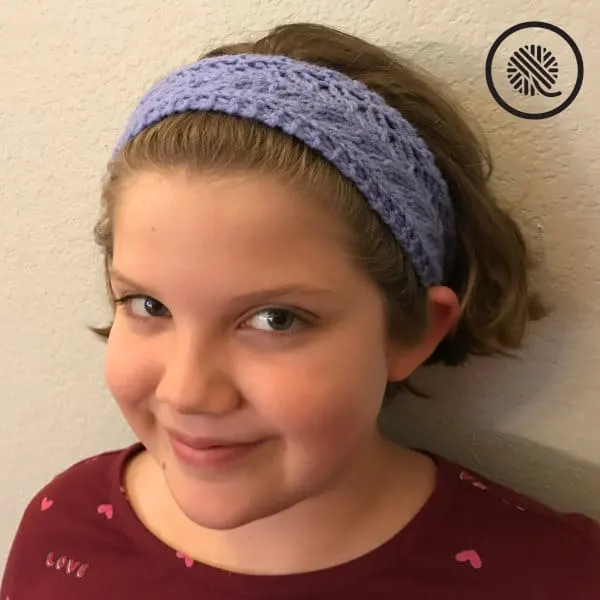
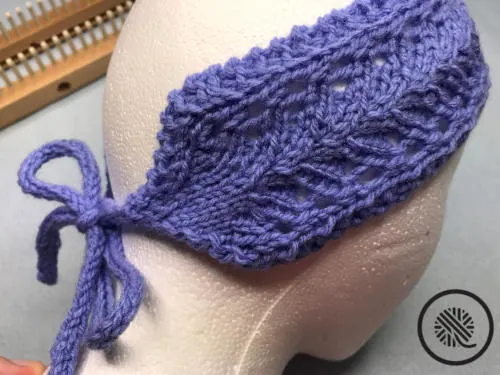
The Feather Lace Headband is stylish way to keep the fly aways at bay. This easy loom knit pattern makes a beautiful tie-on headband. The simple 4-row lace repeat knits up quickly so you can make one to match all your favorite summer styles.
MATERIALS
Yarn: Bernat Baby Sport (12.3 oz/350 g; 1256 yds/1148 m) Color: Lilac 1 ball
Loom: ⅜” gauge loom with at least 16 pegs.
KB All in One used in sample. Alternately use KB 28” loom with peg extenders.
Stitch marker
Tapestry needle
ABBREVIATIONS
Approx. = Approximately
EK = Ewrap knit
FK = Flat knit
UK = Uwrap knit
P = Purl
M1R = Make 1 stitch (right-leaning)
M1L = Make 1 stitch (left-leaning)
K2tog = Knit 2 together
Ssk = Slip slip knit
ep = Repeat
St(s) = Stitch(es)
YO = Ewrap Yarn over
GAUGE
10 sts x 4 rows in lace stitch pattern = 2.5” x 0.5”
SKILL LEVEL
Easy
MEASUREMENTS
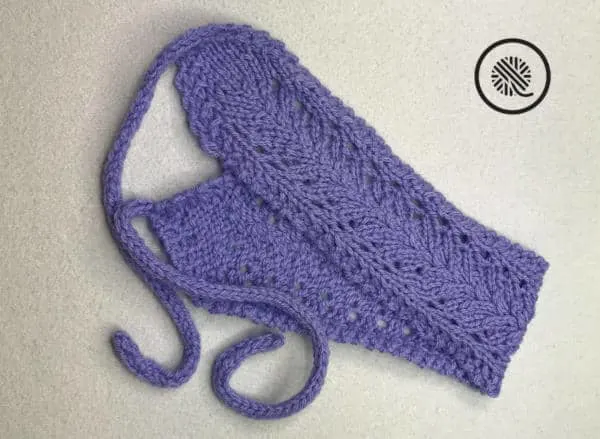
Approx. 2.75” x 38” (16” of Feather Lace Headband plus i-cords)
NOTES
This pattern uses both Ewrap and Uwrap knit stitches. The uwrap stitches need to be loose. If it’s too tight use the true knit stitch to replace the uwrap knit stitches.
Use the cast on of your choice.
This pattern uses the M1R and M1L increases. This makes a new stitch that leans either right or left.
- M1R – To do the Make 1 Right pick up the ladder between the stitches from the previous row and twist it to the LEFT (counter-clockwise).
- M1L – To work a make 1 Left pick up the ladder between the stitches from the previous row and twist it to the RIGHT (clockwise).
To make eyelets more open do the following on the even rows:
- Lift yarn over off peg.
- Untwist the yarn over. (It will be twisted from working an Ewrap yarn over.)
- Place stitch back on peg.
- Knit the stitch.
INSTRUCTIONS
Cast on 3 sts.
I-cord:
Row 1: FK all. Bring working yarn behind all pegs back to beginning of row.
Rep Row 1, always working from the starting peg not back and forth, until i-cord measures approx.11”.
Increases:
Row 2: EK all. (This will take you back to the beginning of the row).
Row 3: EK1, M1L, UK1, M1R, EK1. (5 sts).
Row 4: P2, UK1, P2.
Row 5: EK2, M1L, UK1, M1R, EK2. (7 sts).
Row 6: P2, UK.3, P2
Row 7: EK2 M1L, UK to last 2 sts, M1R, EK2. (9 sts).
Row 8: P2, UK to last 2 sts, P2.
Rep. Rows 7 and 8 3 more times. (15 sts).
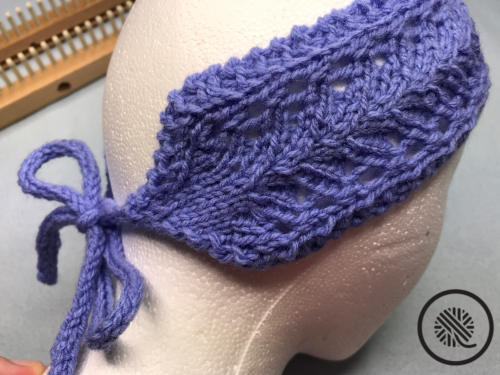
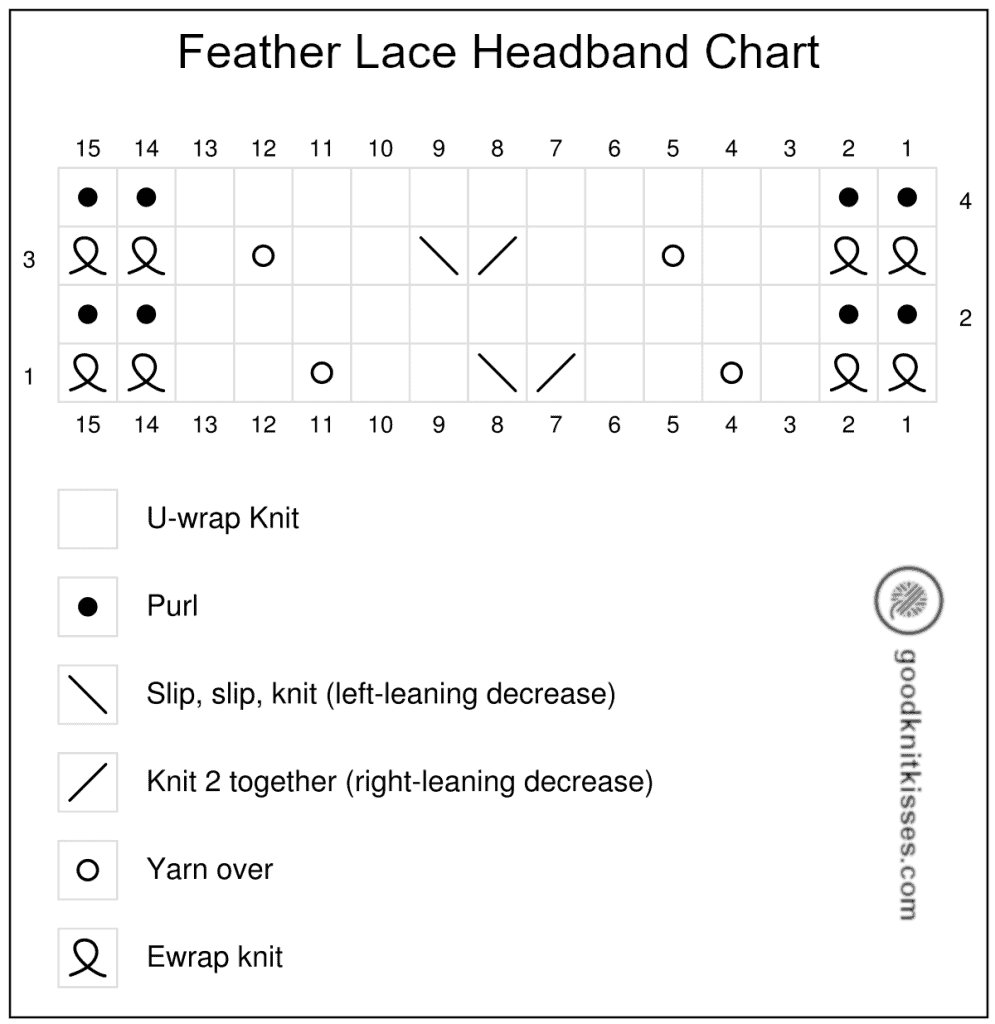
Feather Lace Stitch Pattern (see chart below):
Row 9: EK2. UK2, YO, UK2, Ssk, K2tog, UK2, YO, UK1. EK2.
Row 10: P2. UK to last 2 sts. P2.
Row 11: EK2. UK1, YO, UK2, Ssk, K2tog, UK2, YO, UK2. EK2.
Row 12: P2. UK to last 2 sts. P2.
Rep Rows 9-12 until work from beginning of headband increase measures approx 14.5” (or 25.5” from icord) ending on Row 12.
Decreases:
Row 13: EK2, Ssk, UK to last 4 sts, K2tog, EK2. (13 sts.)
Row 14: P2, UK to last 2 sts, P2.
Rep. Rows 13 and 14 3 more times. (7 sts.)
Row 15: EK1, Ssk, UK1, K2tog, EK1 (5 sts.)
Row 16: P2. UK1, P2.
Row 17: Ssk, UK1, K2tog. (3 sts.)
Row 18: UK all.
Headband should measure approx. 16” from where you finished the first i-cord (or approx. 27” from the beginning).
I-cord:
Row 19: FK all. Bring working yarn behind all pegs back to beginning of row.
Rep. Row 19 until i-cord measures approx. 11”.
Bind off by placing the stitches on Pegs 1 and 3 onto Peg 2 and knit over. Weave in tails. Wet block. Wear tied in a bow or loose knot.
Feather Lace Headband Chart:
This chart shows Rows 9-12 of the feather lace stitch pattern including the border.

Sherrie LaForce
Friday 30th of October 2020
Hi Kristen, love this headband, but I really prefer that it is all one piece and doesn't require it to be tied. Is there a way to make this so that it is all one piece? I have a loom to make it on, and all of this is new to me. Please explain in layman's, turns. I would buy the pattern but then it is a pattern that needs to be tied. Do I need to buy it anyway? Thank
Sherrie