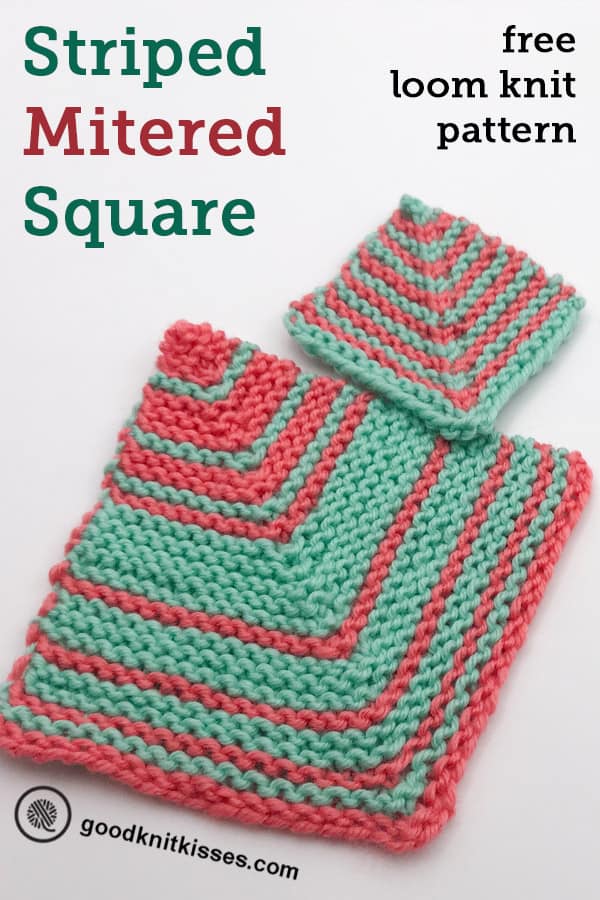
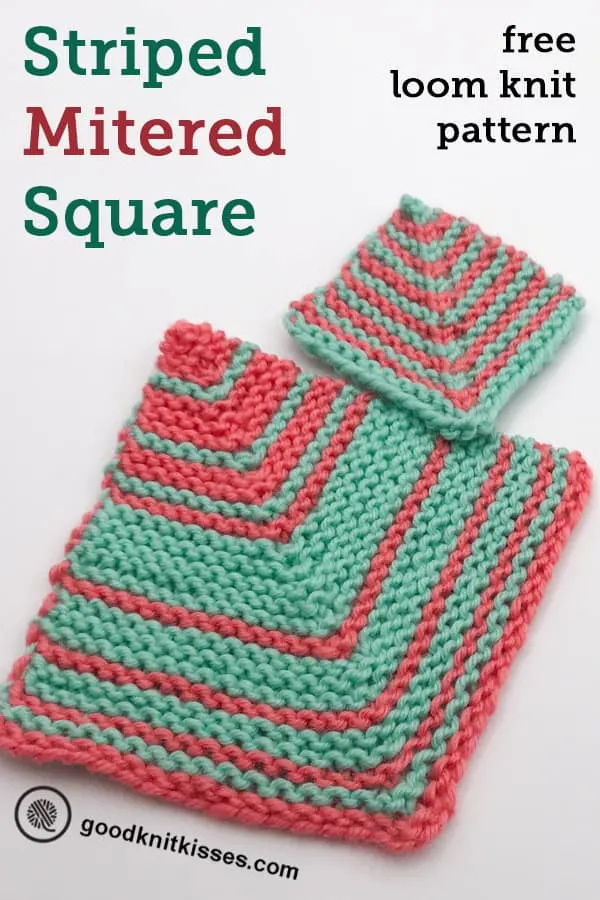
Inside: Free loom knit striped mitered square pattern with tips and tutorial videos.
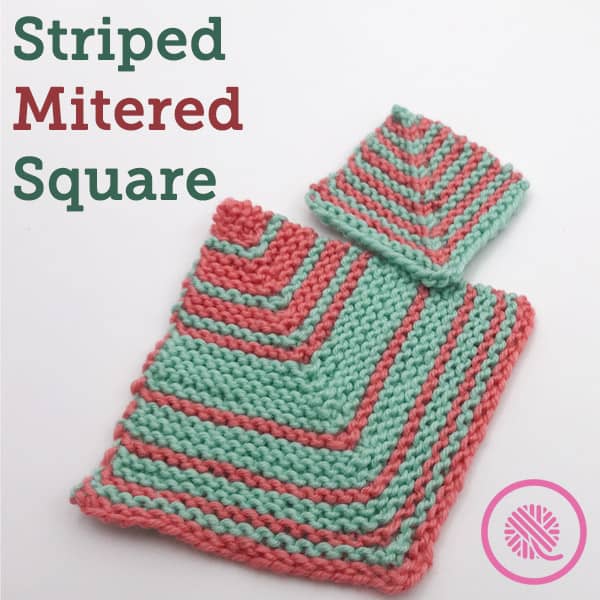
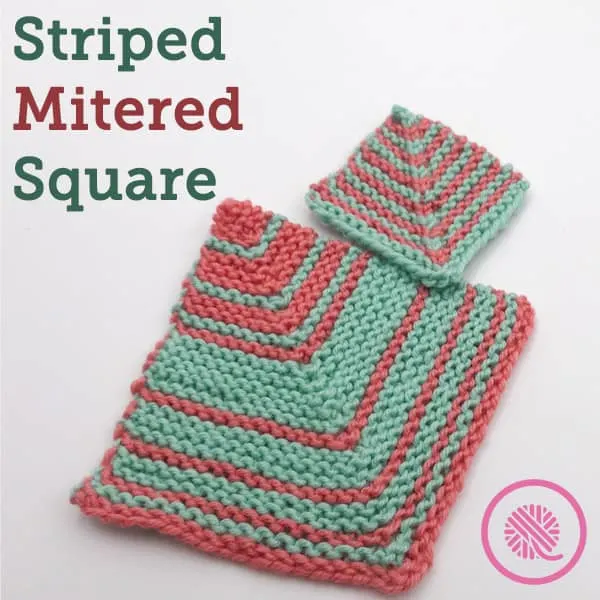
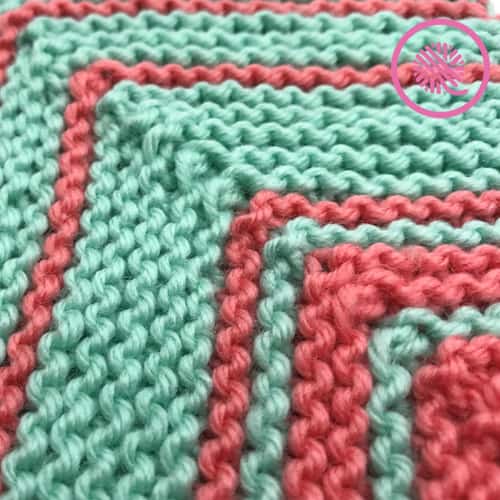
Stripes! They are the best way to show the true beauty of a mitered square. Alternating colors allow you to see how the rows change direction. This pattern not only teaches you how to loom knit a true mitered square, but includes how to change colors and carry the yarn up the side so you don’t have loads of yarn tails to weave in.
Using my Loom Knit Mitered Square Calculator and this pattern to be sure that your square will turn out correctly. This pattern includes multiple sets of instructions to help you make the perfect square depending on your loom choice and gauge.
Loom Knit Striped Mitered Square Pattern
By Kristen Mangus
A downloadable PDF of this pattern is available in my Etsy store and from Ravelry at the links below:


MATERIALS
Links below are affiliate links to products I used to create this pattern/video. Clicking the links costs you nothing, but helps support GoodKnit Kisses.
Yarn: Any yarn that is an appropriate size for the loom you choose.
Medium weight (#4) Red Heart Chic Sheep (100g / 3.5oz, 170 m / 186 yards) used in sample:
Color A: Mai Tai used in sample.
Color B: Color Creme de Mint used in sample.
Loom: Any gauge loom
KB Looms All N One loom (SG – ⅜”) with 1-peg slider add on used for sample.
GAUGE Not important for this pattern.
SIZE Any size.
ABBREVIATIONS
K = Knit (U knit, True knit or E wrap)
P = Purl
Cdd = Central Double Decrease
K2tog = Knit 2 together
P2tog = Purl 2 together
Ssk = Slip, slip, knit
Ssp = Slip, slip, purl
St(s) = Stitch(es)
SKILL LEVEL Easy+
NOTES
Loom choice – Since you can make a mitered square on any loom, does it matter which one you choose? Yes! It is much easier to use an adjustable loom when working the Central Double Decrease (Cdd) in the Traditional pattern. You can use a non-adjustable loom with this version of the pattern, but you may find it easier to use the Alternate version of the pattern (pages 5-6) to prevent tension issues. The Alternate version uses, k2tog, ssk, p2tog and ssp decreases and I found this much easier to work on a fixed peg loom. [Special note for Kiss Loom knitters: You may skip the calculator and go directly to Pattern #1. Kiss Looms with pins (F1 up to Dragon) are created to have uniform knit and purl stitches so no special instructions are necessary.]
Mitered Square Calculator – This tool determines your personal gauge and tells you which of the patterns 1, 2 or 3 will be best to ensure a perfect square. That means you can use an Ewrap knit, if you prefer that instead of a U wrap. The pattern instructions are customized to how YOU loom knit.
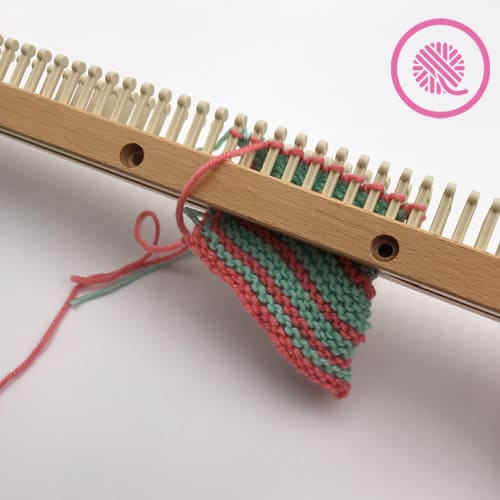
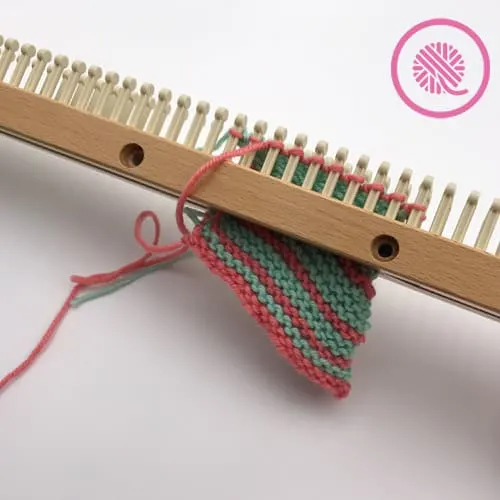
Changing color and carrying yarn – To work the stripes you will knit with alternating colors. Cast on with Color A and when instructed, begin using Color B. It is not necessary to use a slip knot or tie Color B to your work. Once the yarn tail is woven in it will be secure.
When switching colors instead of cutting the yarn you carry the unused color up the selvedge edge. This video shows you how to twist the strands to trap the yarn in the edge stitch. https://www.youtube.com/watch?v=fOi0bgkNlRg
Design options –
- I wrote the pattern working the center peg in garter stitch. If desired, you can work the center peg using a knit stitch for a raised diagonal design across your square.
- This pattern is written alternating color every other row. This gives you narrow stripes. You can change colors every 4, 6, or 8 rows to create wider stripes if desired.
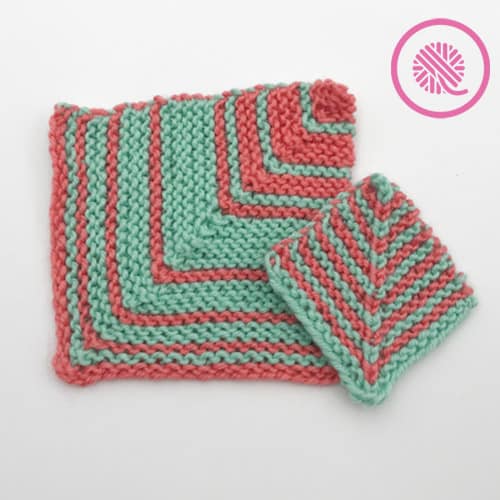
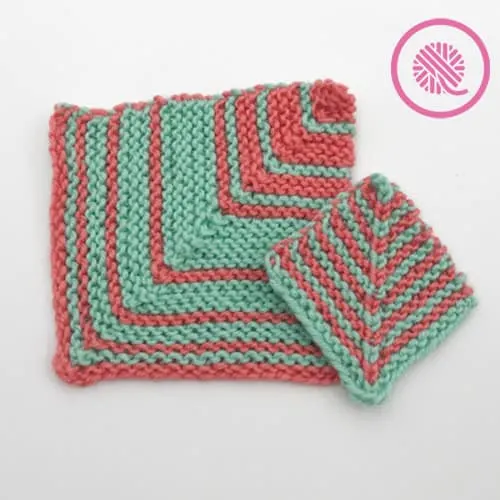
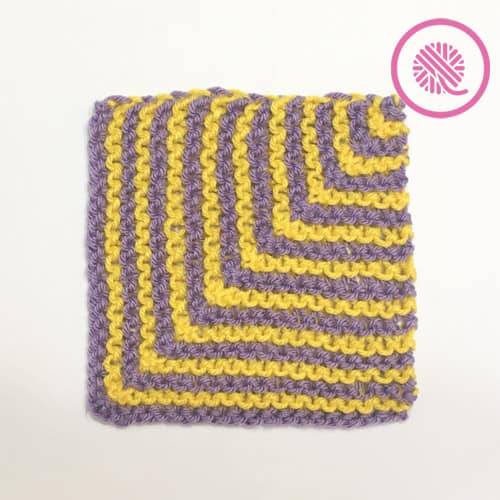
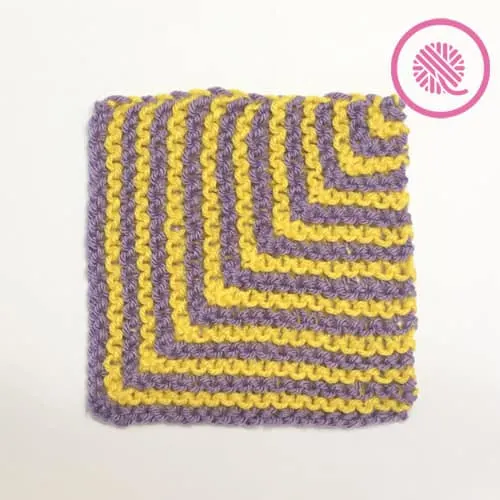
To make the square shown below with wider stripes follow these guidelines:
1. Each narrow stripe as written in the pattern is 2 rows: a knit row followed by a purl row.
2. To make wider stripes work 4, 6, 8 or any other even number of rows in the same color.
3. Here’s the pattern of stripes I did with a cast on of 39 stitches:
1 stripe (2 rows) of Color A
1 stripe of Color B
1 stripe of Color A
2 stripes (4 rows) of Color B
1 stripe of Color A
3 stripes (6 rows) of Color B
1 stripe of Color A
5 stripes of (10 rows) Color B (I mistakenly did one extra!)
1 stripe of Color A
1 stripe of Color B
2 stripes of Color A
1 stripe of Color B
3 stripes of Color A
1 stripe of Color B
Finish with Color A

Blocking – When you finish your project may not appear perfectly square, but tug it in both directions and let the stitches relax. If desired, you can steam or wet block each square before seaming to ensure an exact size. Video link: How to Wet Block
Seaming – For seaming the squares I recommend using a Bickford seam. Video link: How to Sew a Bickford Seam
INSTRUCTIONS
Use the Loom Knit Mitered Square Calculator to determine which pattern to use and how many stitches you need to cast on for your desired size. NOTE: You may use either the Traditional or Alternate Pattern of the correct number (1, 2 or 3). Finished square may vary slightly, but will easily block to desired size.
Striped Mitered Square 1
With A, cast on desired number of sts and place marker on center peg.
Row 1: P all.
Row 2: With B, Knit to 1 st before marker, cdd, knit to end of row.
Row 3: P all.
Row 4: WIth A, Knit to 1 st before marker, cdd, knit to end of row.
Rep Rows 1 and 4 until 3 sts rem. Finish with current color of working yarn and cut contrast color yarn leaving tail to weave in.
Row 5: P all.
Row 6: Cdd (central double decrease).
Pull working yarn through stitch to fasten off. Weave in tails.
Striped Mitered Square 2
With A, cast on desired number of sts and place marker on center peg.
Row 1: P all.
Row 2: With B, Knit to 1 st before marker, cdd, knit to end of row.
Row 3: P all.
Row 4: With A, Knit to 1 st before marker, cdd, knit to end of row.
Row 5: P all.
Row 6: With B, K all.
Row 7: Purl to 1 st before marker, cdd, purl to end of row.
Row 8: With A, K all.
Row 9: Purl to 1 st before marker, cdd, purl to end of row.
Row 10: With B, K all.
Row 11: P all.
Row 12: With A, Knit to 1 st before marker, cdd, knit to end of row.
Row 13: P all.
Row 14: With B, Knit to 1 st before marker, cdd, knit to end of row.
Row 15: P all.
Row 16: With A, K all.
Row 17: Purl to 1 st before marker, cdd, purl to end of row.
Row 18: With B, K all.
Row 19: Purl to 1 st before marker, cdd, purl to end of row.
Row 20: With A, K all.
Rep Rows 1-20 until 3 sts rem ending after a knit row. Finish with current color of working yarn and cut contrast color yarn leaving tail to weave in.
Row 21: P all.
Row 22: Cdd.
Pull working yarn through stitch to fasten off. Weave in tails.
Striped Mitered Square 3
With A, cast on desired number of sts and place marker on center peg.
Row 1: P all.
Row 2: With B, Knit to 1 st before marker, cdd, knit to end of row.
Row 3: P all.
Row 4: With A, K all.
Row 5: Purl to 1 st before marker, cdd, purl to end of row.
Row 6: With B, K all.
Row 7: P all.
Row 8: With A, Knit to 1 st before marker, cdd, knit to end of row.
Row 9: P all.
Row 10: With B, K all.
Row 11: Purl to 1 st before marker, cdd, purl to end of row.
Row 12: With A, K all.
Rep Rows 1-12 until 3 sts. rem. ending after a knit row. Finish with current color of working yarn and cut contrast color yarn leaving tail to weave in.
Row 13: P all.
Row 14: Cdd.
Pull working yarn through stitch to fasten off. Weave in tails.
Alternate Instructions for NON-Adjustable Looms
Alternate Striped Mitered Square 1
With A, cast on desired number of sts and place marker on center peg.
Row 1: P all.
Row 2: With B, Knit to 2 sts before marker, k2tog, k1, ssk, knit to end of row.
Row 3: P all.
Row 4: With A, Knit to 2 sts before marker, k2tog, k1, ssk, knit to end of row.
Rep Rows 1-4 until 3 sts rem. Finish with current color of working yarn and cut contrast color yarn leaving tail to weave in.
Row 5: P all.
Row 6: Cdd.
Pull working yarn through stitch to fasten off. Weave in tails.
Alternate Striped Mitered Square 2
With A, cast on desired number of sts and place marker on center peg.
Row 1: P all.
Row 2: With B, Knit to 2 sts before marker, k2tog, k1, ssk, knit to end of row.
Row 3: P all.
Row 4: With A, Knit to 2 sts before marker, k2tog, k1, ssk, knit to end of row.
Row 5: P all.
Row 6: With B, K all.
Row 7: Purl to 2 sts before marker, p2tog, p1, ssp, purl to end of row.
Row 8: With A, K all.
Row 9: Purl to 2 sts before marker, p2tog, p1, ssp, purl to end of row.
Row 10: With B, K all
Row 11: P all.
Row 12: WIth A, Knit to 2 sts before marker, k2tog, k1, ssk, knit to end of row.
Row 13: P all.
Row 14: With B, Knit to 2 sts before marker, k2tog, k1, ssk, knit to end of row.
Row 15: P all.
Row 16: With A, K all.
Row 17: Purl to 2 sts before marker, p2tog, p1, ssp, purl to end of row.
Row 18: With B, K all.
Row 19: Purl to 2 sts before marker, p2tog, p1, ssp, purl to end of row.
Row 20: With A, K all.
Rep Rows 1-20 until 3 sts rem ending after a knit row. Finish with current color of working yarn and cut contrast color yarn leaving tail to weave in.
Row 21: P all.
Row 22: Cdd.
Pull working yarn through stitch to fasten off. Weave in tails.
Alternate Striped Mitered Square 3
With A, cast on desired number of sts and place marker on center peg.
Row 1: P all.
Row 2: With B, Knit to 2 sts before marker, k2tog, k1, ssk, knit to end of row.
Row 3: P all.
Row 4: With A, K all.
Row 5: Purl to 2 sts before marker, p2tog, p1, ssp, purl to end of row.
Row 6: With B, K all.
Row 7: P all.
Row 8: With A, Knit to 2 sts before marker, k2tog, k1, ssk, knit to end of row.
Row 9: P all.
Row 10: With B, K all.
Row 11: Purl to 2 sts before marker, p2tog, p1, ssp, purl to end of row.
Row 12: With A, K all.
Rep Rows 1-12 until 3 sts. Rem. ending after a knit row. Finish with current color of working yarn and cut contrast color yarn leaving tail to weave in.
Row 13: P all.
Row 14: Cdd (central double decrease).
Pull working yarn through stitch to fasten off. Weave in tails.
Get these other free mitered square patterns designed just for loom knitters:
Traditional Mitered Square
Short Row Mitered Square
C2C Mock Mitered Square for Beginners