
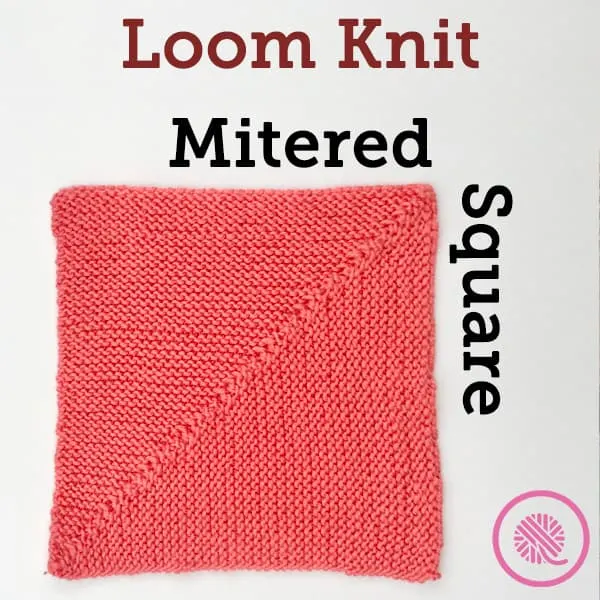
Inside: Free pattern for a loom knit traditional mitered square customized to your gauge.
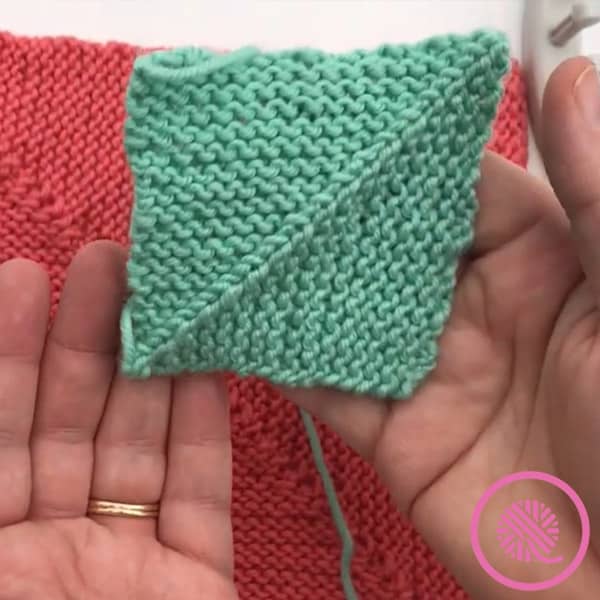
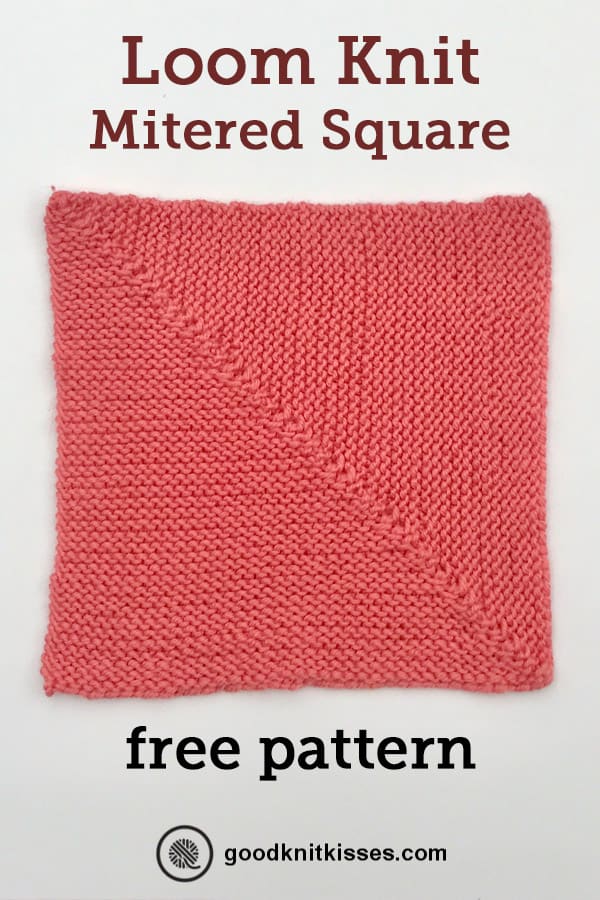
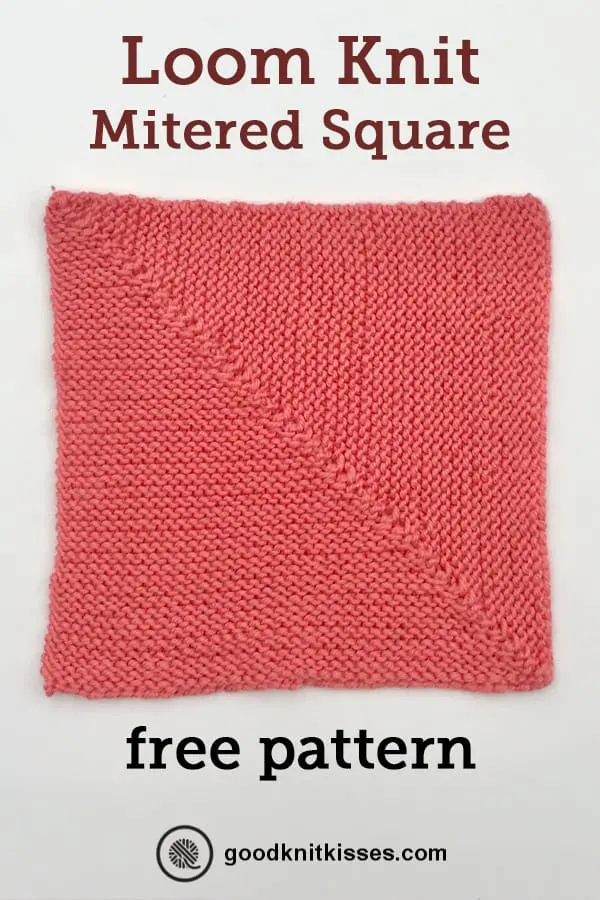
The traditional needle knit mitered square involves casting on two sides of your square and gradually working decreases at the center to shorten each side and create a perfect square. On the loom the size of knit and purl stitches isn’t always the same so it can be tricky to get a perfect square.
Until now.
Using my Loom Knit Mitered Square Calculator and this pattern you can be confident that your square will turn out correctly. This pattern includes multiple sets of instructions to help you make the perfect square depending on your loom choice and gauge.
Does it matter which loom I use?
Yes… and no! You CAN use any loom, but it is much easier with an adjustable loom. If you have a loom with a movable slider (preferably with 1 peg) you can work the Central Double Decrease (Cdd) in the Traditional version pattern without moving any stitches. Using a slider is much easier than moving all the stitches on either side of the center peg. It will save you loads of time!
But if you don’t have an adjustable loom you can still use the pattern, but may find it easier to use the Alternate version to prevent tension issues. The Alternate version uses, k2tog, ssk, p2tog and ssp decreases and I found this method worked better when moving the stitches.
Special note for Kiss Loom knitters: You may skip the calculator and go directly to Pattern #1. Kiss Looms with pins (F1 up to Dragon) are created to have uniform knit and purl stitches so no special instructions are necessary.
Why are there so many versions of the pattern?
The short answer is that in loom knitting knit and purl stitches are different sizes (both width and height) and over many rows it is a noticeable difference. When you work a mitered square it is essential to space your decreases correctly so you end up with a square instead of a kite or arrowhead shape.
By calculating the width and height of YOUR personal tension I’ve figured out how to incorporate the decreases to make sure you get a square. I go into a lot more explanation on the calculator page if you want to learn more!
Do I have to use calculator?
The Mitered Square Calculator is an essential part of this pattern as it is used to determine the best placement of the decreases to help you get a perfect square. If you choose to work the pattern without using the calculator you or may not get a square.
The real question is, “Are you feeling lucky?”

Loom Knit Traditional Mitered Square
By Kristen Mangus
A downloadable PDF of this pattern is available in my Etsy store and from Ravelry at the links below:


MATERIALS
Links below are affiliate links to products I used to create this pattern/video. Clicking the links costs you nothing, but helps support GoodKnit Kisses.
Yarn: Any yarn that is an appropriate size for the loom you choose.
Medium weight (#4) Red Heart Chic Sheep (100g / 3.5oz, 170 m / 186 yards) used in sample:
Color Mai Tai used in sample.
Loom: Any gauge loom
KB Looms All N One loom (SG – ⅜”) with 1-peg slider add on used for sample. (CinDwood X-Looms and Kiss Looms are also good options.)
GAUGE Not important for this pattern.
SIZE Any size.
Sample is approx 8” x8”
ABBREVIATIONS
K = Knit (U knit, True knit or E wrap)
P = Purl
Cdd = Central Double Decrease
K2tog = Knit 2 together
P2tog = Purl 2 together
Ssk = Slip, slip, knit
Ssp = Slip, slip, purl
St(s) = Stitch(es)
If you want a refresher on loom knitting basics see the blog posts below to get started:
13 Questions for Beginner Loom Knitters
How to Loom Knit Basics
How to Loom Knit Basic Stitch Patterns
How to Loom Knit in the Round
SKILL LEVEL Easy+
NOTES
Loom Knit Mitered Square Calculator – This tool helps determine your personal gauge and tells you which of the patterns 1, 2 or 3 will be best to ensure a perfect square. That means you can use an Ewrap knit, if you prefer that instead of a U wrap. The pattern instructions are customized to how YOU loom knit.
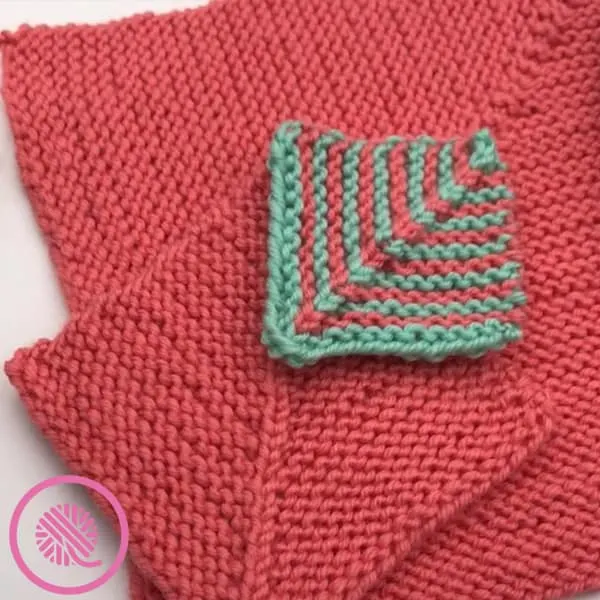
Blocking – When you finish your project may not appear perfectly square, but tug it in both directions and let the stitches relax. If desired, you can steam or wet block each square before seaming to ensure an exact size. Video link: How to Wet Block
Seaming – For seaming the squares I recommend using a Bickford seam. Video link: How to Sew a Bickford Seam

INSTRUCTIONS
Use the Loom Knit Mitered Square Calculator to determine which pattern to use and how many stitches you need to cast on for your desired size. NOTE: You may use either the Traditional or Alternate Pattern of the correct number (1, 2 or 3). Finished square may vary slightly, but will easily block to desired size.
Traditional Mitered Squares
Traditional Mitered Square 1
Cast on ____ sts and place marker on center peg.
Row 1: P all.
Row 2: Knit to 1 st before marker, cdd, knit to end of row.
Rep Rows 1 and 2 until 3 sts rem.
Row 3: P all.
Row 4: Cdd (central double decrease).
Pull working yarn through stitch to fasten off.
Traditional Mitered Square 2
Cast on ____ sts and place marker on center peg.
Row 1: P all.
Row 2: Knit to 1 st before marker, cdd, knit to end of row.
Row 3: P all.
Row 4: Knit to 1 st before marker, cdd, knit to end of row.
Row 5: P all.
Row 6: K all.
Row 7: Purl to 1 st before marker, cdd, purl to end of row.
Row 8: K all.
Row 9: Purl to 1 st before marker, cdd, purl to end of row.
Row 10: K all.
Rep Rows 1-10 until 3 sts rem ending after a knit row.
Row 11: P all.
Row 12: Cdd.
Pull working yarn through stitch to fasten off.
Traditional Mitered Square 3
Cast on ____ sts and place marker on center peg.
Row 1: P all.
Row 2: Knit to 1 st before marker, cdd, knit to end of row.
Row 3: P all.
Row 4: K all.
Row 5: Purl to 1 st before marker, cdd, purl to end of row.
Row 6: K all.
Rep Rows 1-6 until 3 sts. Rem. ending after a knit row.
Row 7: P all.
Row 8: Cdd.
Pull working yarn through stitch to fasten off.

Alternate Instructions for NON-Adjustable Looms
Alternate Mitered Square 1
Cast on ____ sts and place marker on center peg.
Row 1: P all.
Row 2: Knit to 2 sts before marker, k2tog, k1, ssk, knit to end of row.
Rep Rows 1 and 2 until 3 sts rem.
Row 3: P all.
Row 4: Cdd.
Pull working yarn through stitch to fasten off.
Alternate Mitered Square 2
Cast on ____ sts and place marker on center peg.
Row 1: P all.
Row 2: Knit to 2 sts before marker, k2tog, k1, ssk, knit to end of row.
Row 3: P all.
Row 4: Knit to 2 sts before marker, k2tog, k1, ssk, knit to end of row.
Row 5: P all.
Row 6: K all.
Row 7: Purl to 2 sts before marker, p2tog, p1, ssp, purl to end of row.
Row 8: K all.
Row 9: Purl to 2 sts before marker, p2tog, p1, ssp, purl to end of row.
Row 10: K all.
Rep Rows 1-10 until 3 sts rem ending after a knit row.
Row 11: P all.
Row 12: Cdd.
Pull working yarn through stitch to fasten off.
Alternate Mitered Square 3
Cast on ____ sts and place marker on center peg.
Row 1: P all.
Row 2: Knit to 2 sts before marker, k2tog, k1, ssk, knit to end of row.
Row 3: P all.
Row 4: K all.
Row 5: Purl to 2 sts before marker, p2tog, p1, ssp, purl to end of row.
Row 6: K all.
Rep Rows 1-6 until 3 sts. Rem. ending after a knit row.
Row 7: P all.
Row 8: Cdd (central double decrease).
Pull working yarn through stitch to fasten off.
Loom Knit Traditional Mitered Square Tutorial Videos
If any of the videos below do not show they may be restricted to GoodKnit Kisses YouTube members only. Find out more about GKK Membership HERE!
Right-handed Tutorial
[embedyt] https://www.youtube.com/watch?v=dCarWRpYiM4[/embedyt]
Left-handed Tutorial
[embedyt] https://www.youtube.com/watch?v=RczeMn6uZuE[/embedyt]