
INSIDE: Loom knit sweater pattern with collar variations in sizes XS/S – 4/5XL. Tutorial videos are available for this loom along.
This is it! It’s the summit for many knitters, needle or loom. The ultimate challenge.
The sweater.
Years ago, when I got my first set of Knifty Knitter looms and made a hat, I never dreamed of the places I’d go. I’m amazed at how much looms and loom knitting have developed over the years. We’ve seen new shapes, like X or S, to creatively enlarge our knitting. We’ve conquered lace shawls, full size blankets and socks.
So, what’s next?
It’s time we venture into new territory and explore a relatively uncharted area for loom knitters.
The sweater.
I featured the Easy Going Pullover from Yarnspirations in a knit along and many of you asked me to convert the pattern to the loom. With permission from Yarnspirations I did just that!
If you’re a needle knitter and want to work the knit pattern I’ve got tips and tutorials just for you!
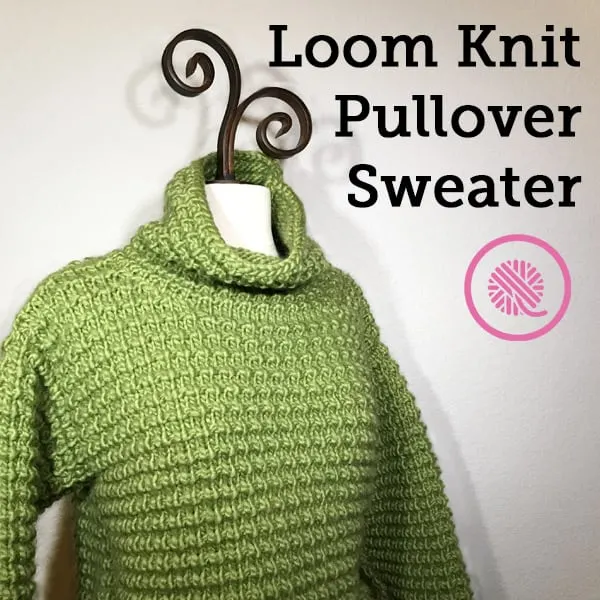
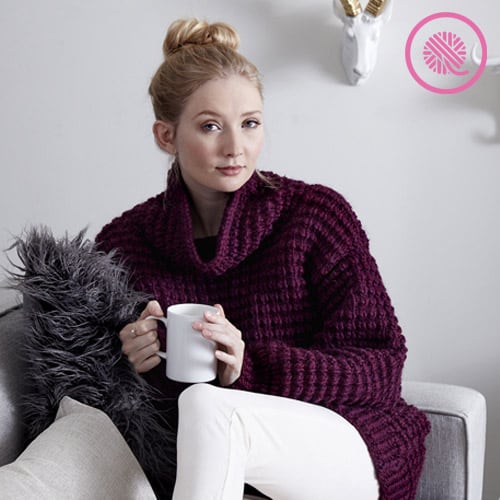
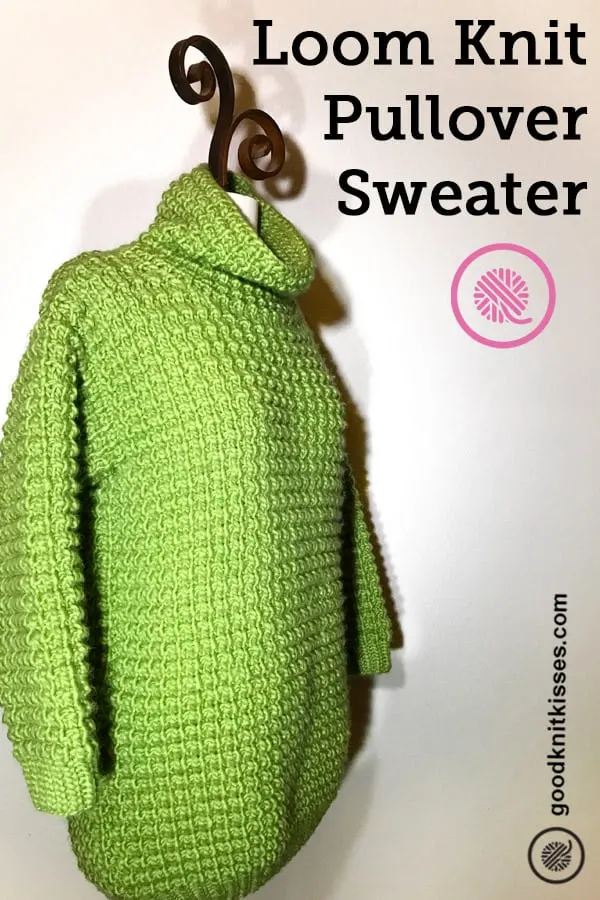
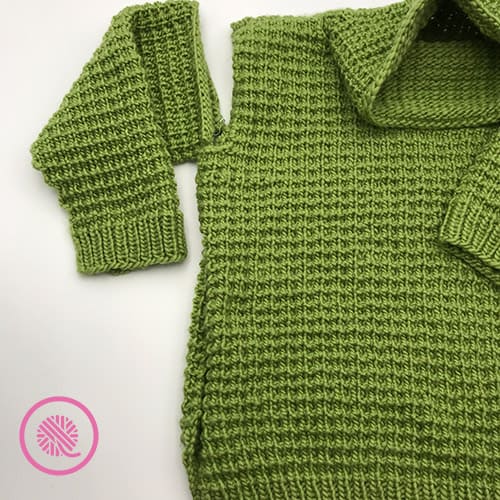
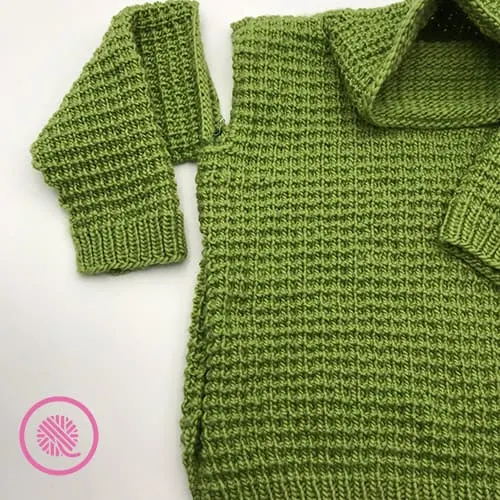
This Easy Going Pullover Sweater for the loom is a cozy, oversized weekender made for chilly winter days at home with a good book. It features drop sleeves, a beautiful textured stitch pattern and several collar options. This pattern is sized from XS-5XL.
Loom knit in Bernat Roving yarn this sweater will become your go to winter favorite.
Easy Going Pullover Sweater
By Kristen Mangus

A downloadable PDF of this pattern is available in my Etsy store or from Ravelry at the links below:


Loom Knit Sweater Part 1:
Overview & Pattern Intro
MATERIALS
Links below are affiliate links to products I used to create this pattern/video. Clicking the links costs you nothing, but helps support GoodKnit Kisses.
Yarn
Bernat Roving (3.5 oz/100 g; 120 yds/109 m)
Color Grass used in sample.
| Sizes | XS/S | M | L | XL | 2/3XL | 4/5XL |
| # of balls | 9 | 10 | 11 | 12 | 14 | 16 |
Loom
⅝” Large Gauge (LG) loom with at least 63 (67-73-79-91-97) pegs
Knitting Board Flexee Loom Chunky used for sample.
Stitch markers – both locking stitch markers and peg stitch markers
Tapestry needle
ABBREVIATIONS
Beg = Beginning
Cont = Continue(ity)
Dec = Decrease
Inc = Increase
K = Uwrap knit
K2tog = Knit 2 stitches together
Kfpb = Knit into the front and purl into the back of the stitch
P = Purl
Pat = Pattern
P1below = Purl 1 below
Rem – Remain(ing)
Rep = Repeat
Rnd – Round
SlwyifP = Slip with yarn in front of peg
SSK = Slip, slip, knit
St(s) = Stitch(es)
GAUGE
12 sts x 16 rows in 4” in Texture Pat.
(See NOTES below.)
SKILL LEVEL Easy
SIZES
XS/S (M, L, XL, 2/3XL, 4/5XL)
| Size | Fits Bust Measurement | Finished Bust |
| XS/S | 28-34″ [71-86.5 cm] | 41″ [104 cm] |
| M | 36-38″ [91.5-96.5 cm] | 44″ [112 cm] |
| L | 40-42″ [101.5-106.5 cm] | 48″ [122 cm] |
| XL | 44-46″ [112-117 cm] | 52″ [132 cm] |
| 2/3XL | 48-54″ [122-137 cm] | 60″ [152.5 cm] |
| 4/5XL | 56-62″ [142-157.5 cm] | 64″ [162.5 cm] |
NOTES
Gauge – Gauge is very important for this pattern. I know how difficult it is to match gauge exactly so I put together some guidelines for you.
- The gauge for this pattern is 3 sts/in.
- If your test swatch is 2.8 – 3 sts/inch make the pattern as written your sweater will come out to the correct size.
- If your swatch gauge is less than 2.8 sts/in. I’d suggest trying a different yarn to help you tighten up your gauge OR make one size smaller.
- If your gauge is over 3 sts/in try to loosen your stitches. If it is more than 3.3 sts/in you could make one size larger.
Customize Length – Sweater patterns are designed to fit an average height person. If you are not average this is an easy pattern for you to customize. Lengthen or shorten the sweater on the BOTH the front and back between the ribbing and armholes. The easiest way to figure out how long to knit it is to measure the length of one of your own sweaters along the side seam from the armpit to the bottom of the sweater. Write that number on the line below for future reference. I have a note in the pattern below telling you where to use your custom length.
Bottom of sweater to armhole Custom Length ________
Cast on – I recommend the long tail cast on for this pattern. If you prefer another cast on I also show the Double Ewrap and Chain cast ons in the tutorial video.
Continue in Pattern – This instruction, abbreviated “Cont in pat”, means to keep your textured stitch pattern consistent as you increase or decrease. You want all the columns of your stitch pattern to line up. Place a stitch marker on the peg for the SlwyifP in Row 1 near the edge of your row as a visual cue.


Collar Options –
- Flat Knit Collar – This collar follows the original pattern and is a flat knit panel.
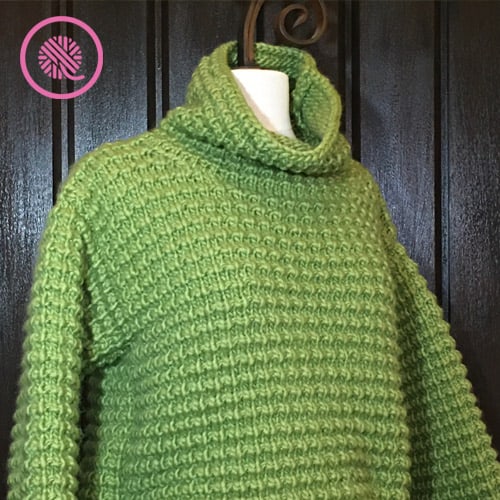
- Cowl Collar – This is the wide cowl shown in the picture above. It is knit as a flat panel and seamed.
- Open Collar – Knit the flat panel to your desired length, but do not seam the ends. Fold open the edges for a splayed collar.
- Collar with Closures – Knit the flat panel and omit seaming. Sew toggle closures to the collar to allow you to wear the collar open or closed.
- Cowl Collar Knit in the Round – This option allows you to knit the entire cowl in the round to your desired length. It will look the same as the flat knit cowl but without a seam.
SCHEMATIC

Make the matching hat to wear with your Easy Going Pullover Sweater:

Part 1 Tutorial Video
Select videos are available to GoodKnit Kisses YouTube members only. To get exclusive access to GKK VIP-only content, free PDF patterns, weekly Zoom meetup and more, sign in to YouTube and join as a VIP Member today! Find out more about GKK Membership HERE!
Part 1 Timestamps
00:00:11 Welcome & Overview
00:01:26 Basic Design
00:01:47 Sizing and Finished Measurements
00:02:45 Collar Customization
00:03:27 Supplies – Loom options
00:04:32 Supplies – Yarn
00:05:17 Sizing & How much yarn
00:08:59 Swatch: Begin swatch with 3 cast ons shown
00:12:47 Stitch: Ribbing
00:14:53 Stitch: Textured Pattern
00:18:43 Swatch: Provisional bind off
00:19:15 Swatch: Block & measure
00:20:44.03 Calculate gauge
00:21:31 TIP: Tension and adjusting gauge
00:22:20 Loom along series schedule
Right handed:
Left handed
Loom Knit Sweater Part 2: Back
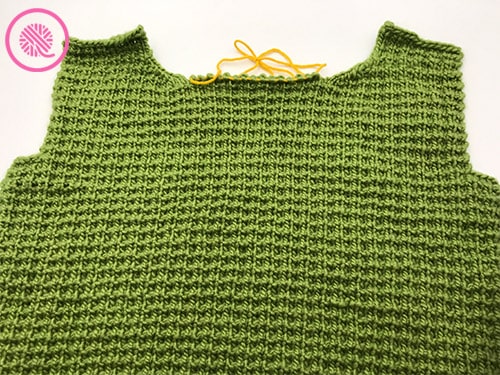
Part 2 gets you started loom knitting the back of the sweater. I review the pattern and stitches needed to complete this portion plus I have lots of handy tips to help you manage your project.
INSTRUCTIONS – Back
Part 2: BACK
**Cast on 63 (67-73-79-91-97) sts.
Row 1: * UK, P. Rep from * to last st. UK.
Rep Row 1 of Ribbing until piece measures 2” (5 cm).
Proceed in Texture Pat as follows:
Row 1 (Setup): *K1, SlwyifP. Rep from * to last st. K1.
Row 2: P1, *P1below. K1. Rep from * to last 2 sts. P1below, P1.
Rows 3 and 4: K all.
These 4 rows for the Texture Pat.
Cont in pat until work from beg measures 19″ [48 cm]. NOTE: If you are working the sweater to a custom length. Use that measurement here.
Shape armholes:
Keeping cont of pat, bind off 4 sts at beg of next 2 rows. 55 (59-65-71-83-89) sts.**
Cont even in pat until armhole measures 8 (9-9½-10-10-10½)” [20.5 (23-24.5-25.5-25.5-27.5) cm].
Shape shoulders: Keeping cont of pat, bind off 7 (8-9-10-13-15) sts beg next 2 rows, then 7 (8-9-11- 14-15) sts beg following 2 rows. Leave rem 27 (27-29-29-29-29) sts on a st holder.
Watch the tutorial video below to see each part of the pattern.
Part 2 Timestamps
00:00:28 Review Pattern: Cast on #s
00:00:58 Loom setup
00:01:35 TIP: Control tension
00:02:15 Review Pattern: Stitches & Customizing length
00:03:52 Review Pattern: Row instructions for Back
00:05:39 TIP: Measuring length & Calculating # of rows needed
00:08:51 TIP: Add a new ball of yarn
00:09:42 Review Pattern: Armhole shaping
00:10:37 Armhole: Bind off 1st 4 sts
00:13:10 Armhole: Bind off next 4 sts (SlwyifP notes)
00:14:43 Cont in pat: Row 1
00:15:15 TIP: Removing links
00:15:44 Cont in pat: Row 2
00:16:10 TIP: Calculate armhole length
00:16:59 Review Pattern: Shape shoulders
00:18:54 TIP: Keep your stitch pattern lined up when working bind off sts.
00:20:41 Review stitch count after armhole bind off & remove links
00:21:32 Provisional bind off
00:22:51 Finished Back panel shown
Part 2 – Tutorial Video
Right handed
Left handed
Loom Knit Sweater Part 3: Front
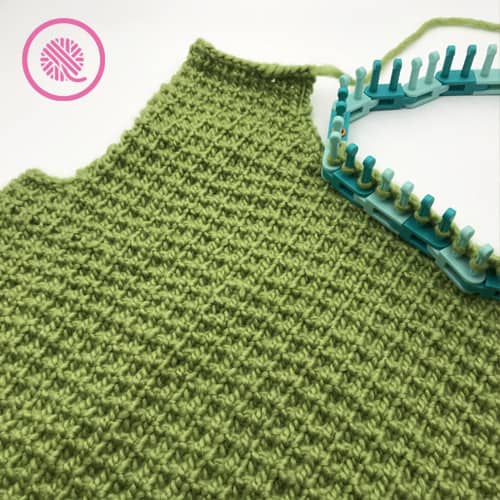
In Part 3 we’re going to loom knit the entire Front panel including shaping the shoulders and neckline. By using strategically placed stitch markers as visual cues you’ll have your shoulders done in no time without having to count and recount your stitches.
Let’s get started!

INSTRUCTIONS – Front
Work from ** to ** as given for Back.
Cont even in pat until armhole measures 5 (6-6½-7-7-7½)” [12.5 (15-16.5-18-18-19.5) cm].
Shape neck:
Next row: Cont in pat across 20 (22-24-27-33-36) sts. Place marker on last peg worked; this indicates neck edge. Ignore rem sts on loom. Turn and work back to beg of row.
Cont in pat, *dec 1 st at neck edge on next 4 rows, then every other Row twice more. 14 (16-18-21- 27-30) sts.
[*To dec on even row: K1, k2tog, cont in pat to end. To dec on odd row: Cont in pat to last 3 sts, k2tog, k1. Note: All decreases at neck edge only.]
Cont even in pat until armhole measures same length as Back to shoulder making sure first two sts on each row 2 are knit at neck.
TIP: Count pattern ridges on armhole back panel for exact length.
Shape shoulder:
Keeping cont of pat, bind off 7 (8-9-10-13-15) sts beg next row.
Work 1 row. Bind off rem 7 (8-9-11-14-15) sts; leave tail and cut yarn.
Skip next 15 (15-17-17-17-17) sts. Place marker for neck edge. Join new yarn at marked peg and work rem sts cont in pat to end of row.
Cont in pat, *dec 1 st at neck edge on next 4 rows, then every other Row twice more. 14 (16-18-21- 27-30) sts.
[*To dec on even row – Cont in pat to last 3 sts, ssk, k1. To dec on odd row – K1, ssk, cont in pat to end.]
Cont even in pat until armhole measures same length as Back to shoulder; making sure last two sts on each row 2 are knit at neck. Ending on an odd row at the start of the shoulder; opposite the neck.

Shape shoulder:
Keeping cont of pat, bind off 7 (8-9-10-13-15) sts beg next row.
Work 1 row. Bind off rem 7 (8-9-11-14-15) sts; leave tail and cut yarn.
Leave rem 15 (15- 17-17-17-17) sts on a stitch holder or scrap piece of yarn (Provisional bind off).
Part 3 – Tutorial Video
Part 3 – Timestamps
00:00:10 Overview
00:00:44 Review Pattern: Same as Back Panel (Part 2)
00:01:39 Review Pattern: Armhole
00:02:35 Review Pattern: Shape neck
00:04:15 Begin neck shaping
00:05:47 Review Pattern: ‘*dec 1 st at neck edge…’
00:07:55 Place 2nd st marker
00:08:11 1st decrease (Texture Pat ‘Row 3’)
00:09:17 2nd decrease (Texture Pat ‘Row 4’)
00:10:51 3rd decrease (Texture Pat ‘Row 1’)
00:12:00 4th decrease (Texture Pat ‘Row 2’)
00:14:00 5th & 6th dec every other row
00:14:57 Review Pattern: ‘Cont even in pat until armhole measures…’ 00:16:06 Review Pattern: Shape shoulder (Right) and bind off
00:17:04 Review Pattern: ‘Skip next 15 (..) sts …’ & st marker placement.
00:18:32 Join yarn & cont in pat (Texture Pat ‘Row 1’)
00:20:00 1st decrease (Texture Pat ‘Row 2’)
00:21:57 2nd decrease (Texture Pat ‘Row 3’)
00:23:08 Review Pattern: 3rd-6th dec explained
00:23:34 Review Pattern: ‘Cont even in pat until armhole measures…’ & ending on odd row.
00:24:12 Shape shoulder (Left) and bind off
00:25:21 Finishing with Provisional bind off
Right Handed
Left Handed
Loom Knit Sweater Part 4: Sleeves
Consider this the top of the hill. You’ve already done the hard work to get up here and you can coast down the rest of the way.
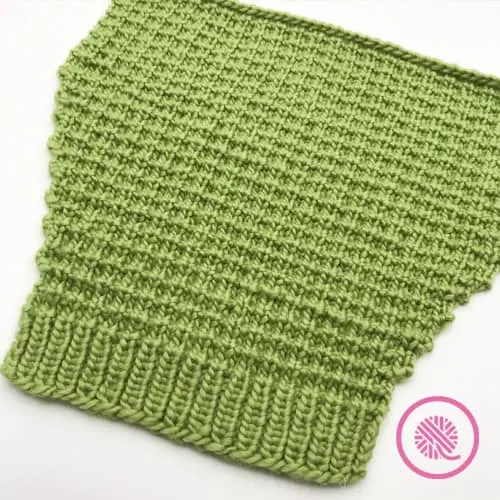
The sleeves will seem to knit up super fast after you’ve already done the front and back panels. Like the other sections, you begin with ribbing and then move into the Texture Pattern and shaping.
On the sleeves I decided to change the Texture Pattern to only use knit stitches on the ends of the rows (See Alt Texture Pat Row 2 below for changes.) This made the increases on the edges much smoother allowing for a smoother seam. It’s a minor change, but with a noticeable result.

INSTRUCTIONS: Sleeves
Cast on 33 (33-33-35-37-39) sts.
TIP: Your loom will need at least 49 (55-57-61-61-63) pegs total to accommodate sleeve increases.
Work 2″ [5 cm] in Ribbing as given for Back.
Alt Texture Pat:
To ensure a smoother edge for seaming the sleeve, use the Alt Texture Pat below. (NOTE: Only the first and last st of Row 2 is different.)
Row 1 (Setup): *K1, SlwyifP. Rep from * to last st. K1.
Row 2: K1, *P1below. K1. Rep from * to last 2 sts. P1below, K1.
Rows 3 and 4: K all.
These 4 rows form the Alt Texture Pat.
Proceed in Alt Texture Pat for 4 rows.
Sleeve Increases:
Sleeve increases are worked every 4 or 6 rows at both the beginning and end of the row. While following the Alt Texture Pat these increases are on either a Row 2 or Row 4 of the stitch pattern. Work as follows:
Row 2 Inc: Kfpb, cont in pat until 1 st rem. Move last stitch over 1 peg to create empty peg. Kfpb.
Row 4 Inc: Kfpb, knit across until 1 st rem. Move last stitch over 1 peg to create empty peg. Kfpb.
Cont in pat, inc 1 st each end of next and following 6th (6th-6th-4th-4th-4th) rows until there are 49 (45-45-61-61-63) sts.
TIP: After working an inc row, place a locking stitch marker on the back (or front) of your knitting. Mark the same peg column each time to make counting easier. Use this marker to check if on a 4th or 6th row by counting rows between markers.
Sizes M and L only: Cont in pat and inc 1 st each end of following 4th rows until there are (55-57) sts.
All sizes: Cont even in pat until Sleeve from beg measures 16 (16-17-17-18-18)” [40.5 (40.5-43-43- 45.5-45.5) cm]. Place markers, on knitting, at each end of last row; this will be referenced when sewing in sleeves.
Work 4 more rows even in pat. Bind off.
Part 4 – Tutorial Videos
Part 4 – Timestamps
00:00:10 Pattern Overview
00:00:38 Loom Setup
00:02:20 TIP: Use stitch marker on loom to mark special st in Row 2
00:03:26 Alt Texture Pattern
00:04:27 TIP: Use stitch markers to track increases
00:07:37 Alt Texture Pat: Rows 1-3
00:08:20 Row 4 Increase – Beg of row
00:10:22 Row 4 Increase – End of row
00:11:35 TIP: Mark Inc row with stitch marker
00:12:50 Pattern Notes: Increasing every 4th row vs. every 6th row
00:13:57 Row 2 Increase – Beg of row
00:15:14 Row 2 Increase – End of row 00:16:25 TIP: Mark Inc row with stitch marker
00:16:54 TIP: Counting increases every 6 rows
00:17:40 TIP: Move stitch marker on loom to help Cont in pat.
00:18:13 Pattern Review: Stitch counts after increases
00:18:55 Pattern Notes for M and L sizes
00:19:45 TIP: Calculate sleeve length after increases
00:21:52 Place marker for seaming
00:22:41 Work last 4 rows and bind off
00:22:50 Finishing notes
Right Handed
Left Handed
Loom Knit Sweater Part 5: Collar


You are knocking out this pattern! All the main pieces are done and you’re feeling pretty good. The hardest part is over.
Unless you have trouble making decisions.
The Easy Going Pullover Sweater has several collar variations and now is the time to choose just one.
Collar Options –
- Flat Knit Collar – This collar follows the original pattern and is a flat knit panel.
- Cowl Collar – This is the wide cowl shown in the picture at the top of the page. It is knit as a flat panel and seamed.
- Open Collar – Knit the flat panel to your desired length, but do not seam the ends. Fold open the edges for a splayed collar.
- Collar with Closures – Knit the flat panel and omit seaming. Sew toggle closures to the collar to allow you to wear the collar open or closed.
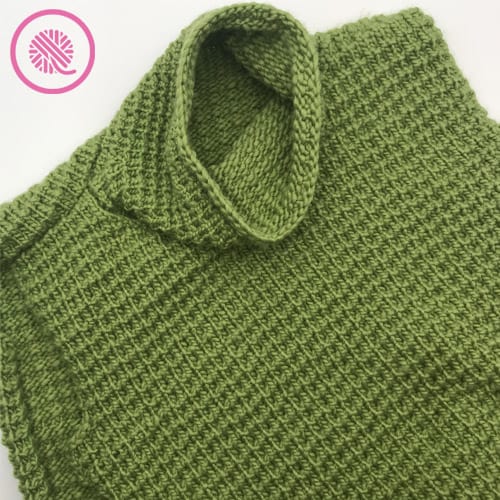
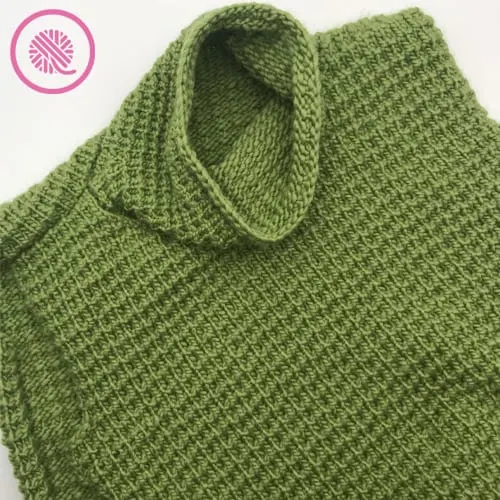
- Cowl Collar Knit in the Round – This option (shown below) allows you to knit the entire cowl in the round to your desired length. It will look the same as the flat knit cowl but without a seam.
After I published the knit along for the needle knit version of this pattern I received some feedback about the collar. Some knitters felt that cowl was too loose and bulky while wearing the sweater.
In the tutorial video below I discuss reducing the bulk by working a couple decrease rounds. I only decreased 8 stitches in the cowl shown below but it makes a big difference.
Once you decide which collar fits your style, you’re almost ready to get loom knitting. Almost.
Before you start picking up stitches for your collar it’s a good idea to wet block the pieces of your sweater. Blocking not only sets the stitches, but it also allows you shape your pieces to exact measurements.
If you need more help with wet blocking I’ve got an instructional post and tutorial video to help you.
INSTRUCTIONS: Collar
Loom Setup:
Flat Panel Collar: Use loom with at least 67 (67-71-71-71-71) pegs.
Cowl Collar in the Round Use loom with exactly 66 (66-70-70-70-70) pegs.
[See Collar Options above.]
Sew right shoulder seam.
Front:
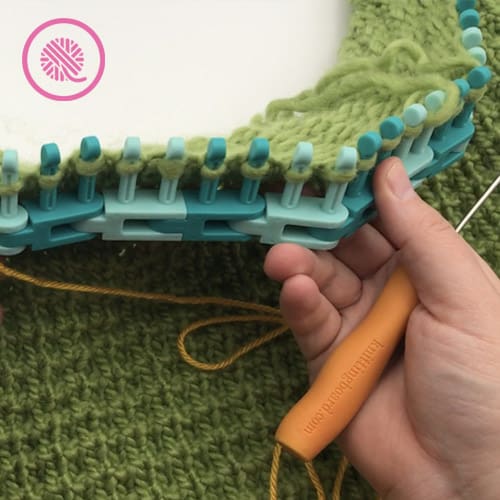
Left front neck edge – Place marker on Peg 1. Beg with 2nd st on neck edge pick up 12 sts evenly (ending before sts on holder), place on loom and UK each.
Sts on holder (neck front) – Place 15 (15-17-17-17-17) from Front st holder on loom and UK each.
Right front neck edge – Beg with 2nd st on neck edge pick up 12 sts evenly, place on loom and UK each.
Back:
Place 13 (13-14-14-14-14) sts from holder onto loom and UK each.
Skip 1 peg and place next st on peg after skipped peg. Inc this stitch with *kfpb.
1. Flat Panel Collar
Place rem 13 (13-14-14-14-14) sts onto loom and UK rem sts. 67 (67-71-71-71-71) sts.
Next row: Knit.
Beg on a Row 1, work in Texture Pat as given for Back until Collar measures approx 71/2″ [19 cm] or to desired length, ending on Row 2 of pat. Bind off knitwise loosely.
2.Cowl Collar in the Round
Place 12 (12-13-13-13-13) sts onto loom and UK. Place last st above st on marked Peg 1 and UK top st only. 66 (66-70-70-70-70) sts.
Next row: K2tog, Knit.
Textured Pat in the Round:
Rnd 1: *SlwyifP. K1. Rep from * around.
Rnd 2: *P1below. K1. Rep from * around.
Rnd 3: Knit
Rnd 4: Knit.
These 4 rnds form Texture Pat.
Beg on Rnd 1, work in Texture Pat as given for Back until Collar measures approx 71/2″ [19 cm] or to desired length, ending on Rnd 2 of pat. Bind off knitwise loosely. Weave in tail.
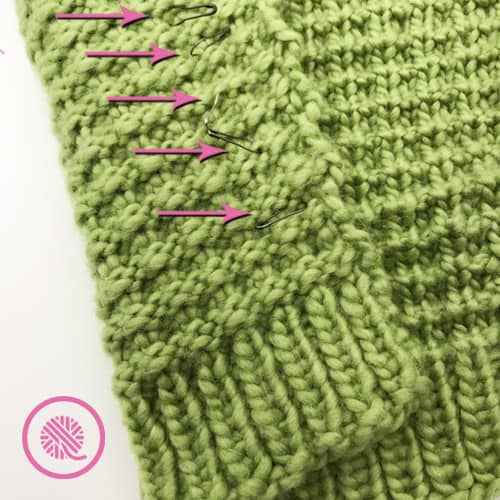
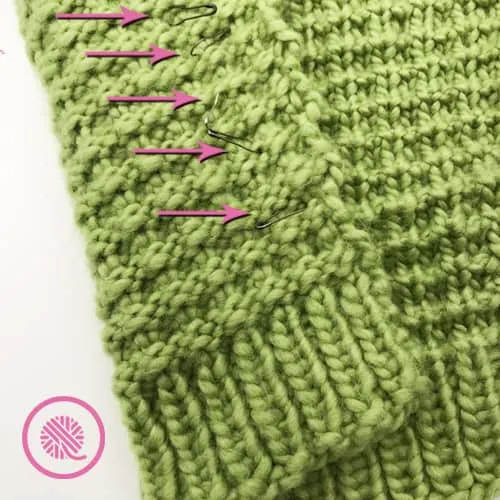
OPTIONAL: For a more fitted cowl, decrease 2 stitches at each shoulder on Rnd 4 on the first two repeats of the Texture Pat. I show clearly how to do this in the tutorial video.
Continue for ALL collar styles:
Sew left shoulder and Collar seam (If worked as flat panel; see Collar options in NOTES above).
Part 5 – Tutorial Videos
Part 5 – Timestamps
00:00:10 Pattern Overview with Collar options
00:01:30 Wet Block finished pieces
00:02:58 Tighten cast on edge
00:10:30 Pattern Review and Collar Options
00:13:30 Sew shoulder seam
00:18:28 Pick up sts along Front
00:22:30 Pick up Front Neck sts from stitch holder
00:23:28 Pick up sts along other side of Front
00:25:32 Pick up first half of Back sts
00:26:47 Increase 1 st (Kfpb)
00:28:12 Pick up rem sts from Back
00:30:46 Pattern Review: Flat Panel vs. In the Round
00:32:36 In the Round: ‘Next rnd: K2tog, Knit.’
00:33:19 In the Round: Texture Pat
00:35:02 (OPTIONAL) In the Round: How to decrease to make a fitted cowl
00:41:21 Flat Panel: Seaming collar and shoulder (See Needle Knit video for full seaming of this section: https://youtu.be/a0d7poMHNK8?t=1082 )
00:42:40 In the Round: Finishing collar
00:45:40 In the Round: Seam shoulder & weave in ends.
Right Handed
Left Handed
Loom Knit Sweater Part 6: Finishing
This is it!
The end of the marathon. 26 miles down, .2 to go! The finish line is in sight.
So, what’s left?
Well, FINISHING!
The pattern instructions are few, basically sewing in the sleeves and side seams, but there are a few tricky spots to watch out for.
First, you begin stitch the sleeves along the side edge, rather than along the bind off edge. You’ll see where the selvage edge of the sleeve fits along the bind off edge of the armhole.
Next, you want to make sure that you mark the center of the sleeve and line that up with the shoulder seam of the sweater. This will ensure that your sleeve seam is smooth and not stretched or bunched up.
INSTRUCTIONS – Finishing
Sew in sleeves placing rows above markers along cast off sts of Front and Back to form square armholes. Sew side and sleeve seams. Weave in all rem tails.
Part 6 – Tutorial Videos
Part 6 – Timestamps
00:00:10 Pattern Overview and Supplies
00:00:55 TIP: Measure correct amount of yarn needed for seam
00:02:20 Pattern: ‘Sew in sleeves ….’
00:02:57 TIP: Mark center of sleeve with stitch marker
00:03:28 TIP: Correct sleeve placement to begin seaming
00:04:16 Begin sewing in sleeve
00:07:48 Turn corner of armhole
00:09:43 TIP: Using visual cues in stitch pattern to keep your seam lined up 00:12:38 TIP: How to ease the fullness to make sure your sleeve and shoulder seam line up.
00:13:35 Sew sleeve at shoulder seam
00:14:46 TIP: Tighten first half of sleeve seam
0015:45 Continue seaming to next corner
00:16:05 Turn second corner of armhole, finish and tighten seam
00:19:42 ‘Sew side and sleeve seams.’
00:20:12 TIP: How to seam ribbing
00:23:12 Begin seaming Texture Pat
00:26:28 Seam armpit area and continue onto sleeve
00:27:40 TIP: How to seam sleeve along increased edge
00:31:00 Seam sleeve cuff
00:33:55 Weave in tails
Right Handed
Left Handed
A downloadable PDF of this pattern is available in my Etsy store or from Ravelry at the links below:
Finished Loom Knit Sweater!
I hope you enjoy wearing your cozy sweater as much you enjoyed making it.
You’ve earned every relaxing winter afternoon curled up with a mug of coffee and good book that you have coming!


Barbara
Thursday 25th of April 2024
Looks like you could make a cute sleeveless sweater out of this for the Spring/Summer. Do you think that would work?
Sarah
Friday 13th of October 2023
Is there a way to make it into a child’s size
Kassandra
Saturday 12th of August 2023
I'm just curious if I'm technically knitting wrong I always seem to cast on left handed despite knitting with my right. I follow the left handed technique but use my right hand as I knit as I'm just more comfortable with the I guess weird hand set up.
Sarah
Sunday 13th of November 2022
Hello I was just wondering if there is a way to convert this into a child’s sweater
Heather England
Monday 1st of March 2021
Absolutely lovely . As I live in the UK where can I purchase a jumper loom ?