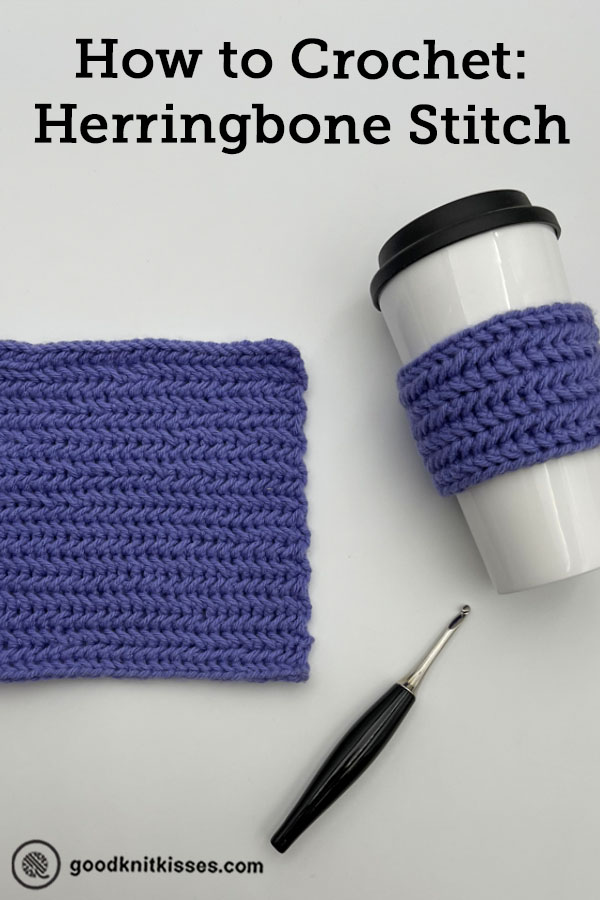
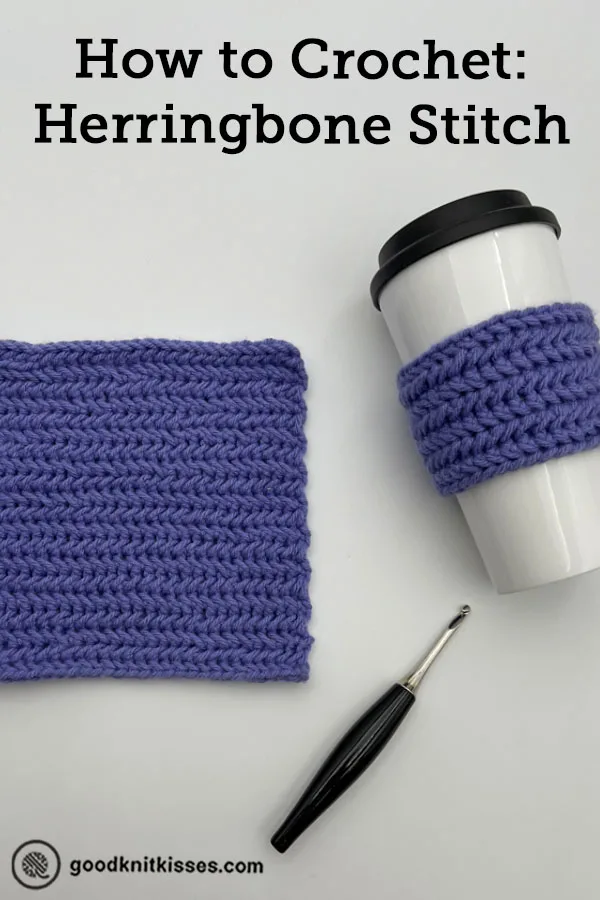
Inside: Learn to crochet the herringbone stitch pattern as a flat panel and in the round. Includes free blanket square pattern with written instructions for 2 common sizes and tutorial videos.
I am having loads of fun working up new stitch patterns and I think I’ve found one of my favorites.
The Herringbone Stitch!
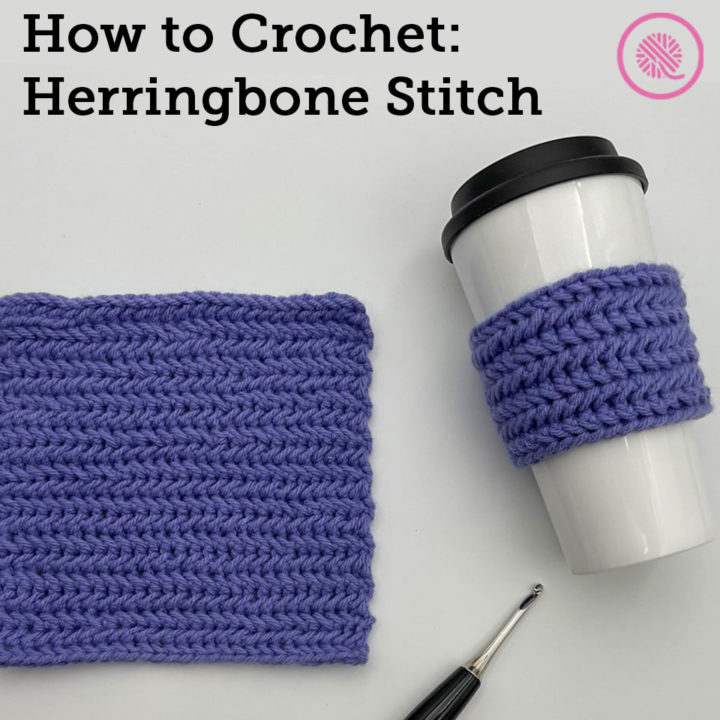
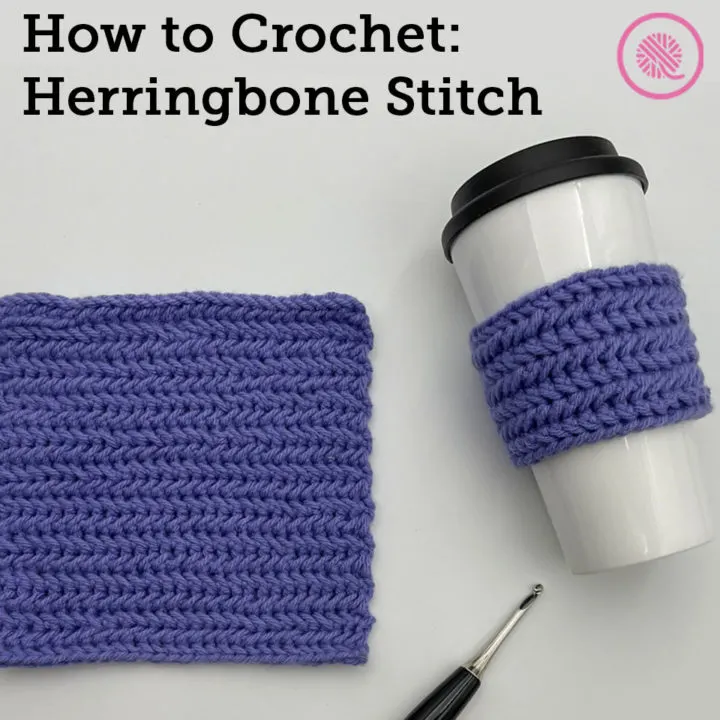
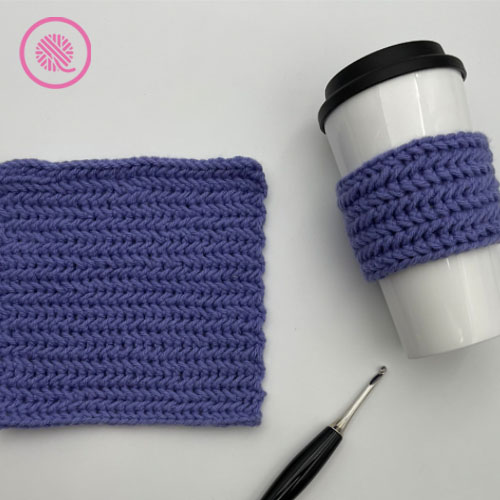
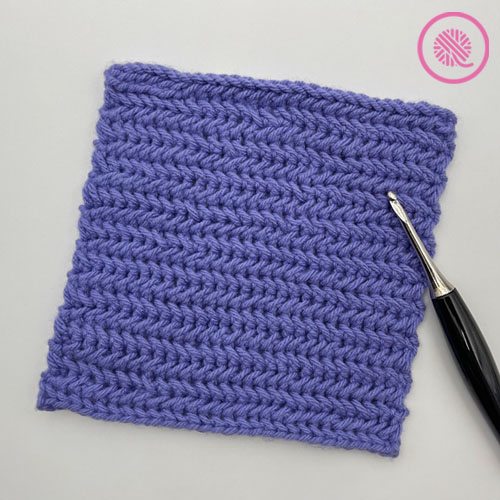
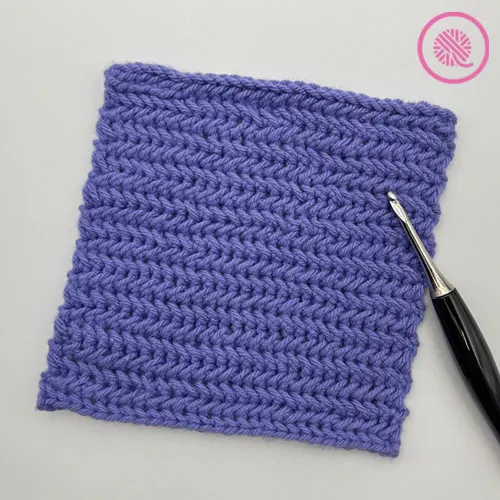
Not only is it easy to crochet the herringbone stitch, but the nested V shaped stitches create a beautiful fabric. This classic design is always in style and pairs up with other stitch patterns perfectly.
Below I’ve included instructions to crochet the herringbone stitch as either a flat panel or in the round. The Herringbone Square is an afghan block, but you could size it up or down to create a washcloth or full size blanket. The Herringbone Cozy Mug Hug is a fast project that is great gift-giving. Plus, as always, I’ve got separate videos for both techniques so be sure to scroll all the way to the bottom to get all the videos.

Herringbone Stitch Pattern Details
What do I need to crochet the herringbone stitch?
MATERIALS
(Materials list may contain affiliate links to products I used to make this project. Using these links cost you nothing, but helps support GKK.)
Yarn
Medium (#4) weight yarn
Caron One Pound (120g/ 4.2 oz, 73 meters/ 80 yd.) in color Lavender Blue used in sample.
Hook
US Size H-8 (5 mm) hook
Furls Crochet Odyssey (5 mm size H) in Black & Nickel used in sample.
Tapestry needle
Stitch marker (optional)
ABBREVIATIONS
ch = chain
Hsc = Herringbone single crochet (see notes below)
rep = repeat
Rev Hsc = Reverse herringbone single crochet (see notes below)
Rev sc = Reverse single crochet (see notes below)
sc = single crochet
st(s) = stitch(es)
If you need a refresher, be sure to check out my How to Crochet series!
GAUGE
16.5 sts x 12 rows in 4” (10 cm) in herringbone stitch
SKILL LEVEL Easy+
1. Herringbone Stitch (Flat)
One of my favorite things about using the herringbone stitch pattern in projects is that it fits perfectly with any stitch count. With a multiple of 1 stitch you’ll always be able to use it.
Imagine a sampler blanket showcasing your favorite stitch patterns with a narrow band of herringbone between the sections. Beautiful!
Or as a seamed hat with vertical columns of herringbone. (If you can’t picture that one, just sign up for my newsletter you’ll be the first to know when that pattern is done!)
But before I get ahead of myself, let’s start with a simple square. I designed the Herringbone Square in two common sizes: 7″ x 9″ rectangle for Warm Up America donations and a 12″ x 12″ square for a larger pieced blanket. If you just want to try it, out feel free to make a smaller sample by shortening your chain. The instructions are the same.
Herringbone Square


MEASUREMENTS
Option 1: 7” x 9” (18 cm x 23 cm)
Option 2: 12” x 12” (30.5 cm x 30.5 cm)
NOTES
The herringbone stitch pattern is a multiple of 1 stitch with a 2 row repeat.
Herringbone single crochet (Hsc): insert hook through vertical bar of the previous single crochet st (last bar closest to working yarn), insert into the next stitch and pull up a loop, yarn over and pull through all 3 loops on the hook. TIP: Make sure yarnover loop is pulled up to height of a full sc).
Reverse single crochet (Rev sc): bring working yarn toward the front of your work, insert hook into the first stitch from the BACK to the front (reverse of sc), yarn over, pull up a loop to the BACK, yarn over and pull through both loops on the hook.
Reverse Herringbone single crochet (Rev Hsc): insert hook through vertical bar on the BACKSIDE of the previous single crochet st (last bar closest to working yarn), insert the hook into the next stitch from BACK to front (same as reverse sc), yarn over, pull up a loop to the BACK, yarn over and pull through all 3 loops on the hook. TIP: Make sure yarn over loop is pulled up to height of a full sc).
INSTRUCTIONS
Chain 30 (51).
Row 1 (RS): Sc into the back hump of the second chain from hook, Hsc in rem sts, turn.
Row 2: Ch 1, Rev sc in first st, Rev Hsc in rem sts, turn.
Row 3: Ch 1, Sc in first st, Hsc in rem sts, turn.
Rep Rows 2-3 until piece measures 9” (12”) [23 (30.5) cm] or until desired length. Weave in tails.
Herringbone Stitch Flat Panel Tutorial Video
Select videos are available to GoodKnit Kisses YouTube members only. To get exclusive access to GKK VIP-only content, free PDF patterns, weekly Zoom meetup and more, sign in to YouTube and join as a VIP Member today! Find out more about GKK Membership HERE!
Right handed
Left handed
PIN IT!
2. Herringbone Stitch (In the Round)
While you can work the herringbone stitch in the round, it is unusual. Typically, when you work in the round you continuously work around the edge or your project in the same direction.
But when you crochet the herringbone stitch in the round you turn your work and work alternate round in the opposite direction. That means on even rounds you’ll have the INSIDE of your project facing you. It sounds a bit confusing, but once you watch the video below you’ll see what I mean.
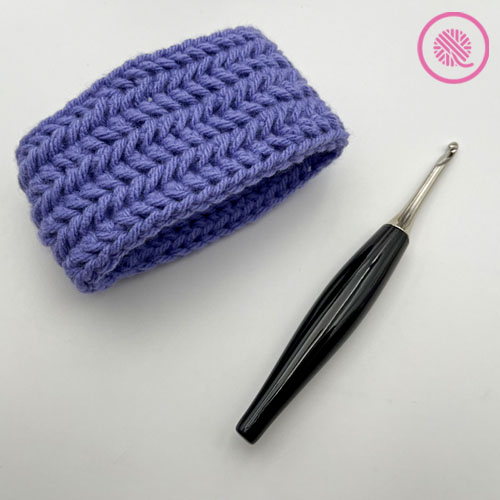
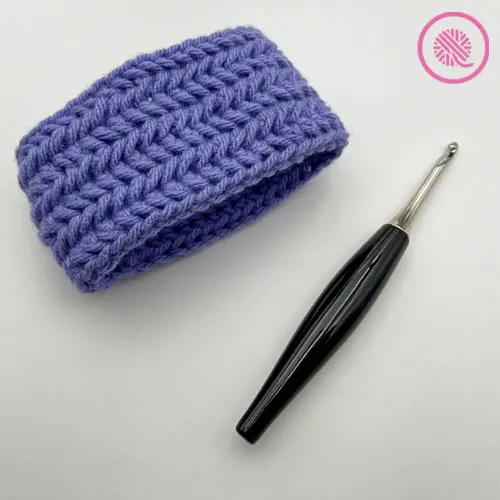
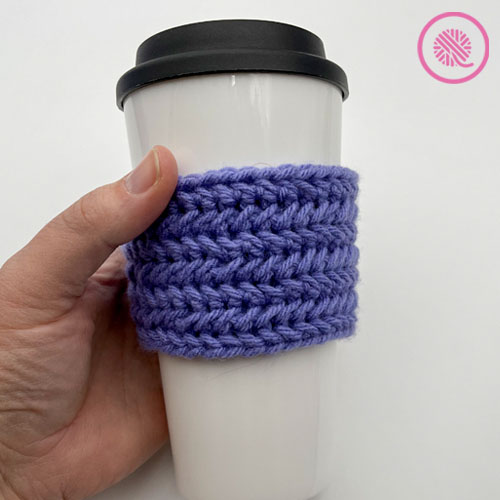
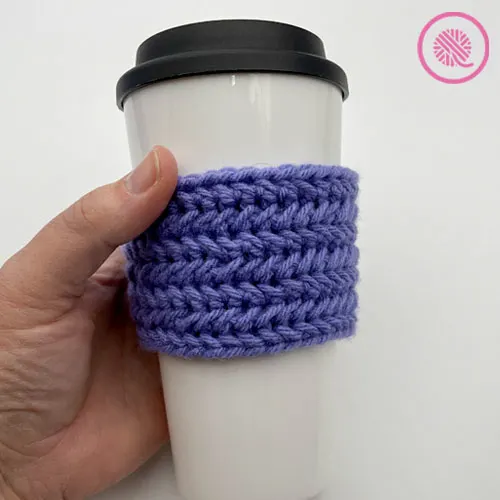
I wanted to create a small project for you to practice on. The Herringbone Cozy Mug Hug slides around travel mug or takeout cup. Once again, you’ve got the option to adjust the size of the project. You can start with a chain of any length. I made an 8″ chain and did just the first two rounds and made a bracelet. So easy!
Herringbone Cozy Mug Hug
A downloadable PDF of this pattern is available in my Etsy store and from Ravelry at the links below:MEASUREMENTS
2.5” (6.4 cm) tall x 9” (23 cm) around
NOTES
The herringbone stitch pattern is a multiple of 1 stitch with a 2 row repeat. When working this stitch pattern in the round you turn your work on alternate rounds and work from the inside.
You may find it helpful to mark the sc or Rev sc at the beginning of each round with a stitch marker. This marks the stitch you will use to join at the end of the round. (See video.)
Herringbone single crochet (Hsc): insert hook through vertical bar of the previous single crochet st (last bar closest to working yarn), insert into the next stitch and pull up a loop, yarn over and pull through all 3 loops on the hook. TIP: Make sure yarnover loop is pulled up to height of a full sc).
Reverse single crochet (Rev sc): bring working yarn toward the front of your work, insert hook into the first stitch from the BACK to the front (reverse of sc), yarn over, pull up a loop to the BACK, yarn over and pull through both loops on the hook.
Reverse Herringbone single crochet (Rev Hsc): insert hook through vertical bar on the BACKSIDE of the previous single crochet st (last bar closest to working yarn), insert the hook into the next stitch from BACK to front (same as reverse sc), yarn over, pull up a loop to the BACK, yarn over and pull through all 3 loops on the hook. TIP: Make sure yarn over loop is pulled up to height of a full sc).
INSTRUCTIONS
Chain 41 and connect in the round.
Rnd 1 (RS): Ch1, sc into the back hump of the first chain. Hsc across to last ch. Slip stitch to close round by inserting hook into last bar and into top of 1st sc, yarnover and pull through all loops. Turn with yarn to inside.
Rnd 2: Ch 1, Rev sc into next st. Rev Hsc across to last st. Slip stitch to close round by inserting hook into last bar from BACK and into top of 1st Rev sc from BACK, yarnover and pull through all loops. Turn with yarn to back.
Rnd 3: Ch 1, Sc. Hsc across to last st. Slip stitch to close round by inserting hook into last bar and into top of 1st sc, yarnover and pull through all loops. Turn with yarn to inside.
Rep Rnds 2-3 until piece measures 2.5” (6.4 cm) or until desired length. Weave in tails.
Herringbone Stitch In the Round Tutorial Video
Select videos are available to GoodKnit Kisses YouTube members only. To get exclusive access to GKK VIP-only content, free PDF patterns, weekly Zoom meetup and more, sign in to YouTube and join as a VIP Member today! Find out more about GKK Membership HERE!
Michelle
Thursday 10th of November 2022
This is different from Bella Coco’s tutorial. She doesn’t go through the back post. I’m confused as to which way is correct?
Miriam
Saturday 20th of November 2021
I followed your video and it seems as if I am losing stitches. I started with 49 chains and by the end of Row 3 I only had 44 stitches. And even at the end of Row 1 I only had 46 stitches. Am I doing something wrong?