
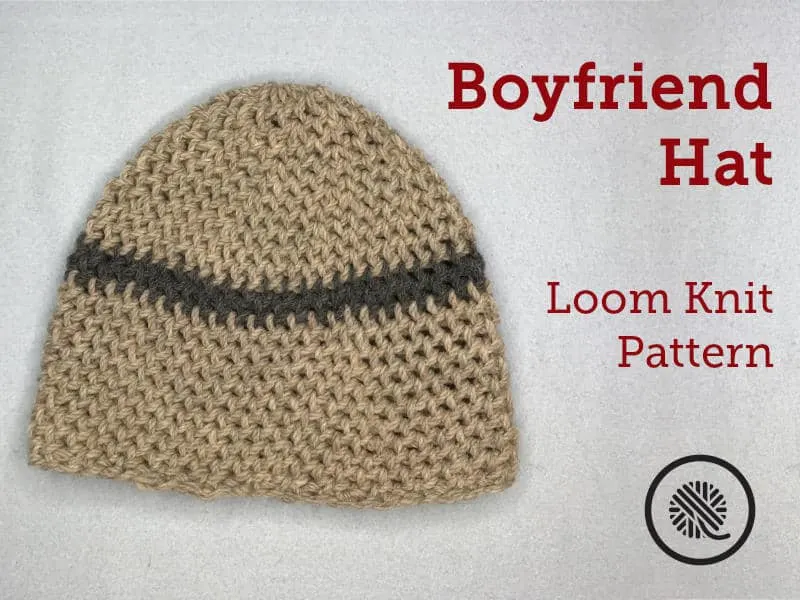
Inside: Free loom knit boyfriend hat pattern and tutorial videos. Includes designs for solid color or with added accent stripe.
“What did you do with my hat?”
This is that hat.
The one you always “borrow” from your boyfriend.
And why not? It’s the perfect fitted beanie but with a little extra room so it doesn’t ruin your hair. I’m here to help you keep the peace in your relationship by giving you a pattern that includes sizes for both you and your boyfriend so you don’t have to share.
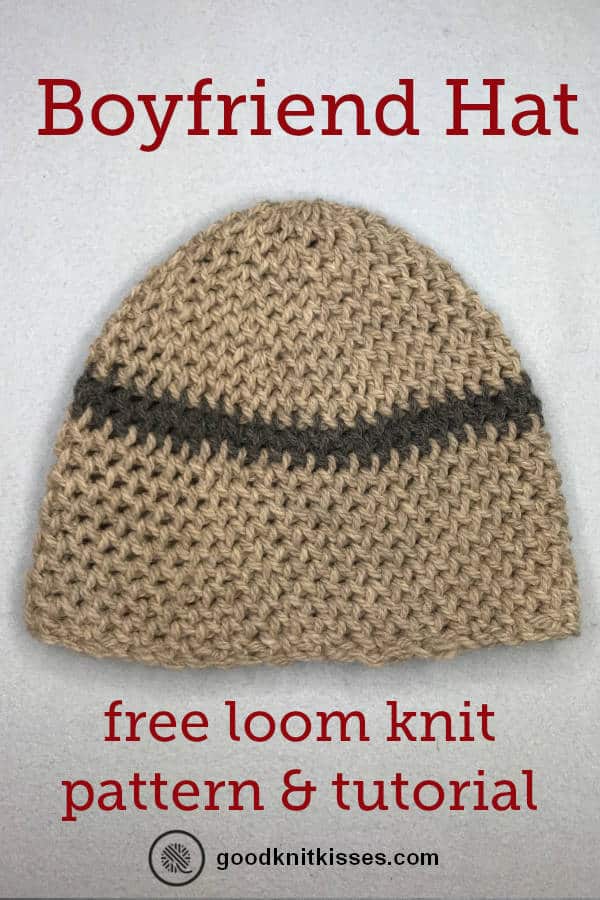
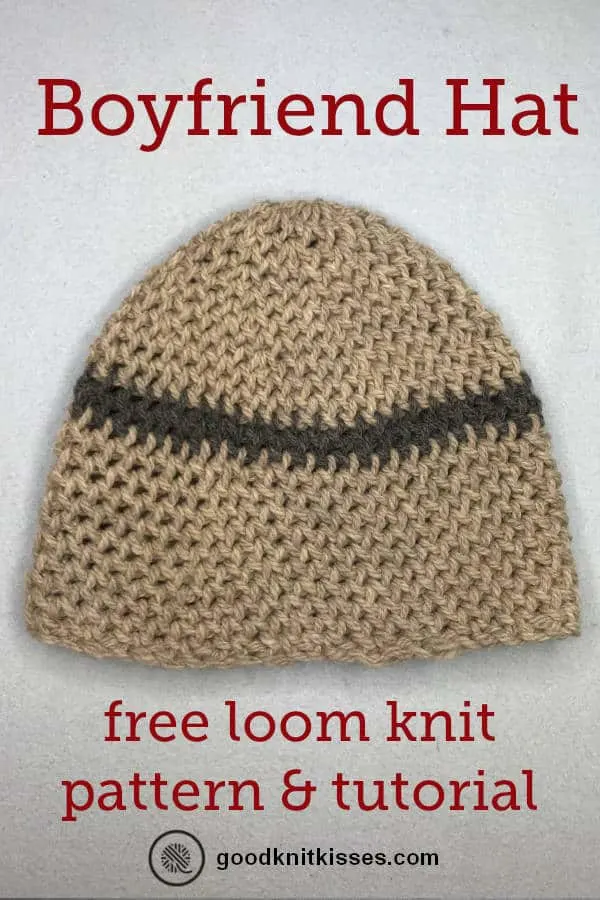
Knit in the round using the diamond lace stitch, the loom knit Boyfriend Hat has the look of crocheted mesh. I even have tips to resize on a small gauge (SG) loom.
You’re going to love the simple contrast stripe and rounded skull cap crown on this reversible beanie. Or work the entire project with a color changing yarn for a unique hat every time.
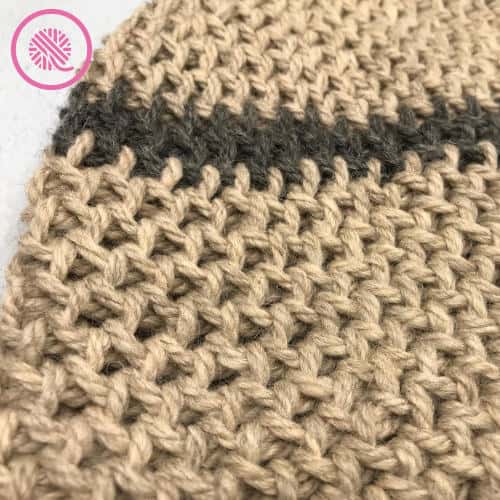
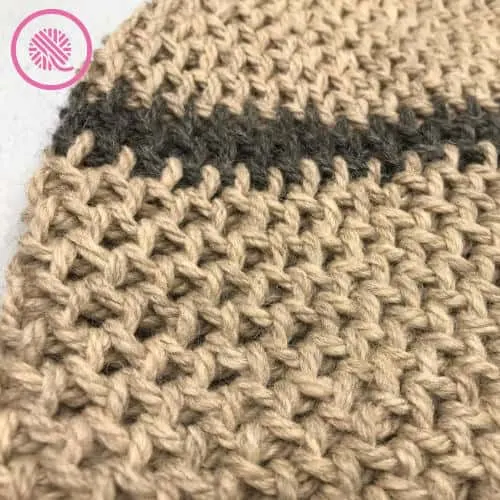
This intermediate level pattern includes the unique diamond lace stitch. This mock crochet stitch has the texture of crochet, but the ease of loom knitting.
I have loads of videos organized into playlists to walk you through this pattern. Each set of videos includes:
- Chain Cast On
- Diamond Lace Stitch
- Shape the Top in Pattern
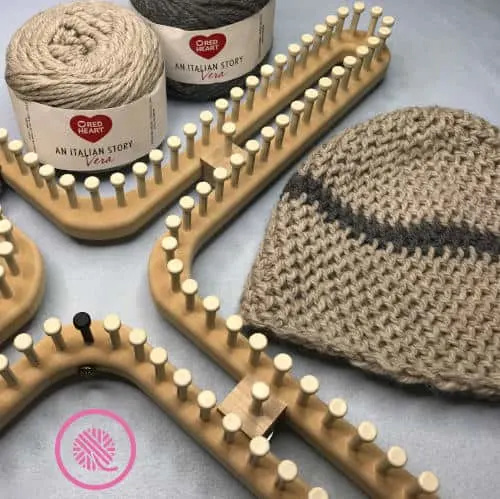
One playlist shows you how to work the pattern on the CinDWood X Looms and the other shows the hat on the KB Looms All N One. Playlists include videos showing the project worked both clockwise and counterclockwise.
If you want to try this project on knitting needles Click HERE!
Loom Knit Boyfriend Hat Pattern
by Kristen Mangus
An ad-free downloadable PDF of this pattern is available for purchase in my GoodKnit Kisses online store, Etsy or Ravelry at the links below:


Links below are affiliate links to products I used to create this pattern/video. Clicking the links costs you nothing, but helps support GoodKnit Kisses.
MATERIALS
Yarn: Red Heart Italian Story Vera (3.5 oz/100 g; 135 yds/123 m)
Contrast A -Color Latte used in sample.
Contrast B- Color Pietra used in sample.
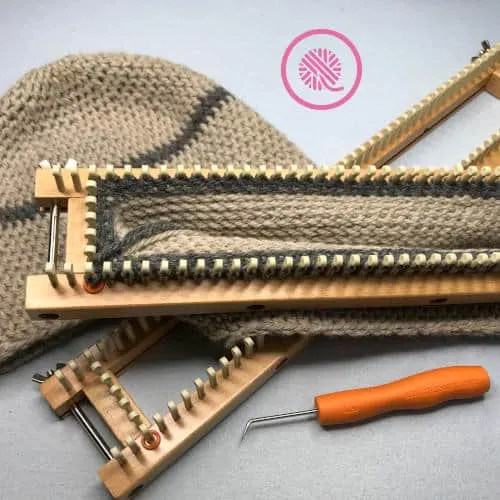
Loom: 5/8” Large gauge LG loom with at least 48 (56) pegs.
CinDwood Universal X Loom used in sample; 104 or 144 peg loom
Notions
Tapestry needle
1 Stitch marker to mark beginning of round
7 stitch markers in different color than beginning marker

ABBREVIATIONS
Approx = Approximate(ly)
Beg = Begin(ning)
DLS = Diamond Lace Stitch
EK = Ewrap knit
K = Knit; U-wrap knit preferred
P = Purl
PM = Place Marker
Rep = Repeat
Rnd(s) = Round(s)
Sl = slip stitch; skip peg with working yarn at the back
St(s) = Stitch(es)
GAUGE
5.25 sts x 6 rows in 2” (5 cm) in diamond lace stitch pattern
SKILL LEVEL
Intermediate
SIZES
Women (Men)
MEASUREMENTS (stretchy)
Women: 18.25” circumference x 8.5” high [46.3 cm x 21.5 cm]
(Men: 21.25” circumference x 9.5” high [54 cm x 24 cm])
NOTES
Beanie is worked in the round. Instructions written for working clockwise (to the left). Please note any directional changes if you choose to work the pattern counterclockwise.
For alternate sizes cast on a multiple of 8 stitches.
The crown/top of this hat uses a unique method to decrease due to the diamond lace stitch pattern. The extra stitch markers are essential to maintaining your stitch count while decreasing. See video tutorials below for details.
Optional crown: Beginners may choose to work a standard gathered bind off instead of the decreased crown. Note that this will change the shape of the hat.
Alternate loom: You can make this hat in a smaller gauge using the CindWood Universal X Loom in ⅜” small gauge (SG). With yarn listed above and small gauge SG ⅜” loom (or size to obtain gauge) I get 3.5 sts per inch. I recommend a cast on of 64 (80). NOTE: This requires 3(4) additional decrease rounds to shape top/crown.

Notes about the Diamond Lace Stitch (DLS):
- Multiple of 2 stitches. Pairs of pegs get worked together wrapping the pegs in a figure 8; this stitch is sometimes called the Figure 8 stitch.
- Each stitch on the round gets worked twice making it twice the height of a standard stockinette row. This is what makes it look crocheted!
INSTRUCTIONS
With contrast A, cast on 48 (56), PM on peg 1 and connect in the round. (TIP: Chain cast on and place last loop on peg 2 so that last chain falls between last peg and peg 1; knit over peg 1 and 2. Work peg 1 on Rnd 1)
Brim:
Foundation Rnd: *K, p. Rep from * to end of rnd.
Rnd 1: *Sl, EK, EK previous slipped stitch and knit over both. Rep from * to end of round until working yarn is coming from last peg and peg 1 has been worked 1 time again. This is the DLS stitch.
Rep Rnd 1 for Diamond Lace Stitch/DLS pattern until approx 3 ½ (4) inches in length; Approx 9 (11) more times. Cut A leaving 6 inch tail.
Accent Band [Optional – If using one color only, work 2 more DLS rnds in contrast A]:
Rnd 2: With B join at 2nd peg by repeating Rnd 1 instructions for DLS.
Rnd 3: Repeat Rnd 1 in contrast B. Cut B leaving a 6 inch tail.
Remaining Pattern:
Rnd 4: With A repeat Rnd 1.
Rep Rnd 1 two (four) more times or until length reaches approx 5 (5 ½ ) inches.
Shape Top:
Divide loom into 8 equal sections; you will have 6(7) pegs in each section. [If you are using a different loom, dividing into 8 equal sections the instructions below can be repeated]. Place markers on the 1st peg in each section making sure the beginning marker looks different so you can tell it apart from the rest.
Rnd 1: Work peg 1 and 2 in DLS; working yarn ends on peg 1. Pick up peg 2 and place peg 3 st on peg 2; place peg 2 st back down. Move remaining stitches inward including peg 1 for the next section; Move marker with peg 1 to its new place. Continue working DLS on remaining pegs in section working two sts over 1 on peg 2.
Next section- *Work peg 1 and 2 in DLS; working yarn ends on peg 1. Pick up peg 2 and place peg 3 st on peg 2; place peg 2 st back down and pull slack from peg 2 that was recently worked. Move remaining stitches inward including peg 1 for the next section; Move marker with peg 1 to its new place. Continue working DLS on remaining pegs in section working two sts over 1 on peg 2.
Repeat from * until remaining 6 sections have been decreased [40 (48) sts remain].
Rnd 2 and alternate rnds: Repeat DLS pattern around.
Rnd 3: Rep Rnd 1 [32 (40) sts remain after all decreases].
Rnd 5: Rep Rnd 1 [24 (32) sts remain after all decreases].
Rnd 7: Rep Rnd 1 [16 (24) sts remain after all decreases].
Rnd 8: Rep DLS pattern around. For Women’s size follow finishing directions.
For Men’s size:
Rnd 9: Rep Rnd 1 [0 (16) sts remain after all decreases].
Finishing:
Break yarn, leaving a long end. Thread end through rem sts and draw up tightly. Fasten securely. Weave in all tails in pattern and block.
Jay
Sunday 5th of December 2021
How would you finish this off on a fixed round loom? Thanks
Kathy
Friday 5th of June 2020
Hello my name is Kathy and I have been following for years... I’m fixen to be 61 yrs old this month and I’m pretty much a picture reader.. Can’t comprehend too much with out pictures.. It seems to me that any loom bigger then the green loom ( hat wise) would be really a big hat for even my 2 grown son... They are pretty y’all and just big bone but not big and obese, So to make this hat or a Cloche hat, What size loom should I use, That yellow one is just too big.. Thank you & Stay Safe!!