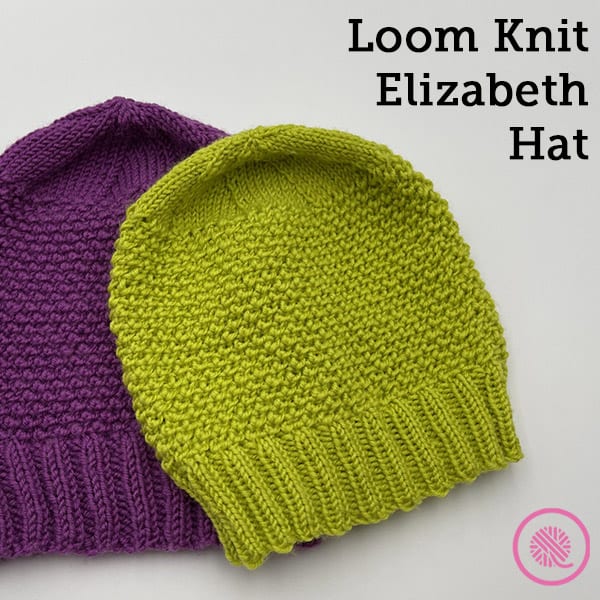

Inside: Loom knit Elizabeth Hat pattern written for sizes Toddler to Adult Large. Includes links to tutorial videos.
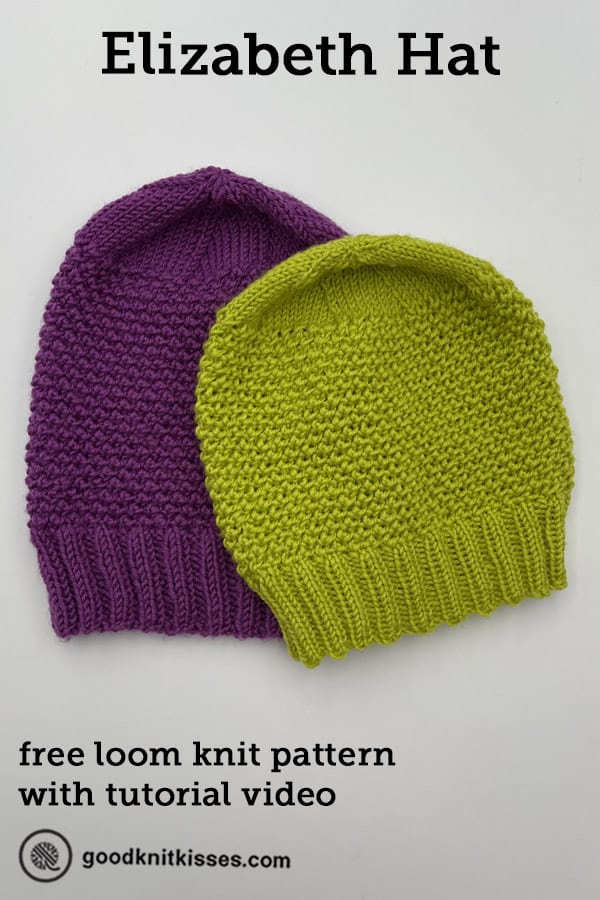
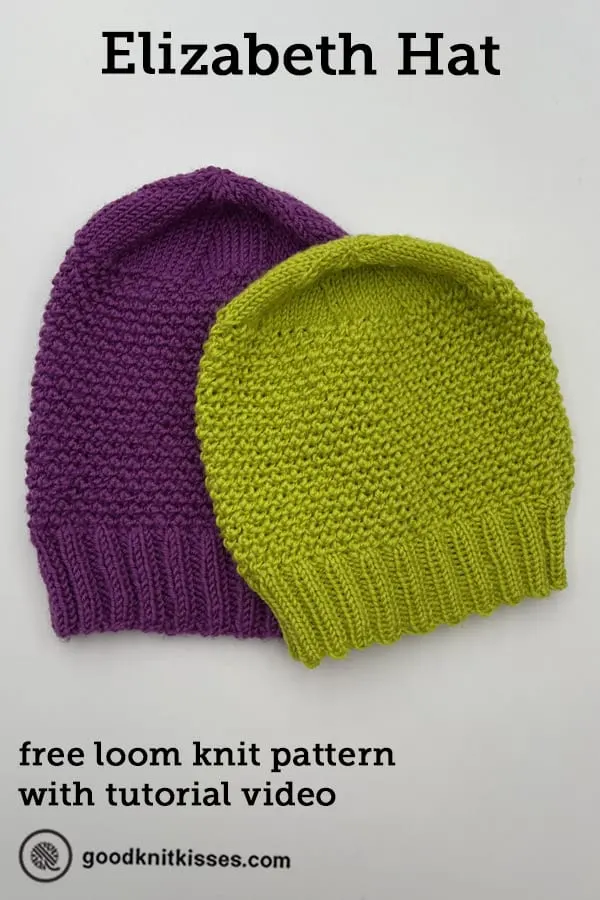
I was working on this hat pattern a few months ago. It features the Reverse Edelweiss Stitch, the happy accident I created when converting the Edelweiss stitch to the loom.
Recently, I found out one of our fellow loom knitters, Elizabeth, passed away unexpectedly. She was a vibrant part of our loom knitting community on Facebook and YouTube. She was always an encourager and helper to her fellow crafters. Elizabeth added so much to our group that I wanted to honor her memory by naming this hat after her.
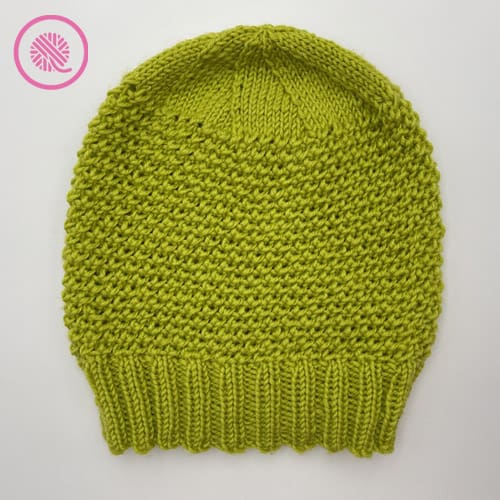

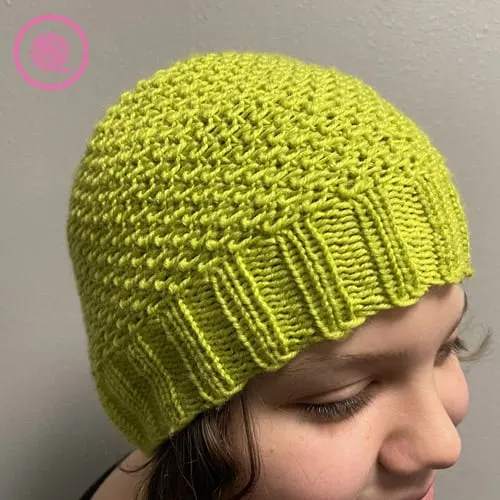
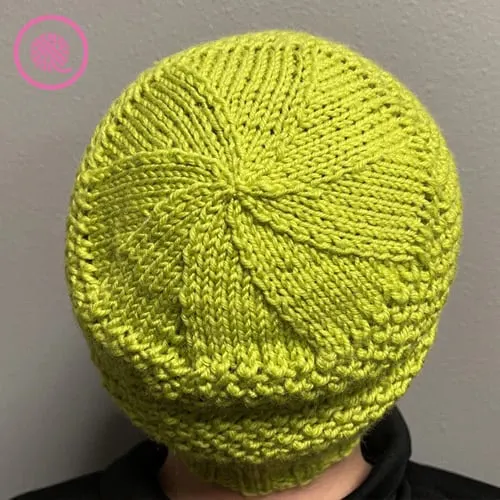
The loom knit Elizabeth hat is a fitted beanie and features a ribbed brim, textured body of the reverse Edelweiss stitch and decreased crown. This breathable, comfy hat is sure to be loved by everyone in your family. Or make a few to donate to your community as chemo hats. Sizes include Toddler to Adult Large.
The decreased crown shapes the top of the hat for a better fit. I’ve included specific instructions for shaping the top with the KB Flexee Loom, other adjustable looms and non-adjustable (fixed size) looms. While this pattern is written for a specific gauge the shaping technique may be used with any loom gauge or hat pattern that uses a multiple of 6 or 8 stitches.
Loom Knit Elizabeth Hat
By Kristen Mangus
A downloadable PDF of this pattern is available in my Etsy store and from Ravelry at the links below:


MATERIALS
Links below are affiliate links to products I used to create this pattern/video. Clicking the links costs you nothing, but helps support GoodKnit Kisses.
Yarn
Medium (#4) weight yarn
Red Heart Chic Sheep (3.5 oz/100 g; 186 yds/170 m) 1 ball.
Color Green Tea used in sample.
Loom
Small Gauge (3/8”) loom with 64 (72, 80, 88, 96) pegs. (or any multiple of 8)
Flexee Loom Skinny used in sample.
Other adjustable looms include: Knitting Board All In One loom, Cindwood X Loom, Kiss Looms Small Gauge Loom.
Possible fixed peg looms for sizes Toddler, Child & Small include: Knitting Board Premium Round Looms.
Notions
Tapestry needle to weave in ends
Crochet hook (for cast on; small enough for between pegs)
8 Stitch markers
ABBREVIATIONS
Approx = approximately
Beg = Beginning
Cont = Continue
K = Uwrap Knit
K2tog = True knit two stitches together
P = Purl
P2tog = Purl two stitches together
Pat = Pattern
Rep = Repeat
Rnd = Round
St(s) = Stitch(es)
GAUGE
20 sts x 30 rows in 4” (10 cm) in Reverse Edelweiss st.
CHECK YOUR GAUGE. Change loom peg count to obtain correct size.
SKILL LEVEL Easy+
SIZES
Toddler (Child, Small, Medium, Large)
MEASUREMENTS
Circumference 12.75 (14.5, 16, 17.5, 19.25) inches and [32.25 (37, 40.75, 44.5, 49) cm and 7.5 (8, 8.5, 9, 9.5) inches [19 (20.5, 21.5, 23, 24) cm] in height.

NOTES
This hat is very stretchy with 3 inches [7.5 cm] of positive ease. While the finished hat may be slightly smaller than a regular hat it is designed to stretch to fit.
Chain cast on is listed in pattern instructions, but you may also use the double ewrap or longtail cast on if you prefer.
Hat is worked in the round. For right handed knitters work from right to left (clockwise); left handed knitters should work in the opposite direction (counter clockwise).
Uwrap knit stitches are used for all stitches denoted as knit or K. For Rows 2 & 4 of the Reverse Edelweiss stitch pattern use the true knit stitch when working the K2tog. Be sure to work loosely to achieve the correct gauge. Tight knitters may be able to use the true knit stitch throughout the pattern. Ewrap is not recommended for this project.
In this pattern the Reverse Edelweiss stitch pattern works 2 stitches together more than once on the same peg to create the stitch. This stitch is worked over 2 pegs.
K2tog, p2tog in same st: Working in pairs, move st from Peg 1 to Peg 2. True knit both stitches together leaving old stitches on Peg 2 and place new knit stitch on Peg 1. On Peg 2, in same two stitches, purl both sts together removing old sts from peg and placing new st on Peg 2. (Note if too tight to take the two previous stitches off the loom then use tool to take off.).
This pattern can be worked on either a fixed peg loom or an adjustable loom with a slider to decrease the number of pegs in use. Please note the special instructions for non-adjustable (fixed peg) looms after Round 7.
For shaping the top of the hat detailed Flexee Loom instructions are listed first, followed by instructions for other adjustable and non-adjustable looms. (See my Ultimate Loom Knit Decreased Crown tutorial video for additional help. NOTE: The stitch counts and where to place your stitch markers will be different than the ones in the video, but the method is the same.)
INSTRUCTIONS
Cast on 64 (72, 80, 88, 96) sts and join in the round. Place marker on Peg 1 to mark beginning of round.
Rnd 1: *K2. P2. Rep from * to end of rnd.
Rep Rnd 1 for 1.5 (1.5, 1.5, 2, 2) inches [4 (4, 4, 5, 5) cm].
NOTE: For longer brim rep Rnd 1 until desired length.
Reverse Edelweiss Stitch
Rnd 1: Knit all.
Rnd 2: K1, *k2tog, p2tog in same st*. Repeat from * to * until 1 st remains. Place last stitch on marked peg. K2tog, p2tog in same st.
Rnd 3: Knit all. (NOTE: The first st is already knit when finishing Rnd 2.)
Rnd 4: *K2tog, p2tog in same st*. Repeat from * to *, to the end.
Rep Rnds 1-4 in Reverse Edelweiss st until work from beg measures approx 5.5 (6, 6.5, 7, 7.5) inches [14 (15, 16.5, 18, 19) cm].
Non Adjustable looms only:
Continue to work Reverse Edelweiss stitch pattern for an additional 1” [2.5 cm] then proceed to SHAPE TOP (Adjustable and non-adjustable looms) working Rnds 1-7 only.

SHAPE TOP (Flexee Loom):
(See video tutorial for example.)
DEC = Move peg 2 to peg 1 and knit together.
Starting at the beginning of the round place a stitch marker every 8 (9, 10, 11, 12) pegs. As you work the decreases be sure to move the stitch marker as you shift stitches around your loom.
Rnd 1: *DEC. Knit 6 (7, 8, 9, 10) placing each st on empty peg. DEC and move to empty peg. Remove empty loom link. Knit 6 (7, 8, 9, 10). Rep from * around. 56 (64, 72, 80, 88) sts.
Rnd 2 and alt rnds: Knit.
Rnd 3: *DEC. Knit 5 (6, 7, 8, 9) placing each st on empty peg. DEC and move to empty peg. Remove empty loom link. Knit 5 (6, 7, 8, 9). Rep from * around. 48 (56, 64, 72, 80) sts.
Rnd 5: *DEC. Knit 4, (5, 6, 7, 8) placing each st on empty peg. DEC and move to empty peg. Remove empty loom link. Knit 4, (5, 6, 7, 8). Rep from * around. 40 (48, 56, 64, 72) sts.
Rnd 7: *DEC. Knit 3 (4, 5, 6, 7) placing each st on empty peg. DEC and move to empty peg. Remove empty loom link. Knit 3 (4, 5, 6, 7). Rep from * around. 32 (40, 48, 56, 64) sts.
Rnd 9: *DEC. Knit 2 (3, 4, 5, 6) placing each st on empty peg. DEC and move to empty peg. Remove empty loom link. Knit 2 (3, 4, 5, 6). Rep from * around. 24 (32, 40, 48, 56) sts.
Rnd 11: *DEC. Knit 1 (2, 3, 4, 5) placing each st on empty peg. DEC and move to empty peg. Remove empty loom link. Knit 1 (2, 3, 4, 5). Rep from * around. 16 (24, 32, 40, 48) sts.
Rnd 13: *DEC. Knit 0 (1, 2, 3, 4) placing each st on empty peg. DEC and move to empty peg. Remove empty loom link. Knit 0 (1, 2, 3, 4). Rep from * around. 8 (16, 24, 32, 40) sts. [Toddler Size break yarn leaving a long tail and continue with FINISHING below.]
Rnd 15: *DEC. Knit X (0, 1, 2, 3) placing each st on empty peg. DEC and move to empty peg. Remove empty loom link. Knit X (0, 1, 2, 3). Rep from * around. X (8, 16, 24, 32) sts. [Child Size break yarn leaving a long tail and continue with FINISHING below.]
Rnd 17: *DEC. Knit X (X, 0, 1, 2) placing each st on empty peg. DEC and move to empty peg. Remove empty loom link. Knit X (X, 0, 1, 2). Rep from * around. X (X, 8, 16, 24) sts. [Small Size break yarn leaving a long tail and continue with FINISHING below.]
Rnd 19: *DEC. Knit X (X, X, 0, 1) placing each st on empty peg. DEC and move to empty peg. Remove empty loom link. Knit X (X, X, 0, 1). Rep from * around. X (X, X, 8, 16) sts. [Medium Size break yarn leaving a long tail and continue with FINISHING below.]
Rnd 21: *DEC placing st on empty peg. DEC and move to empty peg. Remove empty loom link. Rep from * around. X (X, X, X, 8) sts. [Large Size break yarn leaving a long tail and continue with FINISHING below.]
SHAPE TOP (Adjustable and non-adjustable looms):
Starting at the beginning of the round place a stitch marker every 8 (9, 10, 11, 12) pegs. As you work the decreases be sure to move the stitch marker as you shift stitches around your loom.
Rnd 1: *Knit 6 (7, 8, 9, 10), K2tog. Rep from * around. 56 (64, 72, 80, 88) sts.
Rnd 2 and alt rnds: Knit.
Rnd 3: *Knit 5 (6, 7, 8, 9), K2tog. Rep from * around. 48 (56, 64, 72, 80) sts.
Rnd 5: *Knit 4, (5, 6, 7, 8), K2tog. Rep from * around. 40 (48, 56, 64, 72) sts.
Rnd 7: *Knit 3 (4, 5, 6, 7), K2tog. Rep from * around. 32 (40, 48, 56, 64) sts.
If working on an adjustable loom cont in pat as written.
If your loom is NOT adjustable knit one more round and continue to FINISHING below.
Rnd 9: *Knit 2 (3, 4, 5, 6), K2tog. Rep from * around. 24 (32, 40, 48, 56) sts.
Rnd 11: *Knit 1 (2, 3, 4, 5), K2tog. Rep from * around. 16 (24, 32, 40, 48) sts.
Rnd 13: *Knit 0 (1, 2, 3, 4), K2tog. Rep from * around. 8 (16, 24, 32, 40) sts. [Toddler Size break yarn leaving a long tail and continue with FINISHING below.]
Rnd 15: *Knit X (0, 1, 2, 3), K2tog. Rep from * around. X (8, 16, 24, 32) sts. [Child Size break yarn leaving a long tail and continue with FINISHING below.]
Rnd 17: *Knit X (X, 0, 1, 2), K2tog. Rep from * around. X (X, 8, 16, 24) sts. [Small Size break yarn leaving a long tail and continue with FINISHING below.]
Rnd 19: *Knit X (X, X, 0, 1), K2tog. Rep from * around. X (X, X, 8, 16) sts. [Medium Size break yarn leaving a long tail and continue with FINISHING below.]
Rnd 21: *K2tog. Rep from * around. X (X, X, X, 8) sts. [Large Size break yarn leaving a long tail and continue with FINISHING below.]
FINISHING
Thread end through rem sts and draw up tightly. Fasten securely. Weave in tails.
PIN IT!
Loom Knit Elizabeth Hat Video Tutorials
If any of the videos below do not show they may be restricted to GoodKnit Kisses YouTube members only. Find out more about GKK Membership HERE!
The following tutorial videos walk you through what you need to know to make this pattern. The first video shows the stitch pattern. I recommend watching the entire video so you get all the tips and tricks, but if you want to jump right to the part you need fast forward to minute 07:45.
Reverse Edelweiss Stitch Pattern
[embedyt] https://www.youtube.com/watch?v=s6ADtIYkAOY[/embedyt]
Decreased Crown (Flexee Loom) Right handed
[embedyt] https://www.youtube.com/watch?v=VZ921KVSW2Q [/embedyt]
Decreased Crown (Flexee Loom) Left handed
[embedyt] https://www.youtube.com/watch?v=V2_2j0hQG4Y[/embedyt]
Decreased Crown (Other looms)
[embedyt] https://www.youtube.com/watch?v=yoWWHJJMOXs[/embedyt]
Tammy Dorris
Wednesday 26th of May 2021
The video for the stitch is for both flat & round. I just want to watch the round part. Do you know what the time code is for that part? Or is another video for just the round version?
Sharvari
Friday 21st of May 2021
Can I make this on a 5/8 th gauge loom?