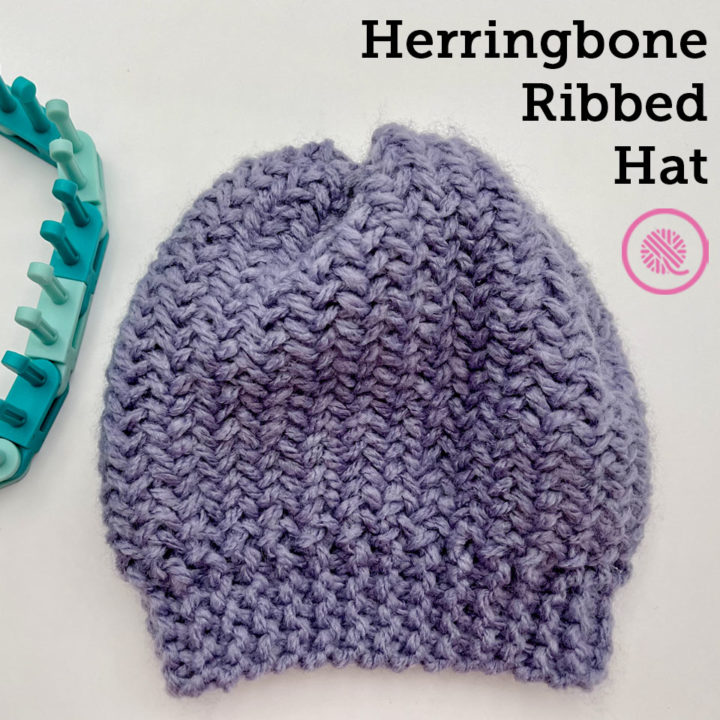

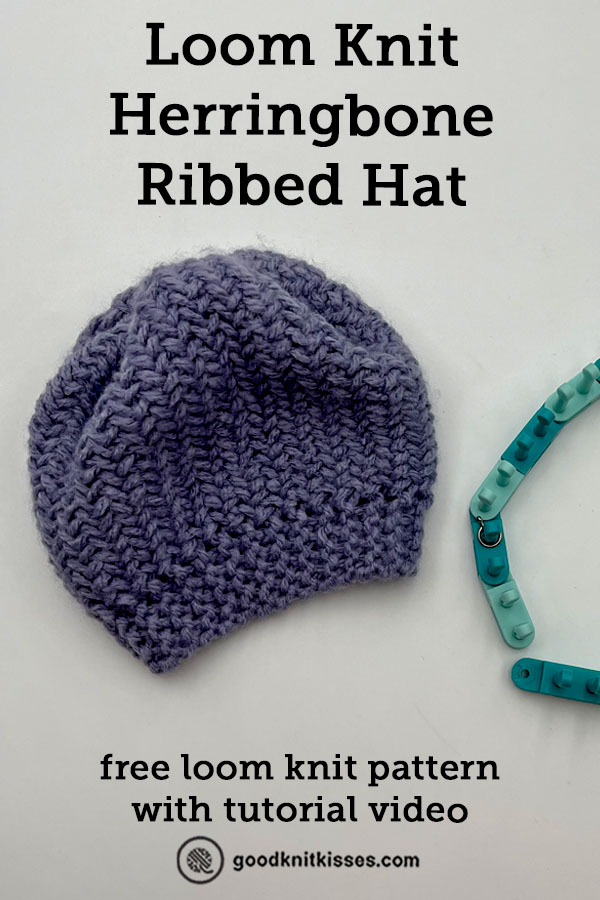
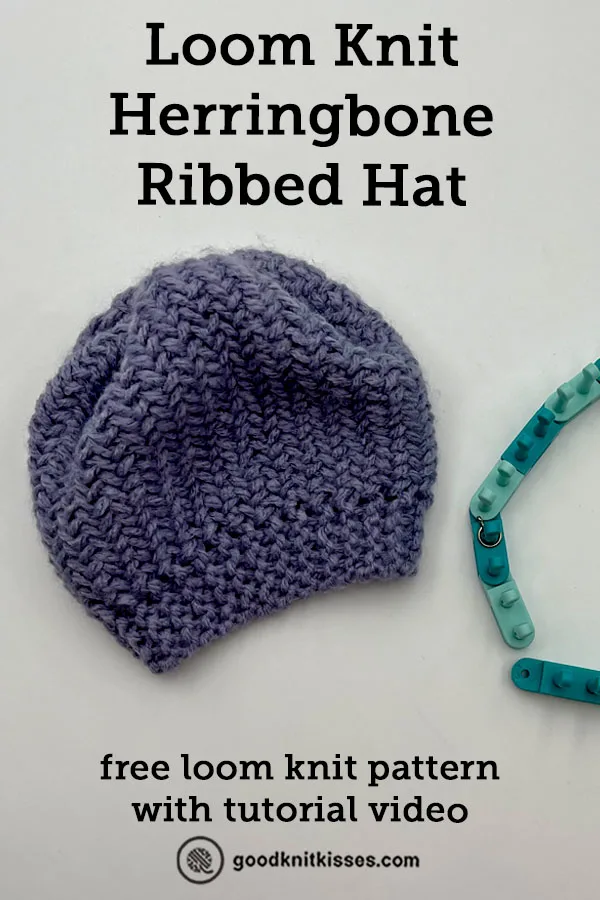
Inside: Learn to loom knit the Vertical Herringbone Ribbed Hat with this free pattern and tutorial video. Available in sizes Toddler, Child, Small, Medium, and Large.
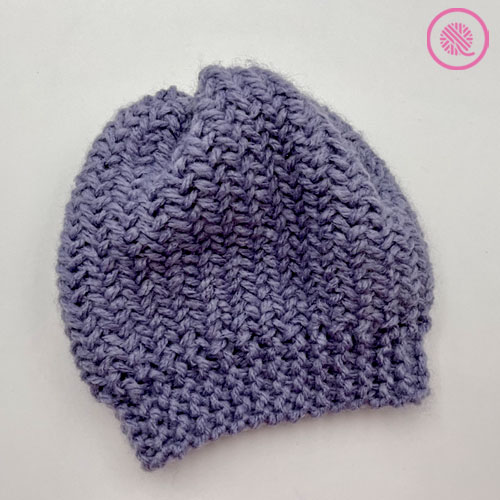
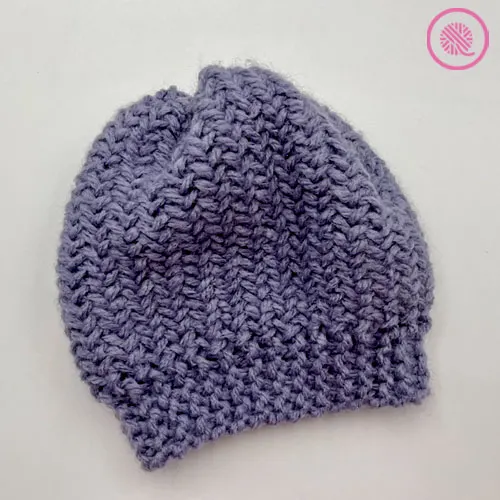
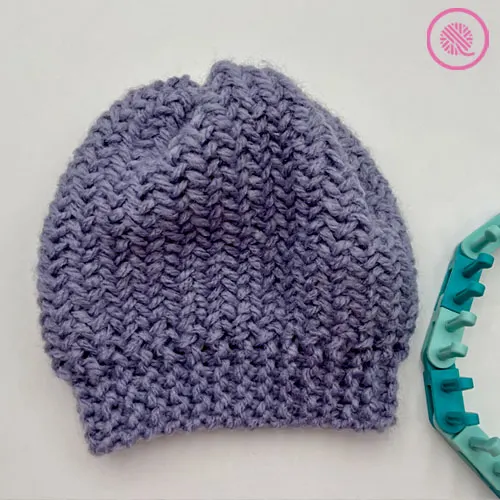
The Vertical Herringbone Ribbed Hat makes a warm, thick hat perfect for the coldest weather. It features a ribbed brim, vertical columns of the iconic herringbone stitch and a drawstring crown. This hat is loom knit side to side as a flat panel then seamed.
Pattern includes written instructions for 5 sizes of hats from Toddler to Adult and links to fully captioned tutorial videos for both left and right handed loom knitters.
Vertical Herringbone Ribbed Hats
By Kristen Mangus
A downloadable PDF of this pattern is available in my Etsy store and from Ravelry at the links below:


MATERIALS
(Materials list may contain affiliate links to products I used to make this project. Using these links costs you nothing, but helps support GKK.)
Yarn
Bulky (#5) weight yarn
Bernat Bounce Back (225g/ 7.9oz, 261 meters/ 285 yd.) in color Lilac used in sample.
Loom
⅝” large gauge (LG) loom with 29 (33, 36, 40, 44) pegs.
KB Flexee Loom Chunky used in sample.
ABBREVIATIONS
EK = E wrap knit
K = U wrap knit
P = Purl
Rep = Repeat
St(s) = Stitch(es)
For a refresher on loom knitting basics see the blog posts below to get started:
13 Questions for Beginner Loom Knitters
How to Loom Knit Basics
How to Loom Knit Basic Stitch Patterns
How to Loom Knit in the Round
GAUGE
15.3 sts x 14.25 rows in 4” in herringbone stitch pattern
SKILL LEVEL Easy+
MEASUREMENTS
Toddler: 7.5” x 17” circumference (19 x 43 cm)
Child: 8.5” x 18” circumference (21.5 x 45.5 cm)
Small: 9.5” x 19.5” circumference (24 x 49.5 cm)
Medium: 10.5” x 21” circumference (26.5 x 53.5 cm)
Large: 11.5” x 22” circumference (29 x 56 cm)
SIZES
Toddler (Child, Small, Medium, Large)
NOTES
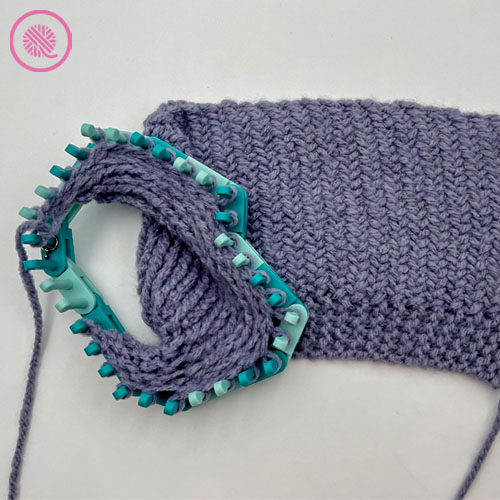
This hat is worked side to side as a flat panel, bound off and then seamed.
Cast on: I recommend the chain, long tail or true cable cast ons for this stitch pattern. I used the chain cast on for my sample.
Brim: Since the hat is worked sideways the brim is worked in garter stitch at the end of a row and not in a typical ribbing stitch. On the brim, knit stitches must be E wrap knit to create the height needed for an even ribbing.
Knit stitches: You must not change the knit stitches to all E wrap in this stitch pattern. Row 1 needs to be U wrap (or flat) knit and Row 2 must use only E wrap knit in order for the herringbone stitch pattern to show properly.

INSTRUCTIONS
Loom Set Up:
Flexee Loom: Link first 6 (8, 8, 8, 8) pegs in the same color of link together. These pegs are the brim sts for your hat.
Other looms: Place stitch marker on Peg 6 (8, 8, 8, 8). These sts at the end of the row are your brim stitches.
Cast on 29 (33, 36, 40, 44). Mark last st with st marker for beginning of Row 1.
Row 1: *K1. Pick up st and move to next peg. Knit over bottom st and hold with fingers or cable needle. With loom tool move rem st back to previous peg. Place held st. on empty peg. Rep from * till 6 sts remain; your last st worked will have used one of the 6 sts to complete the herringbone st and is marked. Purl 6 sts; this is the brim.
Row 2: EK 5. *EK1. Pick up st and move to next peg. Knit over bottom loop and hold with fingers or cable needle. With loom tool move rem st back to previous peg. Place held st on empty peg. Rep from * to last st.
Rep Rows 1-2 until piece measures 17” (18”, 19.5”, 21”, 22”), or until desired hat circumference, ending after a Row 2.
Before binding off tighten herringbone stitches only on pegs beginning at opposite end of row from working yarn.
Bind off: Work a basic bind off, but slip Peg 1. Knit Peg 2, move st from Peg 1 to Peg 2, Knit bottom st over top to bind off. After binding off the first stitch continue the basic bind off as usual. Leave a long tail to sew up seam and top of hat (about 6-8 times the width of your panel).

Bring first and last rows together looking at the RS of the fabric. Using long tail at brim, sew seam together. Insert tapestry needle under full knit stitch V on the 1st row (between cast on and 1st Purl st in brim area) and pull through all of the tail. Insert needle under first full V on the last row and pull through all of the tail. Continue sewing back and forth this way to the end of the panels.

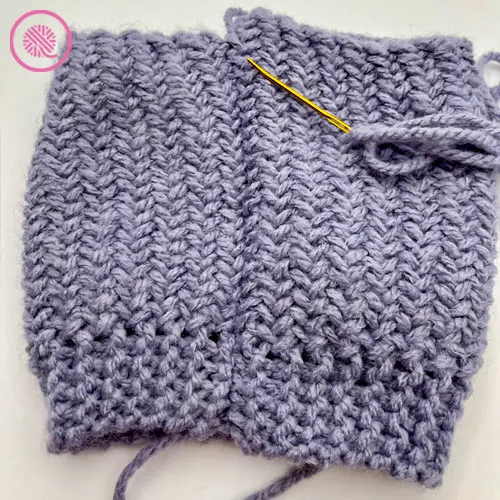
Gathered/drawstring bind off. Insert needle through top of seam from the front. *Skip to top of next herringbone column and pull through from front to back. Continue from * to beginning seam. Place tail inside and turn inside out. Tighten drawstring by pulling gently. Do not break yarn. If your hat doesn’t fully close then continue picking up every other stitch in the center to make another drawstring. Pull tight to close. Knit and weave in remaining tails.
PIN IT!
Loom Knit Vertical Herringbone Ribbed Hat Video Tutorial
Select videos are available to GoodKnit Kisses YouTube members only. To get exclusive access to GKK VIP-only content, free PDF patterns, weekly Zoom meetup and more, sign in to YouTube and join as a VIP Member today! Find out more about GKK Membership HERE!