
Inside: Learn how to loom knit eyelets for lace knitting with these written instructions and tutorial video. Includes free blanket square pattern.
We all love the beautiful openwork of eyelets. They’re what adds the movement of the stitches to lace knitting. Lace knitting is easy to work on the loom and you can create stunning, lace designs using these techniques. But let’s cover the basics first.
What is an eyelet?
Simply put, an eyelet is an intentional hole in your knit fabric.
We’re going to create simple eyelets today that have 2 main parts:
- a decrease (2 stitches into 1)
- a yarnover increase (adds 1 stitch)
By removing one stitch and adding another in the same row, you keep the same stitch count but add an eyelet to your fabric. When making an eyelet you will be working over 2 pegs.
In the examples below, each decrease and yarnover will be directly next to each other. In other intricate lace patterns they may be separated by other stitches.
Eyelet Decreases
The decrease is the first part of making an eyelet. You will need to take 2 stitches down to one to create and empty peg.
This lesson covers 2 decreases: the k2tog and the ssk. The k2tog (knit 2 together) is a right leaning decrease and the ssk (slip, slip, knit) leans to the left. For the purposes of learning this technique you may use either one.
Eyelet Yarnovers
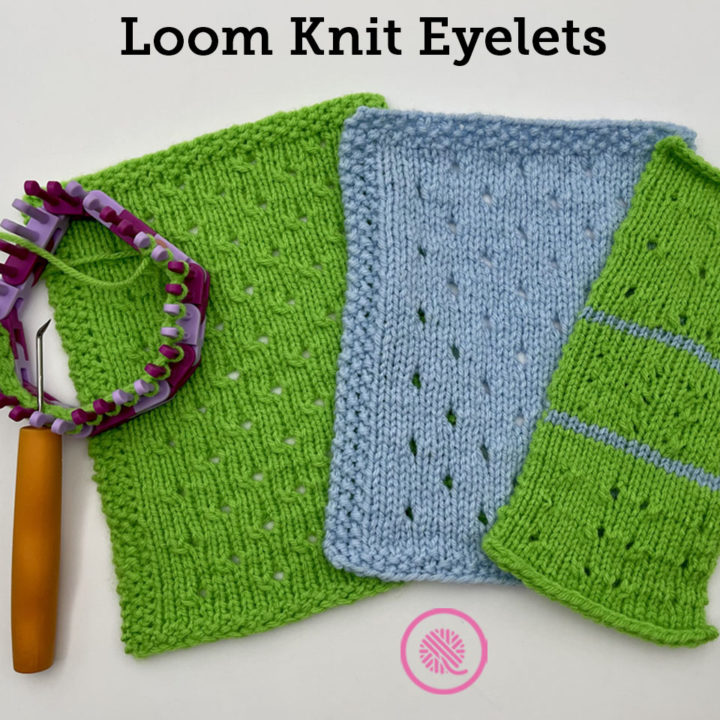
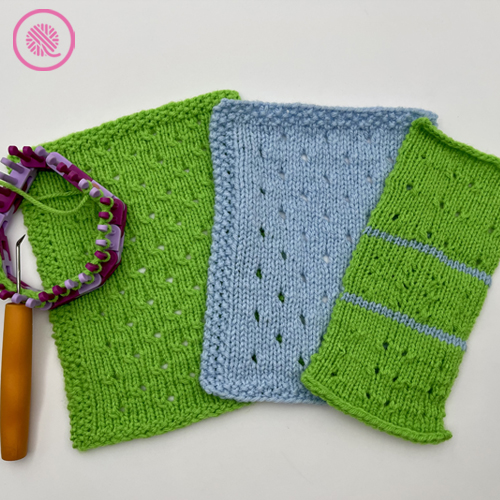
Yarnovers are made on the loom in several different ways, but I’m going to address 3 methods. I demonstrate all 3 of these in the tutorial video.
- Flat YO: This is the easiest method. You place the working yarn in front of the peg and move on the next peg.
- Twisted Ewrap YO: Make this yarnover by ewrapping the peg then move on to the next peg. On the following row you will wrap this peg and knit your ewrap yarnover as usual. This method leaves the twist in the ewrapped stitch and it partially blocks the eyelet making the hole appear small.
- Untwisted Ewrap YO: As before, you simply ewrap the peg and move on. However, on the following row before you work this peg, pick up the yarnover stitch, untwist it so the yarn is no longer crossed in the back, then place it back on the peg. Then you wrap and knit over the peg. This creates the most open eyelet and best resembles the needle knit version of the stitch.

How to Loom Knit Eyelets
Eyelets are created by combining one decrease with one of the yarnovers listed above. The eyelet will lean either to the right or left depending on which decrease you choose and whether the yarnover comes before or after the decrease. So the four basic combinations are:
- K2tog, yo
- Yo, k2tog
- Ssk, yo
- Yo, ssk
But remember, you can also choose which yarnover you want to use, giving you a much larger variety of eyelets to choose from.
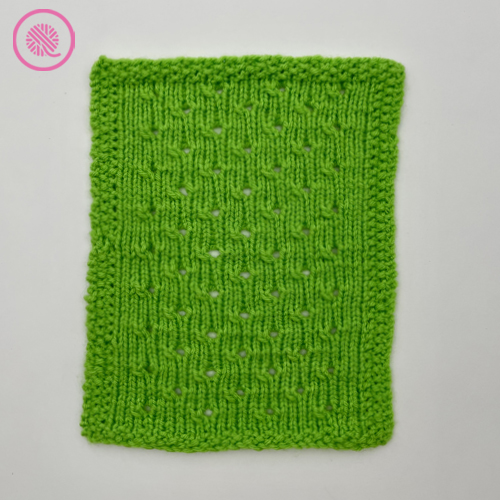
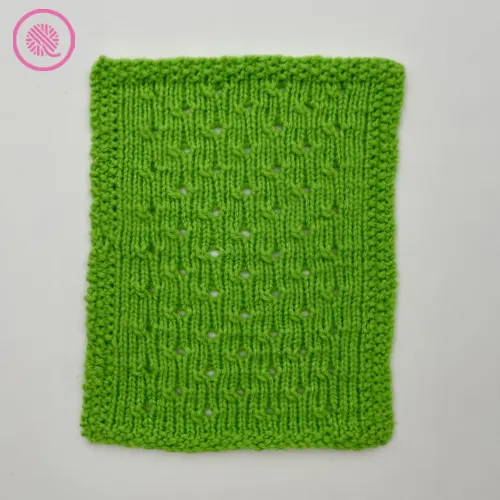
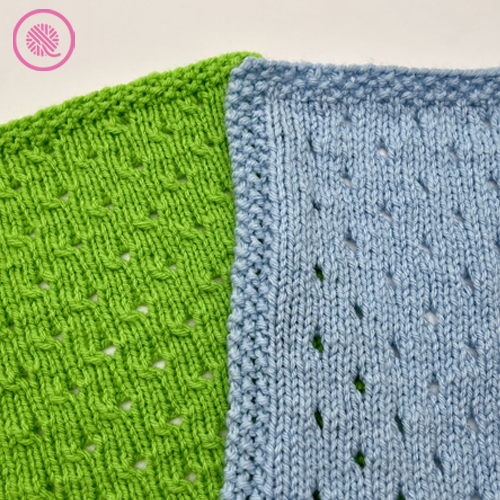
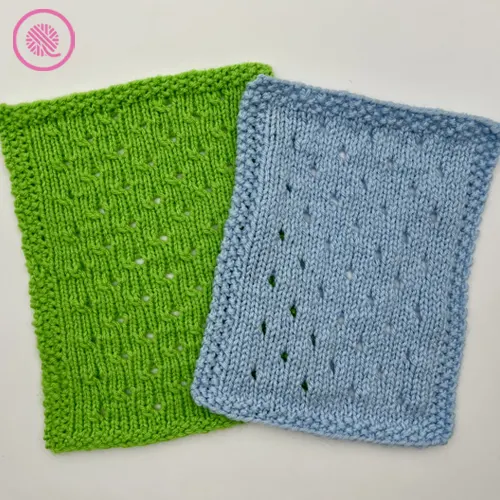
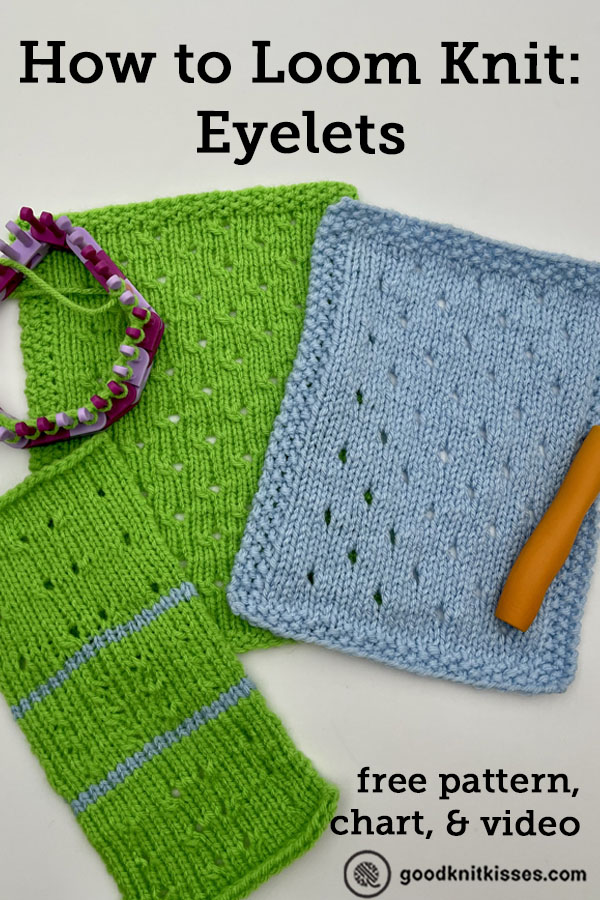
I created the Simple Eyelet Square to help you apply this knowledge. This easy blanket square pattern uses a checkerboard of eyelets on a stockinette fabric. In the pattern below I used the yo, ssk eyelet stitch throughout the square. But you can use any of the eyelet combinations by choosing which decrease and which yarnover you prefer.
Simple Eyelet Square
By Kristen Mangus
A downloadable PDF of this pattern is available in my Etsy store and from Ravelry at the links below:


The Simple Eyelet Square makes a great introduction to knitting lace. With eyelets scattered across a field of stockinette stitch this open work blanket square will make a beautiful addition to your next project. Pattern notes and video cover 3 methods of working a loom knit yarnover and comparing the results.
Pattern includes written instructions for 2 common sizes and links to fully captioned tutorial videos that teach multiple ways to loom knit the eyelets so you can choose your favorite.
MATERIALS
(Materials list may contain affiliate links to products I used to make this project. Using these links cost you nothing, but helps support GKK.)
Yarn
Medium (#4) worsted weight yarn
Red Heart Super Saver in Spring Green used in sample.
Loom
⅜” small gauge (SG) loom with at least 31 (55) pegs.
KB Flexee Loom Skinny used in sample.
Tapestry needle for weaving in ends
ABBREVIATIONS
K = Uwrap knit
K2tog = Knit 2 together
KO = Knit over
Rep = Repeat
P = Purl
Ssk = Slip, slip, knit
St(s) = Stitch(es)
YO = Yarnover (see notes)
For a refresher on loom knitting basics see the blog posts below to get started:
13 Questions for Beginner Loom Knitters
How to Loom Knit Basics
How to Loom Knit Basic Stitch Patterns
How to Loom Knit in the Round
GAUGE
18 sts x 34 rows in 4” in eyelet stitch
SKILL LEVEL Easy
MEASUREMENTS
Option 1: 7” x 9.25” (18 cm x 23 cm)
Option 2: 12” x 12” (30.5 cm x 30.5 cm)
NOTES
I’ve included two square sizes in this pattern that are commonly used to make blankets.
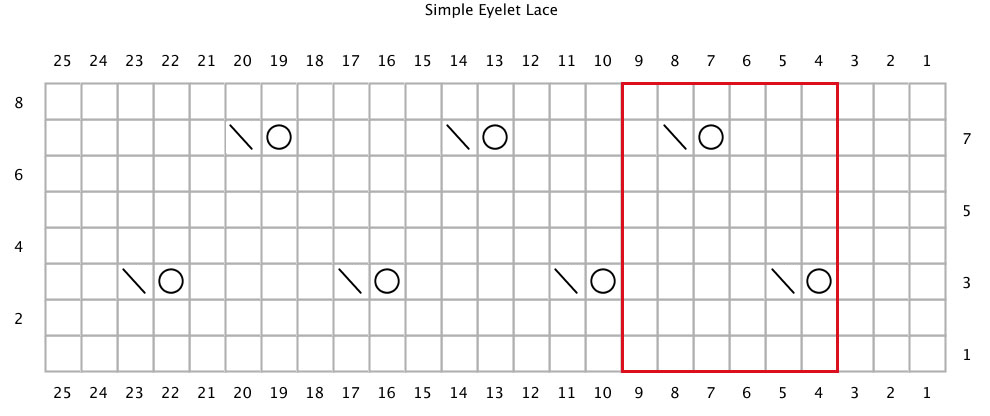
The eyelet stitch pattern is a multiple of 6+7 stitches and uses an 8 row repeat.
The written instructions include a seed stitch border: 3 stitches on the sides and 3 rows on the top and bottom. The chart does not show the seed stitch border and is intended only to show the main stitch pattern. If you decide to change the size be sure to add your own border to prevent the edges from curling.
This pattern is written using a yo, ssk to create each eyelet and uses the Untwisted Ewrap Yarnover. The videos below show how to loom knit eyelets using other methods. You may substitute any of the eyelets shown in the video in this pattern.

INSTRUCTIONS
Option 1 (7” x 9”) Instructions:
Cast on 31 sts.
Row 1: *P1, k1. Rep from * to last st. P1.
Row 2: *K1, p1. Rep from * to last st. K1.
Row 3: *P1, k1. Rep from* to last st. P1.
Row 4: K1, p1. Knit to last 2 sts. P1, k1.
Row 5 and all odd rows: P1, k1, p1. Knit to last 3 sts. P1, k1, p1.
Eyelet Lace Stitch Pattern (includes border):
Row 6: K1, p1. Knit to last 2 sts. P1, k1.
Row 8: K1, p1. k4. *Yo, ssk, k4. Rep from * to last 7 sts. Yo, ssk, k3, p1, k1.
Row 10: K1, p1. Knit to last 2 sts. P1, k1.
Row 12: K1, p1. k7. *Yo, ssk, k4. Rep from * to last 4 sts. K2, p1, k1.
Row 13: Rep Row 5.
Rep Rows 6-13 seven more times or to desired length ending after a Row 9.
Rep Row 6 once more.
Rep Rows 1-3 for top border. Bind off in pattern and weave in ends.
Option 2 (12” x 12”) Instructions:
Cast on 55 sts.
Row 1: *P1, k1. Rep from * to last st. P1.
Row 2: *K1, p1. Rep from * to last st. K1.
Row 3: *P1, k1. Rep from* to last st. P1.
Row 4: K1, p1. Knit to last 2 sts. P1, k1.
Row 5 and all odd rows: P1, k1, p1. Knit to last 3 sts. P1, k1, p1.
Eyelet Lace Stitch Pattern (includes border):
Row 6: K1, p1. Knit to last 2 sts. P1, k1.
Row 8: K1, p1. k4. *Yo, ssk, k4. Rep from * to last 7 sts. Yo, ssk, k3, p1, k1.
Row 10: K1, p1. Knit to last 2 sts. P1, k1.
Row 12: K1, p1. k7. *Yo, ssk, k4. Rep from * to last 4 sts. K2, p1, k1.
Row 13: Rep Row 5.
Rep Rows 6-13 10 more times or to desired length ending after a Row 9 or Row 13.
Rep Row 6 once more.
Rep Rows 1-3 for top border. Bind off in pattern and weave in ends.
I recommend blocking all eyelet or lace patterns. Wet blocking helps set your stitches and will keep your eyelets open. You can find out more on this post: How to Wet Block Your Knitting
CHART
The chart below shows only the simple eyelet lace stitch pattern used in the middle of the 7” blanket square. It does not include the seed stitch border.
The area in red shows one 6 stitch repeat of the eyelet lace for reference.


PIN IT!

How to Loom Knit Eyelets Video Tutorial
Select videos are available to GoodKnit Kisses YouTube members only. To get exclusive access to GKK VIP-only content, free PDF patterns, weekly Zoom meetup and more, sign in to YouTube and join as a VIP Member today! Find out more about GKK Membership HERE!