Inside: How to loom knit Basic Toe-Up Socks with this free pattern. Includes instructions for 4 sizes, sizing chart, and tutorial videos for right and left handed loom knitters.
Socks are a winter necessity to keep our toes cozy and warm.
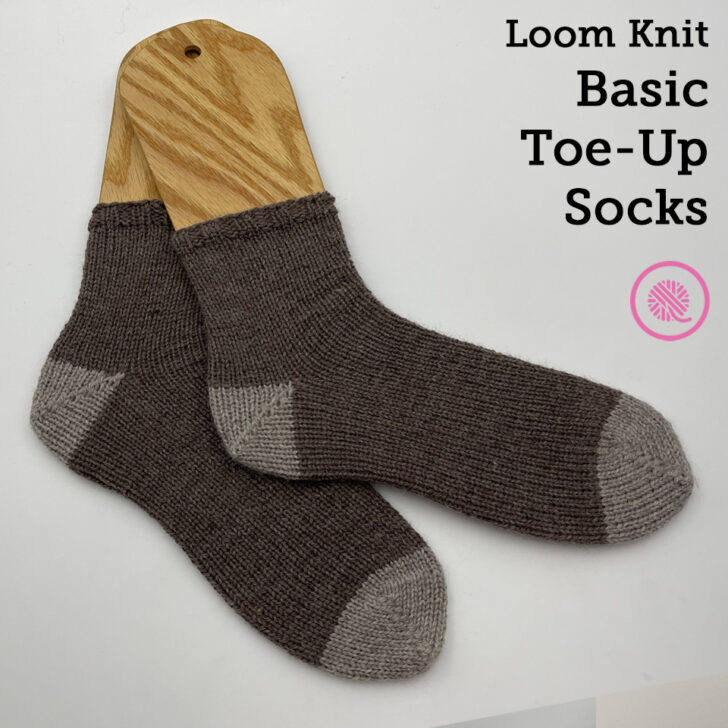
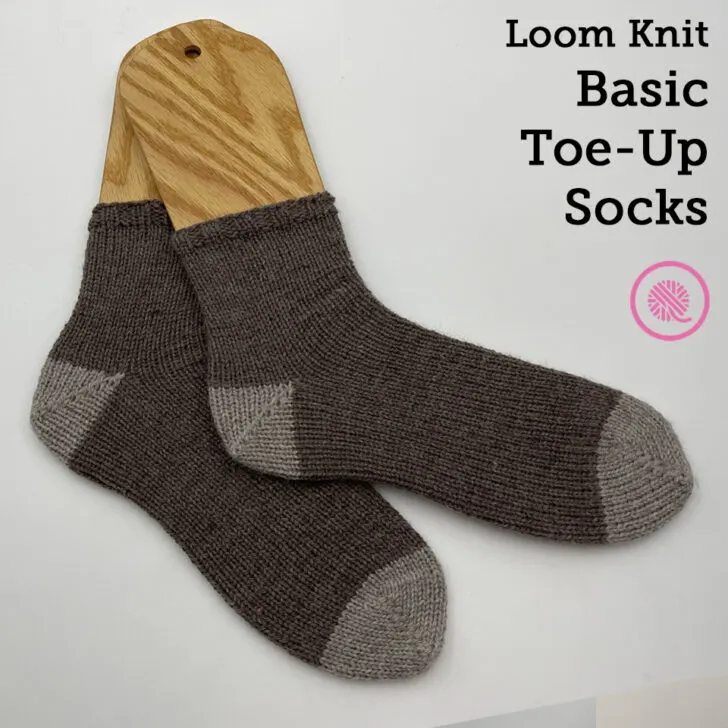
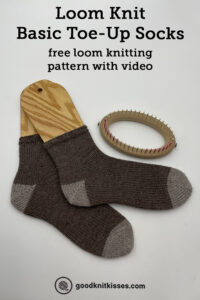
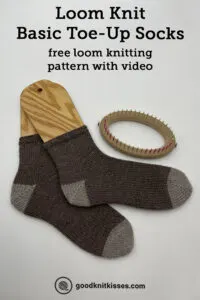
These loom knit Basic Toe-Up Socks will become your go-to sock pattern for your whole family. With 4 sizes from child to adult you’re sure to get a good fit. The toe and heel are worked using short rows (with an optional contrasting color) and the cuff uses 2×2 ribbing for a comfortable fit.
Toe-up socks are the best. There! I said it.

These socks start with a Kitchener cast on at the toe so there’s no tricky seaming when you’re done. There’s just something about doing the hardest part of the pattern at the beginning. You cast on, work the toe, measure, work the foot then knit the heel. Once you’re past the heel (which is identical to working the toe) it’s quick, simple knitting in the round.
Also, these sock use worsted weight yarn and a 3/8″ small gauge (SG) loom so they loom knit up quickly.
Pattern contains written instructions for 4 sizes, sizing chart, and fully-captioned tutorial videos for both right and left handed knitters.
Loom Knit Basic Toe-Up Socks
By Kristen Mangus
A downloadable PDF of this pattern is available in my Etsy store or from Ravelry at the links below:


MATERIALS
(Materials list may contain affiliate links to products I used to make this project. Using these links costs you nothing, but helps support GKK.)
Yarn
Medium (#4) weight yarn
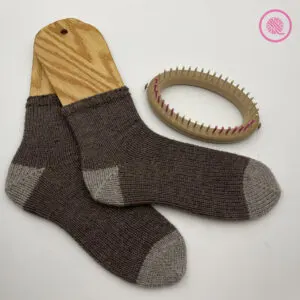
Patons Classic Wool Worsted (3.5 oz/100 g / 194 yds/ 177 meters) used in sample.
Contrast A (Toe/Heel):Color Natural Mix
Contrast B (Main Color): Color Heath Heather
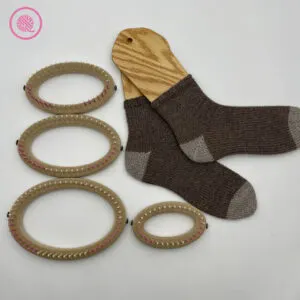
Loom
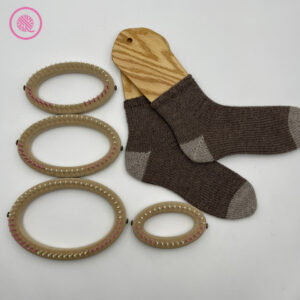
⅜” small gauge (SG) loom with 32 (40, 48, 56) pegs.
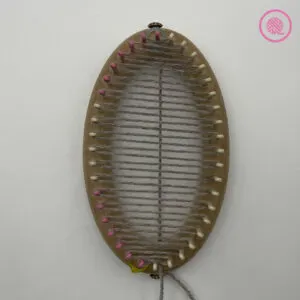
CinDWood CUSTOM ⅜” Oval 40 peg, Adult Sock Loom used in sample.
Use code goodknitkisses for $5 off your loom purchase.
Notions
- Tapestry needle
- 2-18 Stitch markers (2 are used if using the CinDWood premarked oval sock loom, but more are needed to mark your short row pegs on other looms.)
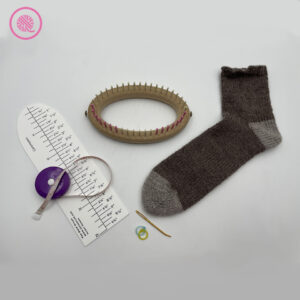
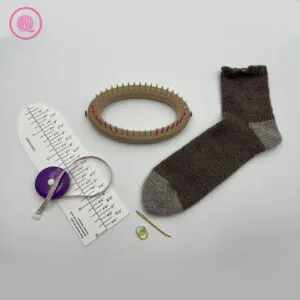
- Measuring tape (to measure foot)
- Sock Ruler (optional) – This is the best tool to get an accurate measurement of a sock in progress, but you can also use a measuring tape if that is all you have. I used the adult size of The Sock Ruler.
ABBREVIATIONS
Approx = approximately
Circ. = circumference
K = Knit
P = Purl
Pat = Pattern
Rep = Repeat
St(s) = Stitch(es)
For a refresher on loom knitting basics see the blog posts below to get started:
13 Questions for Beginner Loom Knitters
How to Loom Knit Basics (cast on, knit, purl, & bind off)
How to Loom Knit Basic Stitch Patterns (garter st, seed st and ribbing)
How to Loom Knit in the Round
GAUGE 23 sts x 36 rows in 4” (10 cm) in stockinette st
SKILL LEVEL Easy+
SIZES (see chart below and Measure Foot NOTE)
32 peg – 5-6” foot circ. (approx. US shoe sizes Child 4-8)
40 peg – 6.25-7.5” foot circ. (approx. US shoe sizes Child 9-13 and Women 5)
48 peg – 7.75-9.25” foot circ. (approx. US shoe sizes Women 6-11 and Men 6-9)
56 peg – 9.5-10.75” foot circ. (approx. US shoe sizes Women 12-13 and Men 10-14)
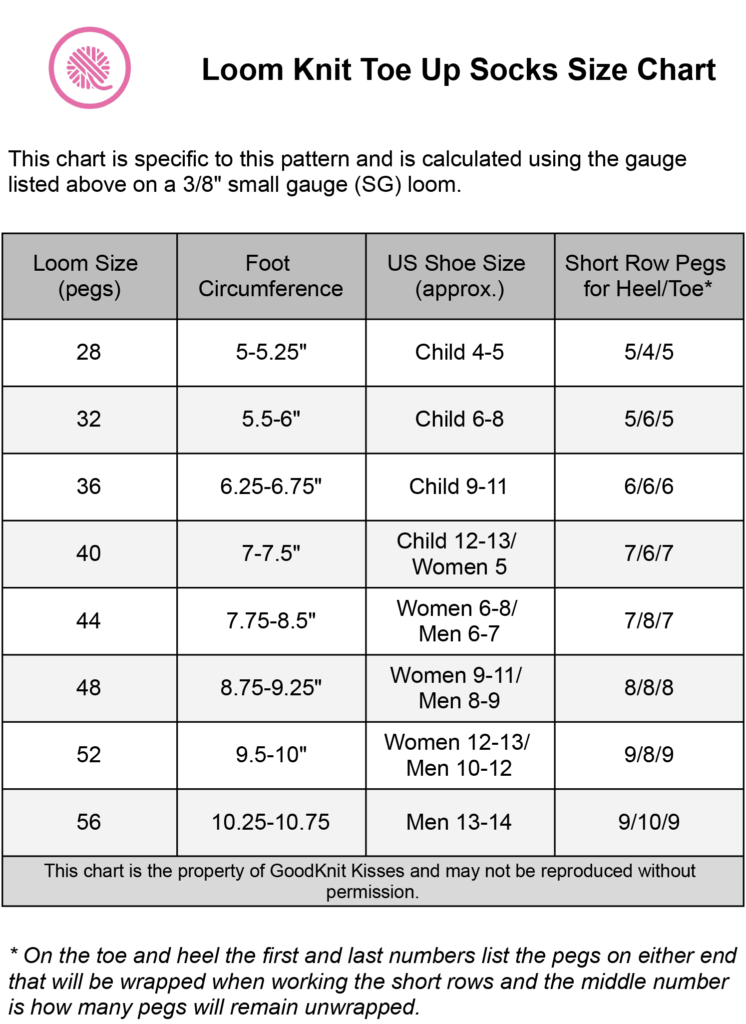

On the chart above the rows in gray show the standard sizes for the CinDWood Oval Sock Loom with premarked pegs for the heel and toe. CinDWood has the other sizes available as a custom order.
NOTES
Knit Stitch: This sock uses only knit stitches, no e-wraps. The flat knit stitch is the best but can be tight and change the size of your sock. I used something between a u-wrap knit and a flat knit. I knit it more like a u-wrap knit stitch and pull a little snug rather than laying across all stitches for a flat knit.
Measure foot: Using a soft measuring tape measure and write down the following measurements. If you are unable to take measurements use the standard sizes as listed in the Sock Sizing Chart.
Ball of foot – This is the widest part of your foot at the base of your toes. Use this measurement to determine what size sock to knit and how many pegs to cast on.
Length of foot – Measure from the tip of your big toe to the back of your heel. You will use this measurement later in the pattern to determine what length to knit the foot of your sock.
Sizing: Use the measurements on the chart listed above to determine the size you need. Your best choice is to get an accurate measurement, but standard sizes are listed for convenience. For ½ shoe sizes, select the larger size on the chart.
The chart listed above is based on the gauge listed in this pattern. If your gauge is different you can use the Interactive Sock Calculator on my website to get your best fit.
Ankle/Leg length and Cuff: This sock is designed to be a base pattern that you can use for a variety of styles. I do not list a length to knit your sock past the heel. That is your preference. For an ankle sock, you can work just a few rounds then begin the cuff. Or you can work 5-6” then begin the cuff for a sock that covers part of your leg. I wrote the pattern using the stockinette stitch for the ankle/leg then finished with ribbing for a cuff. If you prefer, use 2×2 ribbing for the entire leg of the sock.
Short Rows: A short row is a method of knitting used to shape your project. It involves working only part of the row, then wrapping the yarn around a stitch and working back in the opposite direction. The terms we use are wrap and turn. There are 3 ways to wrap loom knit short rows. You can use any of them. I used Method 2 in the video.
- Method 1: Traditional short row- Using loom hook, pick up stitch from peg. Place working yarn behind peg but in front of the stitch you are holding. Place stitch back on peg and bring working yarn around the outside to wrap the front of the peg.
- Method 2: Traditional hack- Place working yarn below stitch as if to purl. Pull up a loop and move it over and behind the peg. Tug working yarn to remove slack and tighten wrapped stitch. Bring working yarn around outside of peg and wrap front of peg.
- Method 3: German short row- Wrap and knit over the peg. Pull the working yarn from back to front around the outside edge of the peg. Tug until the stitch forms a < across the front of the peg.
CinDWood Loom setup: The Oval Sock Loom has some colored pegs on one half of the loom which we will call the Heel/Toe side since this is the half of the loom where we work the heel and toe. The other half has all tan pegs which we call the Front side as this is the side of the sock facing up when on a foot. I’ll refer to these when working the Kitchener cast on. Place stitch markers on the first and last colored pegs of the Heel/Toe side. (See video.)
Other looms setup: Place marker at Peg 1 and place another marker at the halfway point. Example: For a 40 peg loom, place markers at Peg 1 and Peg 20. Now we will mark the pegs needed for the short row toe and heel. Count the pegs you have from Peg 1 to your next marked peg and divide that number by 3. Place markers on the first third and the last third of the pegs in this section. Since the number of pegs may not divide evenly make sure you mark the same number of pegs at each end of the section. The middle section of unmarked pegs may be 1 more or 1 less than the number of marked pegs. Example: On our 40 peg loom, we have 20 marked pegs. Dividing by 3 gives us a number between 6 and 7 so we mark the first 7 pegs, leave 6 pegs unmarked and mark the last 7 pegs. This marked half of the loom is the Heel/Toe Side. The Front Side pegs 21-40 will not have any stitch markers. (See video.)
Contrast Toe/Heel Colors [optional]: This pattern includes optional instructions for using a contrasting yarn for the toe and heel. You can ignore the color change instructions and make a solid color sock if desired.

Loom Knit Basic Toe-Up Socks INSTRUCTIONS
With Contrast A, cast on 32 (40, 48, 56) sts in Kitchener. See instructions below.
Kitchener Cast on – Right Handed [Left Handed]
Place marked loom (see NOTES above) on table with Peg 1 at the top and the middle marked peg at the bottom. The Heel/Toe is on the LEFT [RIGHT] and the Front is on the RIGHT [LEFT].
STEP ONE – Wrapping:
- Place working yarn above the loom and lay the tail between Peg 1 and the last unmarked peg on the Front. Bring yarn tail under bottom of loom at the middle marker and attach to anchor peg or tie onto loom temporarily at this end.
- Wrap working yarn around Peg 1 of the Heel/Toe side from top to bottom and bring working yarn back to inside of loom. The wrap will be as if you are working a U wrap knit stitch. Do not E wrap the peg.
- Wrap first unmarked peg on Front side around the peg from top to bottom and bring working yarn back across center of loom.
- Continue wrapping the next peg alternating between the Heel/Toe side and the Front side. This will look like a zig zag back and forth.
- After wrapping all pegs, working yarn should wrap around the front of the last empty peg.
STEP TWO – Finish Cast-on:
- Push the wraps down toward bottom of pegs.
- Flat knit all stitches. Make sure to push stitches down on pegs after knitting over to prevent them from falling off the pegs.
- Cut an approx 15” strand of Contrast B yarn to use as the anchor yarn. Place one end of anchor yarn between Pegs 1 and 2 at the top of the Heel/Toe side. Place the other end between the last marked peg on the Heel-Toe side and the last peg on the Front side. Push yarn ends underneath to inside of loom and tie at back of loom. This anchor yarn will help you identify where to start closing the Kitchener cast on.

SHORT ROW Section (TOE/HEEL):
This section is worked back and forth using ONLY the marked Heel/Toe side of the loom and is identical for both the toe and the heel.
Short Row 1: Knit to 1 peg before last marked peg. Wrap last peg and turn.
Short Row 2: Knit to 1 peg before last marked peg. Wrap last peg and turn.
Short Row 3: Knit to 1 peg before last wrapped peg. (Wrapped pegs have 2 stitches on them.) Wrap next peg and turn.
Repeat Short Row 3 until all marked pegs are wrapped.
Short Row 4: Knit to first wrapped peg. Knit over both sts on wrapped peg.
Short Row 5: Knit to next wrapped peg. Knit over both sts.
Repeat Row 5 until all pegs have 1 st.
Short Row 6: Knit to next marker.
[End of Short Row Section.]
MEASURE: Measure the length of the short row section from the tip of the toe to your stitches still on the loom. NOTE: Be sure to tug downward on knitting to relax tension as much as possible before measuring. Write down the toe length. This length will be the same as your heel length. Use the following formula to figure out how long to knit your sock before starting the heel.
Length of foot – length of short row section = Length to knit before working heel
Ex: 9.25” – 1.5” = 7.75” Knit Foot Section (below) until sock measures 7.75” from the tip of the toe.
Your measurements: _______ – ________ = _______
Knit 4 rounds before continuing to FOOT Section.
FOOT Section
[Optional Color Change] With Contrast B, knit last st of previous Rnd and continue with Rnd 1.
Rnd 1: Knit all sts in the round.
Rep Rnd 1 in stockinette st until piece measures desired length.
NOTE: Be sure to tug downward on knitting to relax tension as much as possible before measuring.
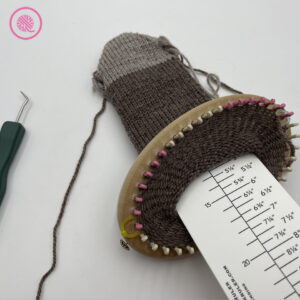

with a sock ruler
HEEL Section
This section includes optional color changes. If making a solid color ignore color change instructions.
With Contrast B, knit halfway around to first marked peg of Heel/Toe side.
With Contrast A and work Short Row Section (see above) once more. Cut A.
[Optional reinforced corners] Pick up last stitch on Front Side and hold to back of loom with fingers or cable needle. Move first stitch of Heel to empty peg. Place held stitch onto first peg of Heel Section. Repeat this procedure at the other end of the Heel Section.
With Contrast B, knit to end of Rnd. [NOTE: The working yarn is already coming from the first peg, but you still knit this peg.]
ANKLE Section
Rnd 2: Knit all.
Rep Rnd 2 until piece measures desired ankle height minus .5”-1” for cuff ribbing.
NOTE: Be sure to tug downward on knitting to relax tension as much as possible before measuring.
CUFF Section
Rnd 3: *K2, P2. Rep to end of round.
Rep Rnd 3 until ribbing section measures .5” (approx 4 rows) or to desired length.
Finishing
Bind off in pattern loosely.
TIP: On this row only use e-wrap for knit stitches to create a more elastic stitch.
Cut yarn and pull through final st to fasten off. Connect to beginning stitch in the round. Weave in yarn tail.
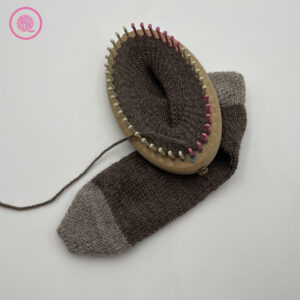
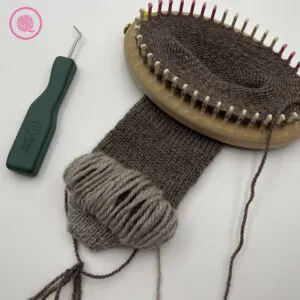
Close Toe:
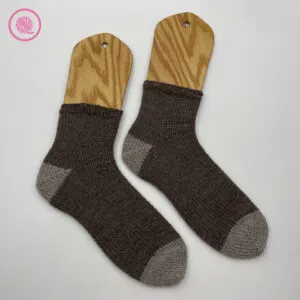
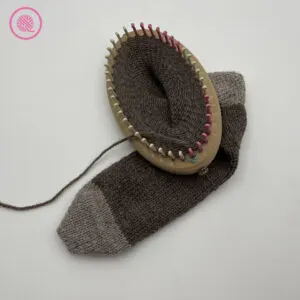
You may close the toe when your sock is finished or, if you prefer, after you work a few inches of the foot while it is still on your loom. (Before and after pictures below.)
- Work on the right side of your project and begin at the end opposite your starting yarn tail.
- Use the anchor yarn to help you find the corner. Gently pull on the second or third loop from the corner. This will close the gap and create knit stitches to join the two sides.
- Use your loom tool to adjust the two sides of the V-shaped knit stitches and make sure they are even.
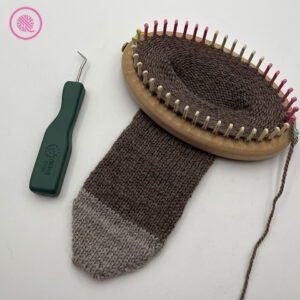
- Continue across the seam pulling each stitch closed and adjusting if needed.
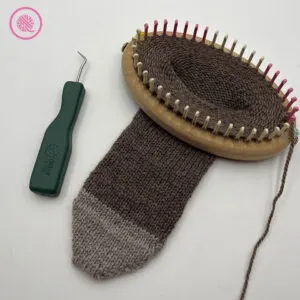
- When all stitches are closed, trim yarn tail, remove anchor yarn, and weave in yarn tail on inside of sock.

PIN IT!
Loom Knit Basic Toe-Up Socks Tutorial Videos
Select videos are available to GoodKnit Kisses YouTube members only. To get exclusive access to GKK VIP-only content, free PDF patterns, weekly Zoom meetup and more, sign in to YouTube and join as a VIP Member today! Find out more about GKK Membership HERE!
These vidoes for the loom knit Basic Toe-Up Socks pattern are a full loom along from start to finish. These skills are demonstrated:
- Kitchener cast on and how to close the toe
- Short rowed toe and heel (all rows shown on toe section)
- Measure toe and calculate foot length
- Reinforce heel stitches
- Loom knit ankle/leg
- Cuff in 2×2 ribbing
- Bind off
lindsey
Tuesday 3rd of June 2025
Hi, Do you have a beginner’s video tutorial for making adult socks on a kb 2 sock knitting loom? Many thanks, Lindsey