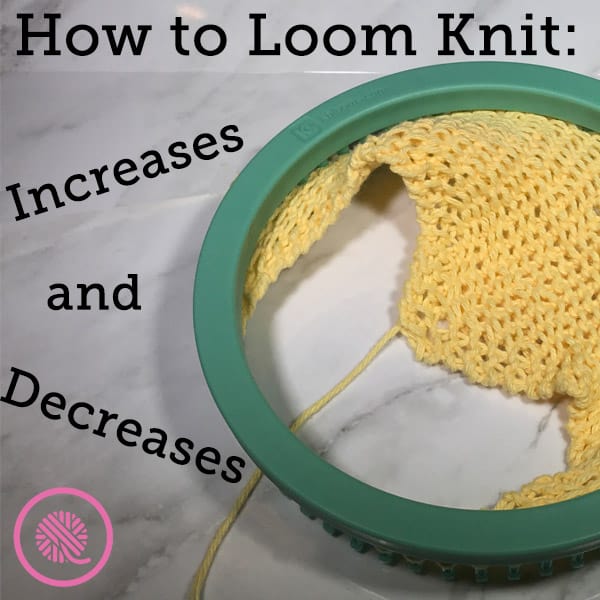

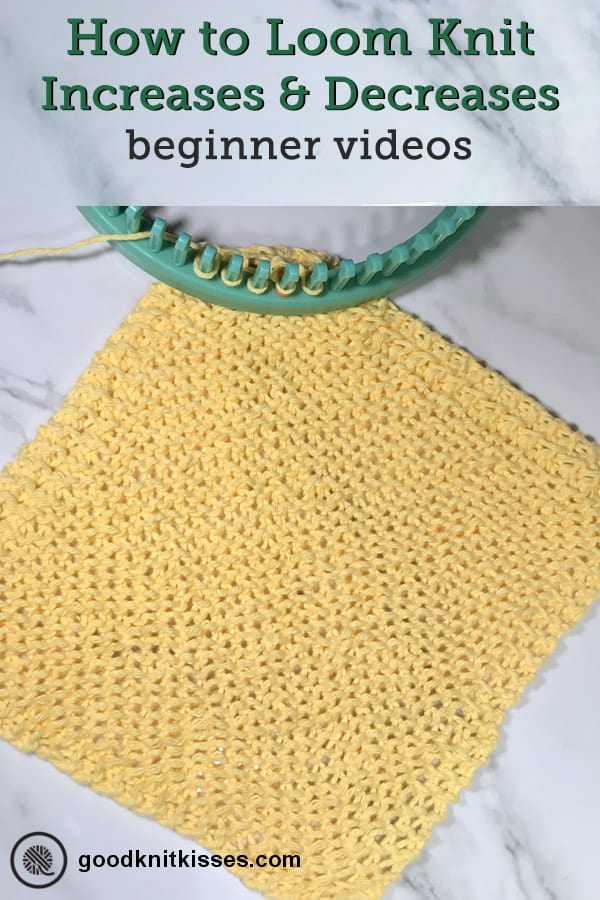
Inside: Learn basic loom knit increases and decreases for beginners. Free tutorial videos and pattern.
Lessons 8 & 9: Increases and Decreases
Wow! You’re getting pretty good at loom knitting.
You can knit up hats for everyone on your block (And maybe you have!) You know some basic stitch patterns and now you’re ready to push the envelope.
Let’s talk about loom knit increases and decreases! These stitches are handy for creating lacework or for shaping your project. There are many methods for both, but we’re going to talk about the simplest ones.
Lesson 8.0: Loom Knit Basic Increase: Yarnover

So what does it mean to increase?
To put it simply to increase means to add one or more stitches.
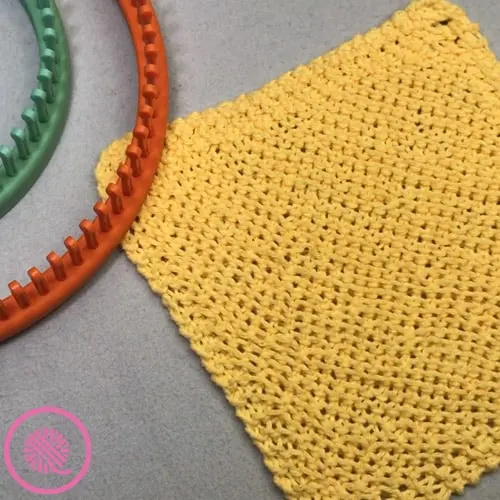
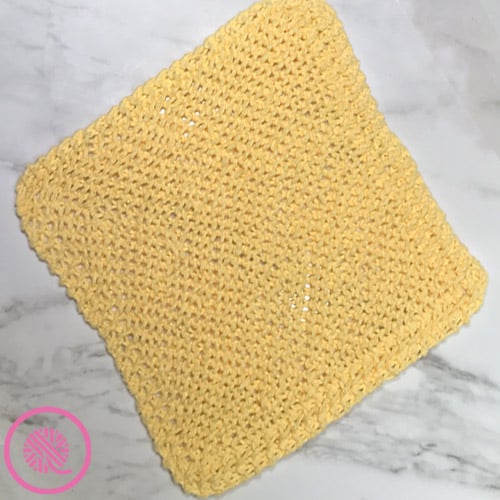
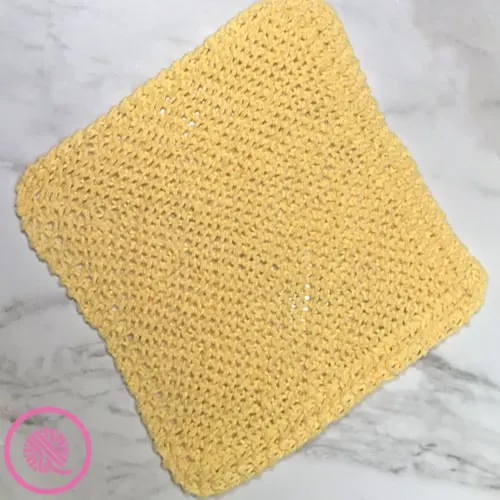
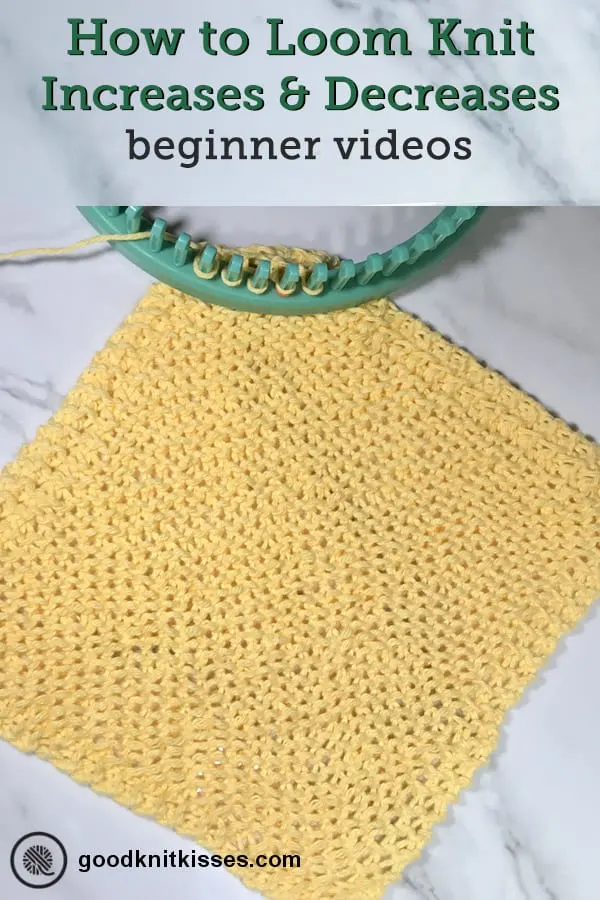
In this week’s video lesson I’m working on the Grandma’s Favorite Dishcloth pattern. This pattern begins at one corner and gradually increases by one peg on each row.
I chose the Yarnover increase (YO) for this pattern because it is the easiest of the loom knit increases to learn. The yarnover increase also creates a hole in the fabric.
Wait! This is a good hole. (Not like those nasty dropped stitches.) A yarnover increase creates an eyelet. It’s that opening you see in lace patterns.
So how do you work a yarnover? Just E wrap an empty peg. (Can you believe it’s that easy?)
But first you need an empty peg. A yarnover increase is typically used between other stitches not at the end of a row. So, depending on the pattern, you need to move one or more stitches over until the peg you need is empty. Then you wrap the peg and continue with the row.
Lesson 8.0 Basic Increase Tutorial Video
Lesson 8.1: More Increases
You may ask, “But what if I don’t want a big hole in my knitting when I increase?”

That’s where the other increase stitches come into play. This lesson is a bit beyond the basics. These increase methods are what you need for shaping your knitting. For example, Increasing along one edge of shawl to create a crescent shape or to shape the armhole of sweater.
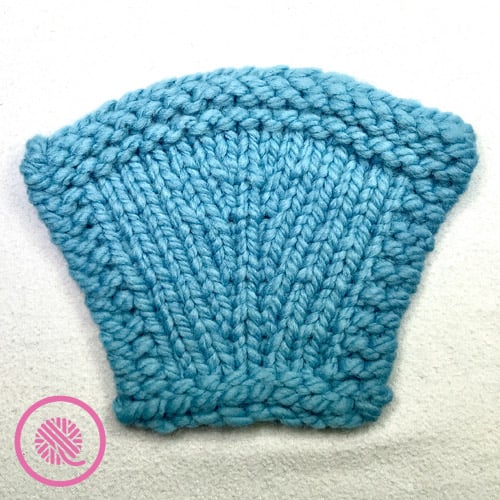
1. M1 (Make 1 Increase – Right & Left)
The Make 1 increase not only adds a stitch to your row, but also causes your stitch to lean either to the right or left. Many loom knit patterns use this method for increasing because it is easy even for a novice loom knitter.
The Make 1 increase creates a new stitch by lifting the yarn (also called the bar or ladder) from between the stitches of the previous row.

Because the increased stitch will lean in a specific direction there are several abbreviations for this stitch:
- M1 – Make 1 – Often a pattern will write the increase without a specific direction. You may chose the direction you want the stitch to lean. Often, this is on the edge of a shawl where the direction is not important.
- M1R – Make 1 Right – This method creates a right leaning increase.
- M1L – Make 1 Left – This is your left leaning increase.
TIP: Work row before your increase row loosely.
M1R – Make 1 Right
- Work stitches up to increase peg.
- Move stitches to create an empty peg next to the increase peg.
- Pick up the bar between stitches with loom tool and tug to create slack.
- Bring loom hook to the RIGHT of the empty peg and continue tugging around to the front peg.
- Using your loom hook, guide the remainder of the bar around and over the top of the peg to complete the wrap.
- Wrap and knit over the new stitch.
M1L – Make 1 Left
- Work stitches up to increase peg.
- Move stitches to create an empty peg next to the increase peg.
- Pick up the bar between stitches with loom tool and tug to create slack.
- Bring loom hook to the LEFT of the empty peg and continue tugging around to the front peg.
- Using your loom hook guide the remainder of the bar around and over the top of the peg to complete the wrap.
- Wrap and knit over the new stitch
2. LI (Lifted Increase – Right & Left)
The lifted increase is similar to the Make 1, but gives you a much smoother result. This is my favorite increase! Look at the nearly seamless transition.
The lifted increase creates a new stitch by picking up part of the stitch from the row below.
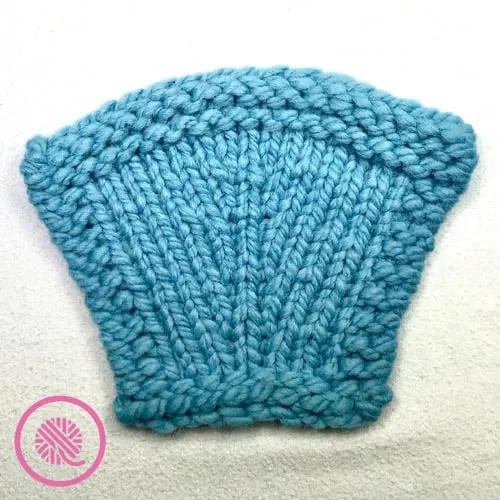
This increase also has a distinct left or right lean so you will see it listed as follows:
- RLI – Right Lifted Increase – This stitch leans right and uses the right side of the stitch from the row below.
- LLI – Left Lifted Increase – This one leans to the left and uses the left side of the stitch from the row below.
Before I give you the instructions for the lifted increase I’ve got a few more tips for you:
- You can not work a right and left lifted increase in the same stitch.
- Work the row before your increase row loosely.
- When working this increase the direction you are loom knitting matters. Below you will see two sets of instructions for each increase depending on which increase you are doing and which direction you are knitting.
RLI – Right Lifted Increase
When working from the RIGHT to the left:
- Work all stitches up to increase stitch and move them to the outside to create an empty peg. The empty peg is BEFORE the increase stitch.
- Pick up purl bump of stitch on previous row with loom tool and place on empty peg to RIGHT.
- Wrap and knit over the new stitch.
- Wrap and knit the next peg (the increase peg).
When working from the LEFT to the right:
- Move stitches to outer edge to create empty peg. Empty peg is AFTER the increase stitch.
- Work all stitches to one stitch BEFORE increase peg.
- Use cable needle or locking stitch marker to mark purl bump behind increase peg.
- Knit increase peg.
- Tug cable needle to create enough slack to put a crochet hook into stitch from front and pull working yarn through (makes knit stitch).
- Place loop of working yarn on empty peg to RIGHT. Pull yarn snug; do not wrap and knit over.
LLI – Left Lifted Increase
When working from the RIGHT to the left:
- Move stitches to outer edge to create empty peg. Empty peg is AFTER increase stitch.
- Work all stitches to one stitch BEFORE increase peg.
- Use cable needle or locking stitch marker to mark purl bump behind increase peg.
- Knit increase peg.
- Tug cable needle to create enough slack to put a crochet hook into stitch from front and pull working yarn through (makes knit stitch).
- Place loop of working yarn on empty peg to LEFT. Pull yarn snug; do not wrap and knit over.
When working from the LEFT to the right:
- Work all stitches up to increase stitch and move them to the outside to create an empty peg. The empty peg is BEFORE the increase stitch.
- Pick up purl bump of stitch on previous row with loom tool and place on empty peg to LEFT.
- Wrap and knit over the new stitch.
- Wrap and knit the next peg (the increase peg)
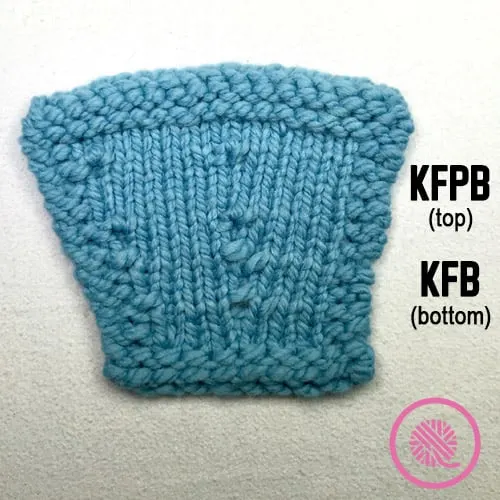
3. KFB (Knit into Front and Back)
This is one of the classic needle knit increases. It’s used because on needles it creates an easy increase and works well on ends. It still works well on the loom, but can create some issues with tension.
The knit into the front and back increases uses the active stitch on your current row.
On knitting needles the words make more sense because as you knit the stitches are wrapped around your needle and you knit the part of the stitch on the front of the needle followed by the part of the stitch in back. It’s a little different for us loom knitters.
The KFB on the loom uses a True Knit stitch for the “front” then an Ewrap Knit to the “back” of the same stitch to create a perfect copy of the KFB needle knit stitch. (You’ll see what I mean below!) This works great along the edges of your loom knitting.
But in the middle of panel it can cause some tension problems and shows a small horizontal bump.
While researching this increase I came across a variation that I decided to include here because it gives a much smoother result without the bump. Ruth Airey is a wonderfully talented loom knitter in the UK. She discovered that knitting the first part of the increase and purling the second part gives a much better result. The Answer Lady on YouTube has a video showing this method called Ruth’s Invisible Increase.
After a but more diving into needle knit stitches I found out this is called a KFPB, knit into the front, purl into the back, stitch.
It’s a bit tricky to work on needles so you don’t see used too often, but the loom results are beautiful!
I’m including both variations below so you can decide which one you like best.

KFB – Knit into the front and back of the stitch
- Work stitches up to increase stitch.
- Move stitches to create empty peg and tug on working yarn to tighten tension. EMPTY peg is BEFORE increase peg.
- Create a True Knit stitch by wrapping your working yarn above stitch, pull yarn loop through and place NEW stitch on empty peg without removing the existing stitch.
- Ewrap Knit the existing stitch.
- Tug working to tighten tension.
KFPB – Knit into the front and purl into the back of the stitch
- Work stitches up to increase stitch.
- Move stitches to create empty peg and tug on working yarn to tighten tension. EMPTY peg is BEFORE increase peg.
- Create a True Knit stitch by wrapping your working yarn above stitch, pull yarn loop through and place NEW stitch on empty peg without removing the existing stitch.
- Purl the existing stitch.
- Tug working to tighten tension.
4. YO (Yarnover – Review)
I know I covered the Yarnover in the first increase lesson, but I have a more notes to share as you start to advance beyond the basics.
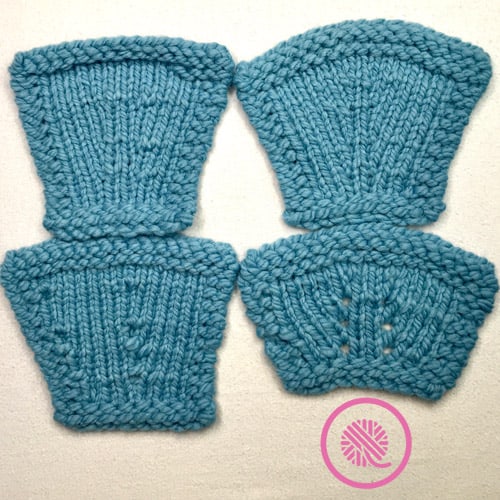
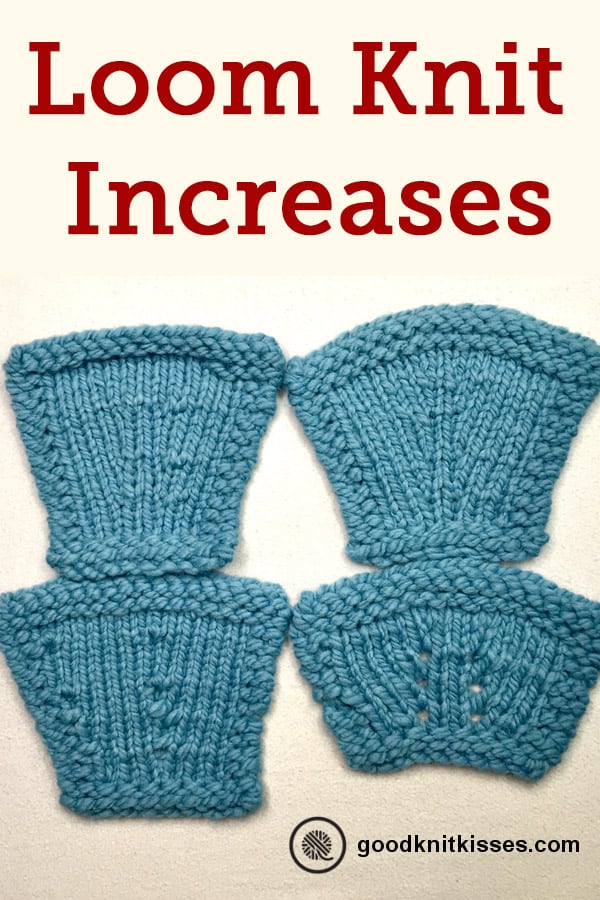
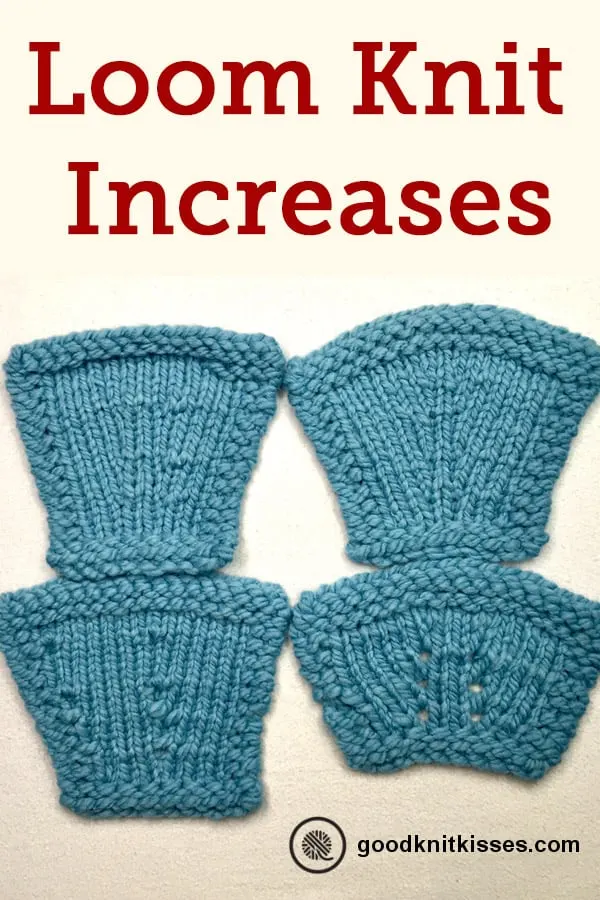
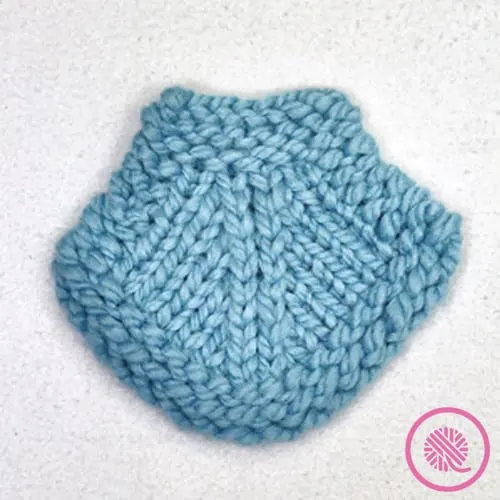
A yarnover increase creates a new stitch on your current row and leaves a hole in your knitting.
As you can see in the picture below, sometimes holes are beautiful. That’s where all those wonderful lace patterns come from. Carefully planned holes.

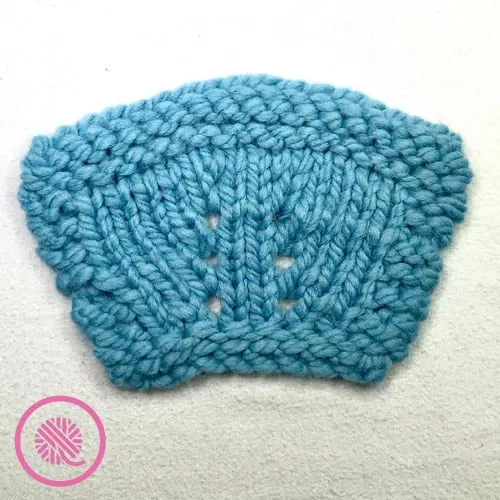
You may not realized it but not all holes are the same. You can control how big the eyelets in your knitting are by how you wrap the peg.
Look at the picture above again. How many rows of Yarnovers do you see? Three pairs of yarnovers in the middle, right?
WRONG! There’s actually FOUR!
The last set I did I Ewrapped the peg instead of wrapping just around the front. Part of the yarn that crosses blocks the hole a bit. You can intentionally create larger or smaller eyelets depending on how you wrap your yarnovers.
Lesson 8.1 MORE Loom Knit Increases Tutorial Video
PIN IT!
Lesson 9.0: Loom Knit Basic Decreases
A decrease is the opposite of an increase.
A decrease stitch combines two (or more) stitches into one stitch.
The most simple method of decreasing involves placing the stitch from one peg onto an adjacent peg and knitting (or purling) the two together. Sounds simple, right? It is, but there’s a bit more to understanding each decrease.
To put it plainly when you move one stitch onto another the stitch on the bottom will appear slanted toward either the right or left. This is why decreases are grouped into right-leaning and left-leaning decreases.
So why does it matter?
In some projects, it’s not important, but in others it makes a big difference. Lace, is a good example. It also makes sense to talk about it since lace is all about using increases and decreases to create the pattern. A lace pattern can appear very different if the stitches are leaning the wrong way.
It’s also very important when shaping your knitting as in shawls and garments. Using consistent right or left-leaning decreases gives a smoother appearance. It makes your loom knit project look consistent.
So let’s talk about the different kinds of decreases and which way they lean. It’s important to know that you can work decrease using knit or purl stitches. When choosing which knit stitch to work consult your pattern or simply use the knit stitch you’ve been using for the rest of your project.
| Right-leaning | Left-leaning |
| K2tog: Knit 2 stitches together | Ssk: Slip, slip, knit |
| P2tog: Purl 2 stitches together | Ssp: slip, slip, purl |
Don’t worry if this is a bit overwhelming at first! I promise it’s actually much easier to work these decreases stitches than to learn the differences between them. Watch the How to Loom Knit Decreases video below to see just how simple it is!
Lesson 9.0: How to Loom Knit Basic Decreases Tutorial Video
9.1 More Loom Knit Decreases
Leaning Left or Right?
Many decreases will cause stitches to lean either to the right or left. This gives your finished project a distinct look. But it can be tricky to remember which decrease leans each direction unless you remember this simple tip.
To lean RIGHT: Move the stitch from the right hand peg and place on the left peg.
To lean LEFT: Move the stitch from the left hand peg and place on the right peg.
This works no matter what direction you’re loom knitting!
1. Decrease from 2 Stitches to 1 (Review)

We already talked about the two most common decreases, the k2tog and ssk, in Lesson 9.0 above. I still included a basic overview of these two stitches in the video for Lesson 9.1. I did that to demonstrate how to work a right vs. left leaning decrease using the tip above.
2. Decrease from 3 Stitches to 1
Some patterns may call for you to decrease more than one stitch at a time. In this case, the following decreases all take 3 stitches and decrease them onto 1 peg.
This is often the case when loom knitting lace. Those light and airy patterns use decreases and increases to create well placed holes in your knit fabric. Once you know a few basic increases and decreases you can make stunning lace shawls or scarves.
I’ll even let you in on a little secret, lace charts are super easy to work on the loom. Each row on the chart shows you exactly what is happening on each peg. But that’s a lesson for another time.
If you are interested in learning more about loom knit lace see these posts:
Easy Lace Headband
Feather Lace Stitch
Quick Lace Scarf
Quick Lace Afghan
(Since each of the following decreases are worked over 3 pegs I will refer to the pegs as left, center and right as I describe them.) Also, I am only showing these decreases using knit stitches, but they can all be worked using purls as well.
a. K3tog (knit 3 together) & Sssk (slip, slip, slip, knit)
It’s not surprising that the K3tog and Sssk are worked the same as the k2tog and ssk but with an additional stitch.
K3tog – Knit 3 stitches together:
- Lift the center stitch off the peg and hold tightly.
- Move the right stitch to the center peg and place center stitch above it.
- Move the left stitch to the center peg.
- Wrap and knit all 3 stitches together.
Sssk – Slip, slip, slip, knit:
- Lift the center stitch off the peg and hold tightly.
- Move the left stitch to the center peg and place center stitch above it.
- Move the right stitch to the center peg.
- Wrap and knit all 3 stitches together.
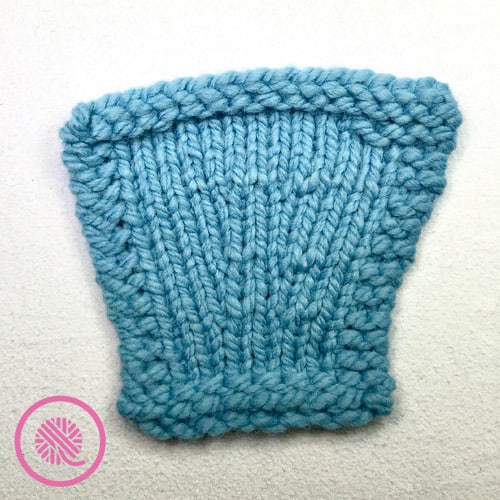
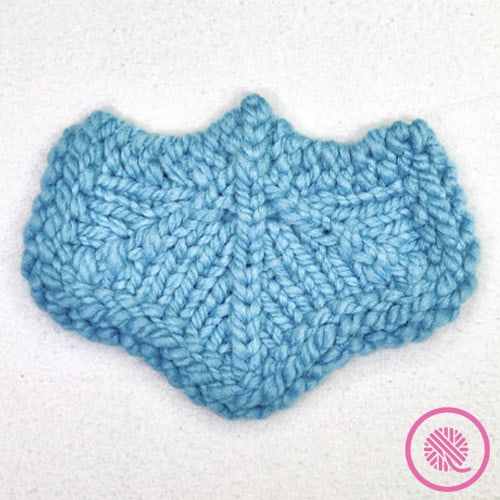
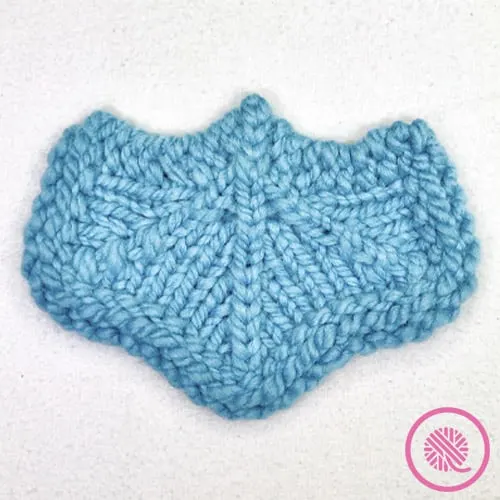
b. CDD (Central Double Decrease)
Mark this one as another of Kristen’s favorites! As you can see from the picture above this decrease doesn’t lean at all. It leaves a beautiful column of knit stitches right in the center.
- Move the stitch from the right peg to the center peg.
- Move the stitch from the left peg to the center peg.
- Wrap and knit all 3 stitches together.
NOTE: You can move the left stitch first and place the right on top. Be sure to work the stitch consistently in your project.
Lesson 9.1: More Loom Knit Decreases Tutorial Video
PIN IT!
L
Thursday 4th of January 2024
How do you purl front and back on a loom?
Deb
Wednesday 23rd of March 2022
Hi Kristen,
I am working a pattern and they do the kfb increase in the very first stitch after the cast on, and also 5 more of them in the first row. (Row 1: Kinc1, k6[8,10,12], kinc1 four times, k6[8,10,12], kinc1. (24[28,32,36] sts)
What would be the reason for doing increases in the very first row instead of just casting on that many more stitches? It seems like a lot of work and not good for the yarn to be moved from peg to peg that much.
Thank you
Courtney
Monday 22nd of March 2021
Hi Good knit Kisses, I love your content l. I'm a loom knitter, my disability means that I can't use needles but I was wondering if you could help me with converting this pattern
https://www.google.com/amp/s/eviesgran.wordpress.com/2012/03/15/easter-chick-easy-knit/amp/ Only trying this one because I can place a chocolate egg inside. Mom is a needle knitter so is doing them her way x
zondu
Monday 23rd of November 2020
Thank you for a wonderful tutorial - it is very helpful! In the lifted left/right increase instead of using a cable needle and crochet hook to work the increase, it looks like one could acheive this more easily by moving the marked ladder onto the empty peg and purling that peg instead of knitting it. It seems like the crochet hook is basically creating a purl stitch with the ladder. Is that correct?