

Inside: Instructions and tutorial video to teach these increases for beginner knitters: YO (yarnover), Kfb (Knit into the front and back of a stitch), Make 1 (right and left) and the Lifted increase (right and left).
Now that you know the basics it’s important that you learn a few more fundamental skills to take your knitting to the next level.
So far, every project used in these lesson has been either a square or rectangle. Even the Basketweave Cowl that was knit in the round kept the same number stitches for each round. But a whole new world opens up when you learn a few knit increases and decreases. (Decreases are covered in the next lesson!)
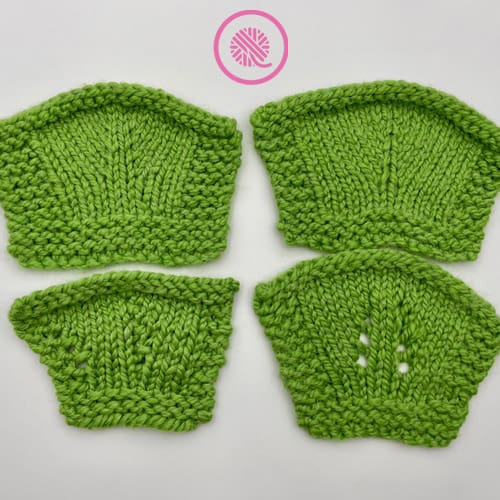
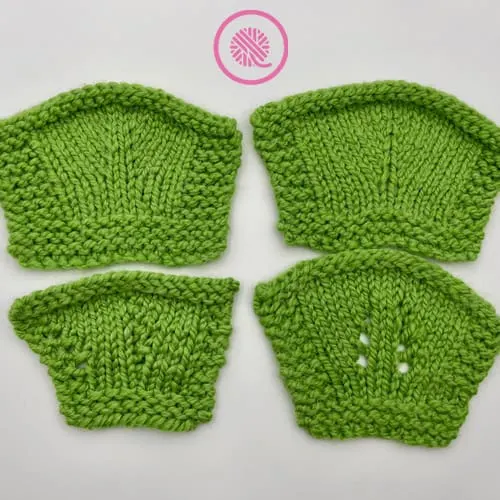
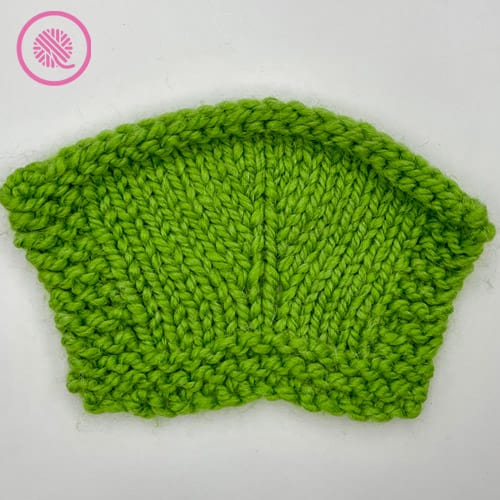
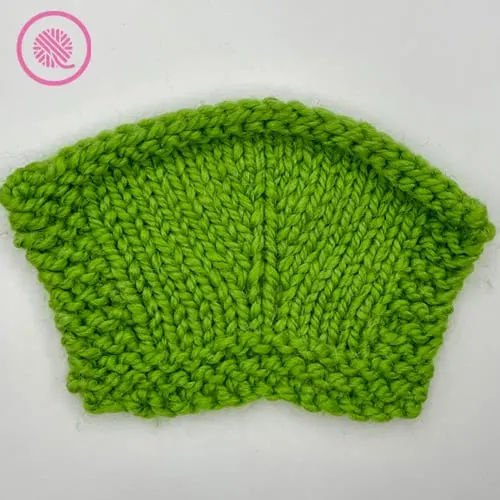
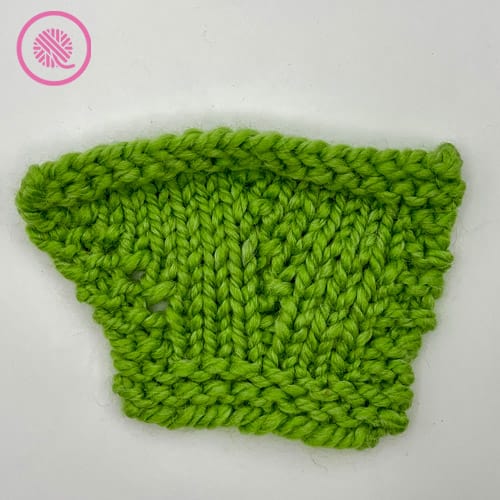
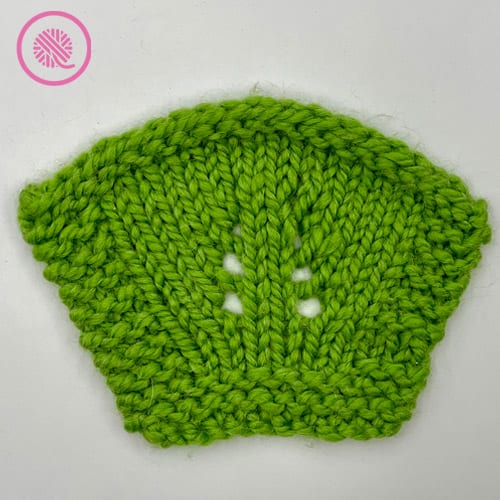
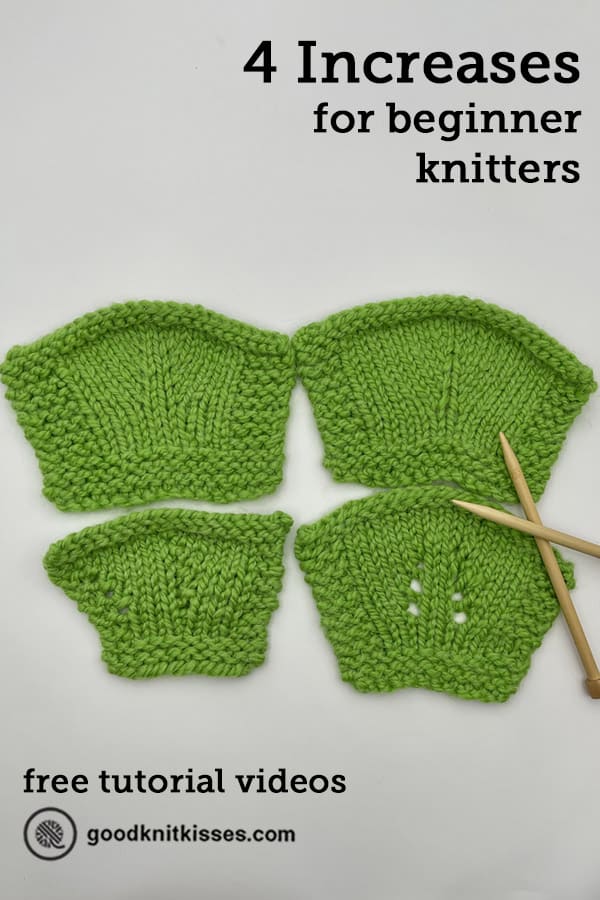
Make 1 (top left), Lifted (top right), Kfb (bottom left) Yarnover (bottom right)
What is an increase?
In knitting an increase is a stitch that adds one (or more) stitches to your row/round. You can add an increase in the middle of a row to add shaping to your knitting.
Knowing some increases and decreases will allow you branch out into making garments that fit. These techniques allow you to create armholes, shape a collar, sleeve or cuff and more.
We’re not shaped like rectangles so our sweaters shouldn’t be shaped like that either.

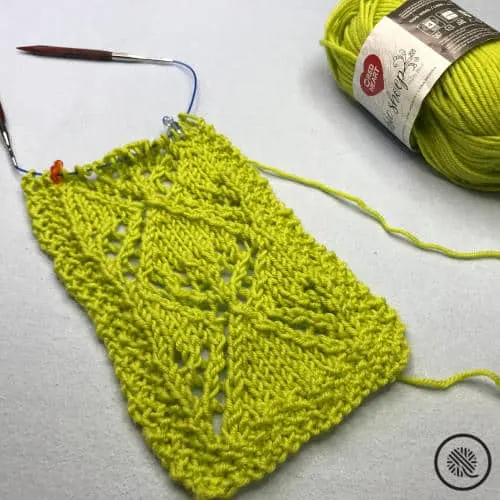
Another benefit of knowing some increases is the ability to knit lace patterns. Lace in it’s simplest form is just knitting that uses increases and decreases to create holes in the fabric.
To keep this simple since this lesson is about increases for beginner knitters I’m only covering methods that increase 1 stitch at a time. There are some increases that allow you to add more than one stitch, but those are more advanced techniques.
A note about terminology: I use the words dominant hand and non-dominant hand rather than just right and left because the video is available for both right and left handed knitters. Just know that if you’re right handed your dominant hand is your right and if you’re left handed it’s your left.
1. Make 1 (Right and Left)

The Make 1 increase is abbreviated M1. Since this either leans to the left or right it is often abbreviated with the intended direction: Make 1 Right (M1R) or Make 1 Left (M1L). If a pattern does not specify the direction you can choose which one you prefer.
Make 1 Right (M1R)
Pull your needles apart and find the horizontal bar of yarn between the stitches from the previous row. It will look like the rung of a ladder and is often referred to as a ladder of yarn.
Next, using your the needle in your non-dominant hand pick up the ladder through the back. Then use your other hand to knit the stitch as you normally would through the front leg of the stitch.
This added 1 stitch to your row.
Make 1 Left (M1L)
Pull your needles apart a bit and find the horizontal bar between the stitches.
Next, using the needle in your non-dominant hand pick up the ladder through the front. (This is a little looser than when you pick it up through the back.) Then using the needle in your other hand knit the stitch through the back loop*. This is leg of the stitch on the back of your needle and is a different method than you use when you knit a stitch.
*Knit through the back loop is separate knit stitch and is abbreviated Ktbl, K tbl, K1, tbl. It is often referred to as the twisted knit stitch.
That’s it. You added 1 additional stitch.
2. Lifted (Right and Left)
The Lifted increase leans left and right so it is abbreviated with the direction as RLI or LLI. You may also see this increase written out without an abbreviation. As with the Make 1, if the direction isn’t written in the pattern use the one you prefer.
The Lifted increase is similar to the Make 1, but has one major difference. Instead of using the ladder between the stitches on the previous row we use the actual stitch from that row.
Right Lifted Increase (Lifted R/RLI)
Start by finding the correct stitch. Look at the next stitch to work on the needle in your non-dominant hand. Move down one row and find the knit stitch shaped like a “V” directly below that.
Using the tip of the needle in your dominant hand pick up knit stitch through the back and place it on the other needle.
Next, knit that stitch as you normally would.
Left Lifted Increase (Lifted L/LLI)
The Lifted left increase takes a little more work to find the correct stitch to pick up. Look at the last stitch you worked on the needle in your dominant hand. Using the tip of the needle in your non-dominant hand, pick up the stitch 2 stitches below that one. (If you pick up the stitch directly below that you are actually getting the stitch from the current row not the row below.)
Knit that new stitch through the back loop.
3. Kfb – Knit into the front & back (with variations)

Knit through the front and back of the stitch is abbreviated Kfb or K1fb.
Unlike the increases we just looked at you work the Kfb using the current stitch on your needle. You do not have to pick up any yarn to create the stitch. This increase does not lean left or right like the Make 1 or Lifted increases so there is only method to learn.
The Kfb is the most common increase because it is easy to knit and easy to remember. Essentially, you are knitting into the same stitch twice to create two stitches from one.
First, knit the current stitch but do not slide the stitch off the needle. You keep the current stitch on the needle in your non-dominant hand and the new stitch on the needle in your dominant hand.
Next, knit through the back loop of the current stitch then slide the current stitch off the needle.
Variations of the Kfb:
1. First, knit the stitch to create a new stitch then instead of knitting in the back loop slide the current stitch onto the needle in your dominant hand. This creates a more seamless join.
2. First, knit the stitch to create a new stitch then purl through the back loop. This is called the Kfpb – knit into the front purl into the back of the stitch.
4. Yarnover (with variations)
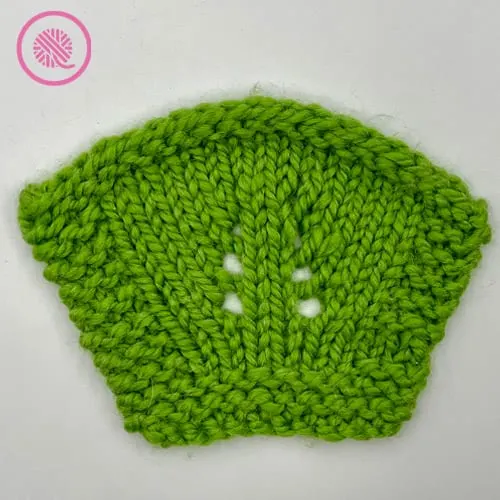
The yarnover is abbreviated YO.
The yarnover increase is the easiest one to do because all you do is wrap the yarn over your needle to create a new loop. This increase leaves a visible hole in your knitting. Normally, that’s not good, but when you’re knitting lace it’s exactly the effect you want to have. Those holes or eyelets are what give lace it’s distinctive design.
Yarnover between 2 knit stitches
Your working yarn starts in the back. Bring the working yarn between your needles to the front, Then wrap over the top of the needle in your dominant hand towards the back.
Yarnover between 2 purl stitches
Your working yarn starts in front. Wrap over the top of the needle in your dominant hand. Then bring the working yarn back to the front between the needles.
Yarnover between a purl stitch and a knit stitch
Your working yarn starts in front. Wrap your working yarn over the top of the needle and leave it in back.
Sometimes you see instructions to YF or put your yarn to the front of your work. This is how we normally hold the yarn when we purl, but if you put your yarn to the front then knit the stitch you will create a yarnover just before the stitch.
Now you can practice your new skills on an actual pattern. Grandma’s Favorite Dishcloth is an iconic pattern ideal to practice increases for beginner knitters.
NOTE: You will also need to learn how to knit decreases in Lesson 11 to finish the Grandma’s Favorite Dishcloth pattern.
PIN IT!

Lesson 10: 4 Increases for Beginner Knitters Video Tutorial
If any of the videos below do not show they may be restricted to GoodKnit Kisses YouTube members only. Find out more about GKK Membership HERE!
Lesson 10 includes all 4 increases plus bonus content. Use the following timestamps to help you navigate the videos to the section you need:
00:00:00 Welcome
00:01:44 Overview – What’s covered in this video
00:02:50 Make 1; M1R and M1L (Make 1 Right & Left)
00:04:48 BONUS Twisted knit stitch; Ktbl (Knit through back loop) tutorial
00:05:28 Lifted Increase; Lifted R & Lifted L
00:08:03 Knit Front Back; KFB (two ways plus KFPB)
00:09:53 BONUS Twisted purl stitch; Ptbl (Purl through back loop) tutorial
00:11:21 Yarnover and Yarn Front; 3 ways
00:13:29 Wrap Up
Right handed
Left handed
Be sure to follow all the How to Knit for Complete Beginners Lessons.
- How to Knit – Garter Stitch for Complete Beginners includes Basic Garter Scarf pattern
- How to Knit – Purl stitch for Stockinette
- How to Knit – Stockinette with Garter Border includes Basic Bordered Dishcloth pattern
- How to Knit – Ribbing 1×1 and 2×2 includes Easy Ribbed Headband pattern
- How to Knit – Seed Stitch for Beginners includes Seed Stitch Washcloth pattern
- How to Knit – Moss Stitch for Beginners includes Moss Stitch Washcloth pattern
- How to Knit – Basketweave Stitch for Beginners includes Basketweave Cowl pattern
- How to Knit – Knitting in the Round includes Moss Cowl pattern.
- How to Knit – 5 Cast Ons for Beginners
- How to Knit – 4 Increases includes Grandma’s Favorite Dishcloth pattern
- How to Knit – 5 Decreases includes Grandma’s Favorite Dishcloth pattern
- How to Knit – Slip Stitches